Brussels Sprout Salad with Bacon Figs and Chili Cinnamon Croutons

Brussels Sprout Salad with Bacon Figs and Chili Cinnamon Croutons

Brussels Sprout Radicchio Salad with Bacon, Figs, Tangerine, and Chili Cinnamon Croutons

Brussels Sprout Salad with Bacon Figs & Chili Cinnamon Croutons

December 17, 2024 by Kimberly

This salad is a cozy mix of crunchy, creamy, and sweet-spicy vibes. Think warm croutons, tangy cheese, and a mulled wine dressing – perfect for holiday feels or a fancy brunch.

40 MINUTES

EASY

OMNIVORE

INT.

688 PER PORTION

COMFORT FOOD

EVERYDAY

LUNCH

AUTUMN
WINTER

INTRODUCTION

ABOUT THE RECIPE

This salad hits that perfect balance of cozy and chic. Crunchy brussels sprouts meet the bold bitterness of radicchio, paired with crispy bacon, juicy figs, and creamy gorgonzola. The real star? A mulled wine oil dressing that wraps everything in warm, spiced magic. Perfect for holidays or whenever you want to impress without breaking a sweat. Sweet, savory, and a little spicy – it’s giving festive food vibes!

How to serve
Serve this salad as a statement starter or a bold side dish at your next dinner party. It pairs beautifully with roasted meats or as a vibrant centerpiece for a cozy brunch spread. Add fresh tangerine slices right before serving for an extra citrusy pop, and don’t forget the chili cinnamon croutons for a spicy-sweet crunch that ties the whole dish together.

How to store
Keep leftovers in an airtight container for up to two days, but store the croutons separately to maintain their crunch. Re-dress with a splash of the mulled wine oil before serving.

Hi, I'm Kimberly!

Hi, I'm Kimberly.

A passionate food lover who believes in the magic of homemade deliciousness that spreads love and warmth. Join me on this culinary adventure as I prepare wonderful dishes and let’s spread some happiness together!

Kimberly the Zett Signature

If you want to get to know me better, click here!


Brussels Sprout Radicchio Salad with Bacon, Figs, Tangerine, and Chili Cinnamon Croutons
„Let’s make a piece of happiness“
Print
clock clock iconcutlery cutlery iconflag flag iconfolder folder iconinstagram instagram iconpinterest pinterest iconfacebook facebook iconprint print iconsquares squares iconheart heart iconheart solid heart solid icon
Brussels Sprout Radicchio Salad with Bacon, Figs, Tangerine, and Chili Cinnamon Croutons

Brussels Sprout Salad with Bacon Figs and Chili Cinnamon Croutons


5 Stars 4 Stars 3 Stars 2 Stars 1 Star

No reviews

  • Author: Kimberly
  • Total Time: 40 min
  • Yield: 2 as main / 4 as starter 1x

Description

Recommended Equipment

  • sharp knife
  • cutting board
  • small pan
  • small bowl

Ingredients

Units Scale

SALAD

  • 200 grams brussels sprout
  • 150 grams red radicchio
  • 1 shallot
  • 1 tsp butter
  • 2 mandarins
  • 2 fresh figs
  • 8 bacon strips
  • 50 grams gorgonzola
  • 50 grams walnuts

CROUTONS

  • 6 slices baguette
  • 1/2 tsp chili flakes
  • 1/2 tsp cinnamon
  • 1 tbsp butter

DRESSING

  • 4 tbsp mulled wine oil
  • 12 tbsp red wine vinegar
  • 1 tsp date syrup
  • 1 tsp dijon mustard
  • salt & pepper to taste

TOPPINGS

  • fresh thyme
  • fresh chives

Instructions

PREPARATIONS

  • Here’s the recipe for mulled wine oil. You’ll need about 3–4 tbsp of it.

INSTRUCTIONS

  1. Wash the Brussels sprouts and slice them into thin strips or shave them finely. Do the same with the radicchio, then wash it. Add both to a large salad bowl.
  2. Lay the bacon strips on a baking tray lined with parchment paper and bake them in a preheated oven at 180 °C (350 °F) for 15–20 minutes until crispy. Use the time to work on the next steps.
  3. Peel the mandarins and remove the white fibers. Cut the figs into eighths and set them aside.
  4. Strip the thyme leaves from the stems and slice the chives into small rings. Set these aside as well.
  5. Toast the walnuts in a dry pan until they smell aromatic. Remove them from the pan and set aside.
  6. Slice the shallot into thin rings. Heat a bit of butter in the same pan and fry the shallot rings until crispy. Remove them and let them cool on a paper towel.
  7. Cut the baguette into large cubes. In the pan, sauté them with butter, cinnamon, and chili flakes until crispy. Remove and set aside.
  8. For the dressing, mix the mulled wine oil, red wine vinegar, date syrup, Dijon mustard, salt, and pepper well. Pour the dressing over the Brussels sprouts and radicchio in the salad bowl, then toss thoroughly.
  9. Top the salad with mandarins, figs, walnuts, crispy shallots, bacon strips, croutons, and a few pieces of Gorgonzola. Finish with fresh thyme and chives before serving.

Gingerbread Oil

Gingerbread Oil

Gingerbread Oil

Gingerbread Oil

December 16, 2024 by Kimberly

Cozy up your cooking with this aromatic oil infused with warm spices like cinnamon and cardamom. It’s like bottling the holidays – perfect for drizzling, baking, or elevating savory dishes.

5 MINUTES

EASY

VEGAN

INT.

40 PER TSP

SPICY

MICHELIN

OIL

WINTER

INTRODUCTION

ABOUT THE RECIPE

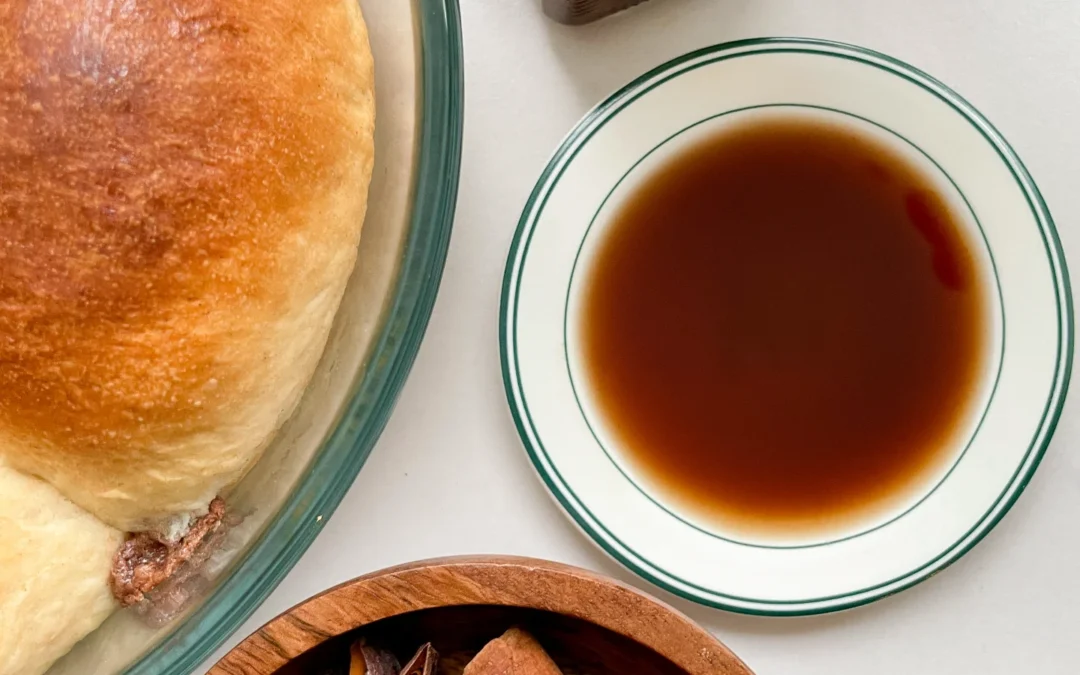
Step into holiday magic with this incredible spiced oil. Infused with cinnamon, cardamom, cloves, and more, it’s the ultimate flavor hack to elevate your cooking. Whether drizzled over roasted veggies, swirled into yogurt, or used for baking, it brings cozy gingerbread vibes to everything. Perfect for adding that warm, nostalgic touch to your festive meals, and hey, it also makes a pretty epic edible gift. Get ready to impress yourself and everyone you share it with!

How to serve
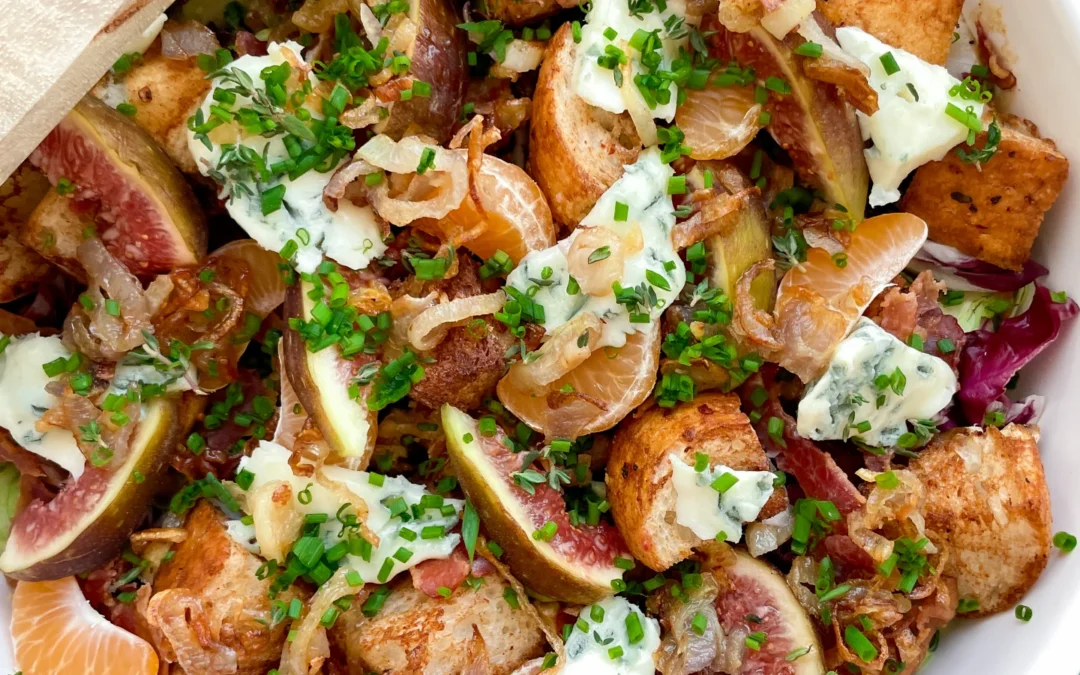
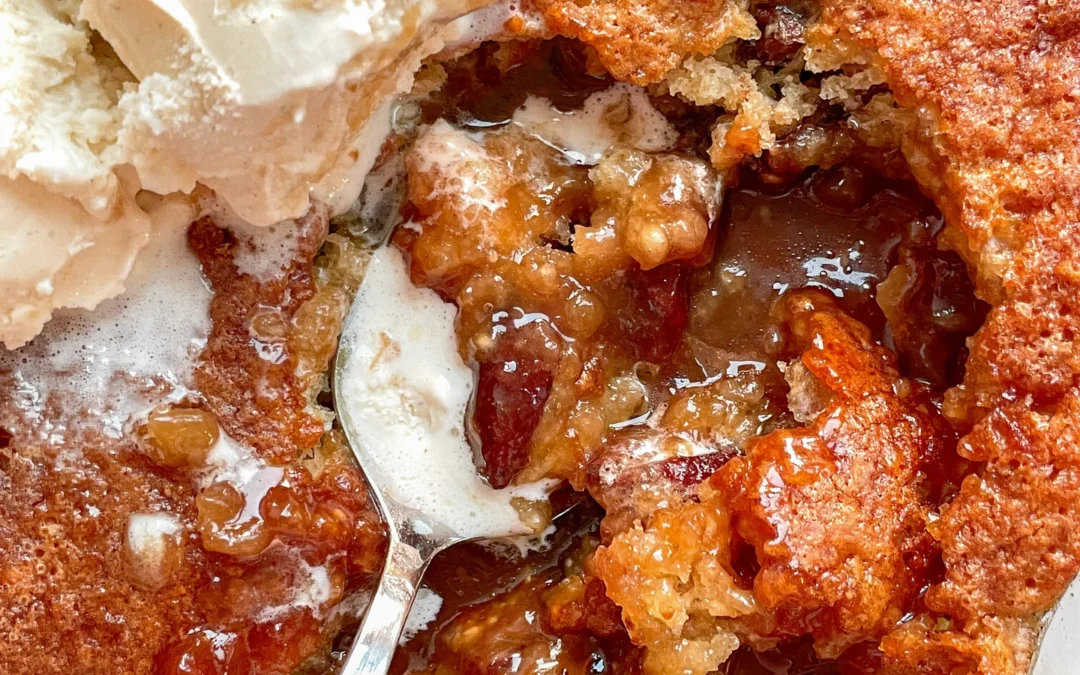
For sweet treats, drizzle it over pancakes, waffles, or even vanilla ice cream. Feeling savory? Use it to dress roasted carrots, drizzle on warm bread, or even toss it into a simple salad dressing. Pro tip: Swirl a little into your hot chocolate or latte for the coziest vibes ever. It’s your new go-to secret weapon for holiday magic in every dish. I used this oil to glaze my milk buns with gingerbread filling – give it a try, you’re gonna love it!

How to store
Keep your spiced oil in a tightly sealed glass bottle in a cool, dark spot. It stays fresh and aromatic for up to a week. Shake gently before using.

Hi, I'm Kimberly!

Hi, I'm Kimberly.

A passionate food lover who believes in the magic of homemade deliciousness that spreads love and warmth. Join me on this culinary adventure as I prepare wonderful dishes and let’s spread some happiness together!

Kimberly the Zett Signature

If you want to get to know me better, click here!


Gingerbread Oil
Gingerbread Oil
Gingerbread Oil
„Let’s make a piece of happiness“
Print
clock clock iconcutlery cutlery iconflag flag iconfolder folder iconinstagram instagram iconpinterest pinterest iconfacebook facebook iconprint print iconsquares squares iconheart heart iconheart solid heart solid icon
Gingerbread Oil

Gingerbread Oil


  • Author: Kimberly
  • Total Time: 5 min
  • Yield: 1 cup / 250 ml 1x

Description

RECOMMENDED EQUIPMENT

  • medium-sized saucepan
  • whisk
  • a bowl which the medium saucepan fits into
  • medium-sized bowl
  • fine sieve
  • sealable container (oil bottle)
  • ice cubes

Ingredients

Units Scale
  • 2 tsp cinnamon
  • 1/2 tsp cloves
  • 1/2 tsp allspice
  • 1/2 tsp cardamom
  • 1/8 tsp nutmeg
  • 3 anise stars
  • 1 piece of fresh ginger
  • 250 milliliter oil

Instructions

  1. Toss everything into the blender.
  2. Pour the mixture from the blender into a medium-sized pot and heat it over medium heat to a temperature of about 100°C (212°F), and maintain this temperature for the next 5 minutes. Stir occasionally, making sure the temperature remains steady and nothing gets burned.
  3. Prepare a bowl large enough to fit a medium-sized pot, and fill it with cold water and a handful of ice cubes. Also, hang a fine sieve strainer over one medium-sized bowl.
  4. Now, place the pot in the ice water and stir to cool the oil quickly. Once the oil is almost cold, remove the pot from the water and pour the oil into the prepared fine sieve to catch the coarse particles.
  5. Once all the oil has passed through the fine mesh strainer, transfer the collected amount of oil into a sealable container or directly into an oil bottle. Store in the refrigerator for up to one week.
  • Passive Time:
  • Cook Time: 5 min

Blini Appetizers

Blini Appetizers

Blini Appetizers

Blini Appetizers

December 15, 2024 by Kimberly

Tiny pillows of heaven! These fluffy blini with a creamy ricotta base and versatile toppings bring bold flavors and cozy vibes. Perfect for casual nights or fancy parties!

40 MINUTES

EASY

OMNIVORE

RUSSIA

40-80 PER BLINI

FLUFFY

DINNER PARTY

APPETIZER

ALL YEAR

INTRODUCTION

ABOUT THE RECIPE

Imagine a table full of vibrant, delicious little bites that disappear as soon as you serve them! These foolproof blini are soft, golden mini pancakes topped with a silky ricotta cream that goes with anything. Whether you’re hosting a cozy brunch or an elegant dinner party, these creative toppings take your appetizer game to the next level. From smoky and herby to sweet and nutty, there’s a flavor for everyone. It’s all about the balance of textures, flavors, and a little drizzle of oil magic!

How to serve
Prepare the blini as mini pancakes, then spread a dollop of the ricotta cream on top and add your chosen toppings. You can serve them pre-assembled for easy grabbing or turn it into a fun DIY setup where everyone can mix and match their toppings. Perfect for any vibe – casual or fancy! You can also prepare the batter and ricotta cream in advance and keep it in the fridge for up to 24 hours. The blini pancakes can also be made ahead of time since they’re typically served cold.

How to store
Store the blini and ricotta cream separately in airtight containers. Keep the blini in the fridge for up to 2 days. The ricotta cream stays fresh in the fridge for 3-4 days.

Hi, I'm Kimberly!

Hi, I'm Kimberly.

A passionate food lover who believes in the magic of homemade deliciousness that spreads love and warmth. Join me on this culinary adventure as I prepare wonderful dishes and let’s spread some happiness together!

Kimberly the Zett Signature

If you want to get to know me better, click here!


Blini Appetizers
Blini Appetizers
Blini Appetizers
Blini Appetizers
„Let’s make a piece of happiness“
Print
clock clock iconcutlery cutlery iconflag flag iconfolder folder iconinstagram instagram iconpinterest pinterest iconfacebook facebook iconprint print iconsquares squares iconheart heart iconheart solid heart solid icon
Blini Appetizers

Blini Appetizers


  • Author: Kimberly
  • Total Time: 40 min
  • Yield: 20 blini 1x

Description

RECOMMENDED EQUIPMENT

  • mixing bowl
  • whisk
  • pan
  • spatula
  • cooling rack
  • piping bag (optional)
  • kitchen knife
  • cutting board


Ingredients

Units Scale

BATTER

  • 90 grams all-purpose flour
  • 1 tsp baking powder
  • 1 egg
  • 125 milliliter buttermilk
  • 1 tbsp olive oil
  • 1/4 tsp salt
  • oil for frying

RICOTTA CREAM

  • 250 grams ricotta
  • 1 tbsp olive oil
  • 1 tbsp lemon juice
  • salt & pepper to taste

BLINI TOPPING 1

  • walnuts
  • shallot
  • oil for frying
  • honey
  • chili oil
  • fresh thyme
  • red pepper flakes

BLINI TOPPING 2

  • fresh fig
  • gorgonzola
  • truffle oil
  • chives
  • black pepper

BLINI TOPPING 3

  • cooked salmon
  • red onion
  • capers
  • olive oil
  • fresh dill
  • black pepper

BLINI TOPPING 4

  • pastrami
  • cornichons
  • walnut oil
  • fresh parsley

BLINI TOPPING 5

  • radishes
  • cress
  • basil oil

Instructions

  1. First, we’re making the blini batter. Mix all the ingredients together until smooth, then let it chill for like 5-10 minutes. Once the batter’s had its lil rest, heat up a pan with a bit of oil or butter and spoon in small circles of batter. I usually use 3/4 of a tablespoon. Here’s the pro tip: when you see those cute little holes popping up on the surface, it’s time to flip them. Cook each side for about 2-3 minutes until they’re golden and gorgeous. Boom, your blinis are born. Pop them on a cooling rack to chill out – no soggy bottoms here.
  2. Grab a bowl and mix the ricotta cream. For this, stir together ricotta, olive oil, lemon juice, salt & pepper until it’s smooth and creamy. Then load it into a piping bag if you’re feeling fancy, or just keep a spoon handy for the easy aesthetic.
  3. Once your blinis are cool, dollop or pipe some ricotta cream onto each one. Get creative – a little swirl, a casual blob, whatever your heart desires. Now they’re ready for toppings.
  4. For Blini topping 1, toast the walnuts in a pan without adding additional fat. Take them out and let them cool. Thinly slice the shallots into delicate rings and fry them in a bit of oil until crispy. Set aside to cool. Add half a walnut onto the blini, as well as about 1 tsp of the crispy onions. Finish with a drizzle of honey and a sprinkle of pink peppercorns. Toss on a few fresh thyme leaves and finish with a few drops of chili oil for a spicy kick that ties it all together.
  5. For Blini topping 2, slice fresh figs into eighths. Place one fig wedge on the ricotta cream, then crumble some blue cheese on the other side – as much or as little as your vibe calls for. Add a few drops of truffle oil, sprinkle with freshly ground pepper, and garnish with a touch of chopped chives to seal the deal.
  6. For Blini topping 3, flake some cooked salmon into bite-sized pieces and nestle it onto the ricotta cream. Slice red onions into thin strips, then scatter a few pieces on top along with some capers. Add a few drops of olive oil, a grind of fresh black pepper, and finish with a couple of dill sprigs.
  7. For Blini topping 4, tear thin slices of pastrami into strips, roll them into little spirals, and press them onto the ricotta. Diagonally halve some cornichons and place one half on the blini. Drizzle a few drops of walnut oil for a rich, nutty twist. Top it all off with a sprig of fresh parsley for a classy finishing touch.
  8. For Blini topping 5, thinly slice radishes into delicate rounds and place two slices on one side of the blini. On the other side, gently press on a little bunch of radish cress for that pop of green. Finish with a few drops of basil oil for a fresh, herbaceous flair.
  9. Serve these cute appetizers on a platter and watch them disappear in seconds.

  • Cook Time: 40 min

French Onion Soup

French Onion Soup

French Onion Soup

French Onion Soup

December 11, 2024 by Kimberly

Cozy up with this rich, caramelized onion soup topped with broiled gruyere and crispy baguette. It’s warm, indulgent, and feels like a hug in a bowl.

75 MINUTES

EASY

OMNIVORE

FRENCH

455 PER PORTION

UMAMI

EVERYDAY

DINNER

WINTER

INTRODUCTION

ABOUT THE RECIPE

There’s something magical about a bowl of caramelized onion soup. The rich, slow-cooked onions melt into a deeply savory broth that feels like pure comfort. And when you top it with a slice of crispy baguette smothered in broiled gruyere? Game over. It’s everything you need on a chilly evening. This dish takes time to build flavor, but trust me, it’s worth every minute. Cozy, rustic, and oh-so-satisfying, it’s the perfect way to warm up your soul.

How to serve
Serve this soup straight from the oven for the best experience. Ladle the rich broth into bowls, top with baguette slices, and load on the gruyere. Broil until the cheese bubbles and turns golden. Place the piping-hot bowls on a trivet or a wooden board, and serve with extra baguette for dipping. Pair it with a simple green salad or a crisp glass of white wine for a true French-inspired meal that hits all the cozy vibes.

How to store
Store leftover soup (without the bread) in an airtight container in the fridge for up to 3 days. Reheat gently on the stove before serving. Broil baguette slices and cheese when ready to enjoy. The flavors deepen, making it even better the next day!

Hi, I'm Kimberly!

Hi, I'm Kimberly.

A passionate food lover who believes in the magic of homemade deliciousness that spreads love and warmth. Join me on this culinary adventure as I prepare wonderful dishes and let’s spread some happiness together!

Kimberly the Zett Signature

If you want to get to know me better, click here!


French Onion Soup
French Onion Soup
French Onion Soup
„Let’s make a piece of happiness“
Print
clock clock iconcutlery cutlery iconflag flag iconfolder folder iconinstagram instagram iconpinterest pinterest iconfacebook facebook iconprint print iconsquares squares iconheart heart iconheart solid heart solid icon
French Onion Soup

French Onion Soup


  • Author: Kimberly
  • Total Time: 75 min
  • Yield: 6 1x

Description

Recommended Equipment

  • large, heavy pot with lid
  • garlic press
  • sharp knife
  • cutting board
  • grater
  • ovenproof soup bowls

Ingredients

Units Scale

SOUP

  • 800 grams onions, sliced
  • 1 tbsp butter
  • 2 tbsp avocado oil
  • 1 tsp salt
  • 3 garlic cloves
  • 1.5 tbsp all-purpose flour
  • 150 milliliter dry white wine
  • 1 liter beef stock
  • some sprigs fresh thyme
  • 2 bay leaves
  • salt & pepper to taste

BAGUETTE

  • 12 slices of baguette
  • 300 grams Gruyere cheese
  • butter
  • garlic powder

TOPPING

  • fresh thyme
  • freshly cracked pepper

Instructions

PREPARATIONS

  • Peel the onions, halve them, and slice into thin half-rings.
  • Peel the garlic cloves; they’ll be pressed into the onions later.

INSTRUCTIONS

  1. Melt butter and oil in a large pot over medium heat. Add the onions, sprinkle with a pinch of salt, and sauté for about 30 minutes, stirring occasionally. The goal? Dreamy, golden-brown caramelization. Yes, it takes patience, but trust me, it’s worth it.
  2. Press the garlic through a garlic press and sauté with the onions for 1 minute until fragrant. Sprinkle the flour like fairy dust over the onions and stir well.
  3. Pour in the white wine and let it cook down briefly. Add the beef broth, thyme sprigs, and bay leaves. Bring to a boil, then cover and simmer over low heat for 30 minutes. Season with salt and pepper to taste.
  4. While the soup simmers, preheat the oven to its highest broil setting. Slice the baguette, butter one side, and sprinkle with a bit of garlic powder. Grate the Gruyère.
  5. Once the soup is done, ladle it into ovenproof bowls. Place the baguette slices on top and generously cover with Gruyère. Broil for 5–10 minutes until the cheese is golden and bubbling.
  6. Garnish with fresh thyme and a pinch of black pepper. Serve hot, grab a spoon, and get ready to impress yourself (and everyone else)!
  • Prep Time: 15 min
  • Passive Time: 15 min
  • Cook Time: 45 min

Cranberry Pistachio Biscotti

Cranberry Pistachio Biscotti

Cranberry Pistachio Biscotti

Cranberry Pistachio Biscotti

December 9, 2024 by Kimberly

These crispy, nutty biscotti are bursting with tart cranberries and crunchy pistachios, dipped in a silky layer of white chocolate. They’re festive, cozy, and perfect for coffee-dunking or gifting.

60 MINUTES

EASY

VEGETARIAN

ITALIAN

107 PER BISCOTTI

SWEET

EVERYDAY

SNACK

WINTER

INTRODUCTION

ABOUT THE RECIPE

These biscotti are everything you want in a cozy snack. Crunchy, nutty, and perfectly sweet, they combine tart cranberries, rich pistachios, and a touch of indulgence with a white chocolate coating. They’re ideal for holiday gifting, pairing with your coffee, or treating yourself to something a little special. The mix of textures and flavors makes them irresistible, and they look as beautiful as they taste.

How to serve
Serve these biscotti alongside a hot cup of coffee, tea, or even hot cocoa for the ultimate cozy vibe. They’re also fantastic as part of a dessert spread, paired with fresh fruit or a creamy mousse. And don’t forget – they make the perfect holiday gift, wrapped up in cute little bags or boxes.

How to store
Store the biscotti in an airtight container at room temperature for up to three weeks. If they’re coated in chocolate, keep them in a cool place to avoid melting. Perfect for make-ahead treats!

Hi, I'm Kimberly!

Hi, I'm Kimberly.

A passionate food lover who believes in the magic of homemade deliciousness that spreads love and warmth. Join me on this culinary adventure as I prepare wonderful dishes and let’s spread some happiness together!

Kimberly the Zett Signature

If you want to get to know me better, click here!


Cranberry Pistachio Biscotti
„Let’s make a piece of happiness“
Print
clock clock iconcutlery cutlery iconflag flag iconfolder folder iconinstagram instagram iconpinterest pinterest iconfacebook facebook iconprint print iconsquares squares iconheart heart iconheart solid heart solid icon
Cranberry Pistachio Biscotti

Cranberry Pistachio Biscotti


  • Author: Kimberly
  • Total Time: 60 min
  • Yield: 14-18 pieces 1x

Description

Recommended Equipment

  • 2 bowls
  • electric mixer
  • whisk
  • baking tray
  • parchment paper
  • sharp knife
  • spoon or spatula
  • food processor (optional, for chopping cranberries)

Ingredients

Units Scale
  • 125 grams all-purpose flour
  • 1/2 tsp baking powder
  • 1/4 tsp salt
  • 30 grams butter, room-temperature
  • 75 grams white sugar
  • 1 egg
  • 1 tsp vanilla extract
  • 50 grams pistachios
  • 50 grams fresh cranberries
  • 100 grams white chocolate

Instructions

  1. Roughly chop the cranberries and pistachios with a knife or a food processor, then set aside. Preheat the oven to 175°C/347°F.
  2. In one bowl, thoroughly mix the flour, baking powder, and salt.
  3. In another bowl, use an electric mixer to cream the soft butter and sugar until fluffy.
  4. Add the egg and vanilla extract to the butter-sugar mixture and mix well.
  5. Add the dry ingredients to the butter-egg mixture, along with the chopped pistachios and cranberries. Mix everything until you get a smooth dough. Only stir until no flour streaks remain.
  6. Place the dough onto a baking tray lined with parchment paper. Lightly dust your hands with flour and shape the dough into a flat, long rectangle (about 20-25 cm long and 6 cm wide).
  7. Bake the dough piece for about 30 minutes. Remove it from the oven and let it cool slightly.
  8. Use a bread knife or sharp knife to slice the baked dough into pieces (about 1.5–2 cm thick).
  9. Place the biscotti slices cut side down back onto the baking tray.
    • For a softer version: Bake each side for 5 minutes.
    • For a crunchier version: Bake each side for 10 minutes.
  10. Dip half of the biscotti in melted white chocolate and sprinkle with chopped pistachios. Let them cool on a wire rack until the chocolate hardens.
  • Passive Time: 40 min
  • Cook Time: 20 min

Pecan Caramel Pie Cobbler

Pecan Caramel Pie Cobbler

Pecan Caramel Pie Cobbler

Pecan Caramel Pie Cobbler

November 27, 2024 by Kimberly

This warm, gooey cobbler is the ultimate comfort dessert – melty caramel candies, crunchy pecans, and buttery dough baked into golden perfection. A cozy, sweet treat for every dessert lover out there!

75 MINUTES

EASY

VEGETARIAN

US AMERICAN

505 PER PORTION

COMFORT FOOD

CHRISTMAS

DESSERT

AUTUMN
WINTER

INTRODUCTION

ABOUT THE RECIPE

There’s something magical about desserts that feel like a warm hug, and this cobbler delivers just that. Melty caramel candies and crunchy pecans create a gooey filling, while the buttery dough bakes into a golden, rustic crust. It’s the perfect dessert for chilly evenings or holiday gatherings, combining the cozy flavors of caramel and pecans into one irresistible dish. Trust me, once you try this cobbler, it’ll quickly become a go-to comfort dessert for every season.

How to serve
This cobbler is best served warm, straight out of the oven, with a scoop of vanilla ice cream or a dollop of whipped cream on top. The cold creaminess of the topping perfectly balances the gooey caramel and crunchy pecans. Sprinkle a few extra pecans over the top for added texture. It’s perfect for family gatherings, dinner parties, or just a cozy night in.

How to store
Store any leftovers in an airtight container at room temperature for up to one day, or in the fridge for up to four days. Reheat individual portions in the microwave for 20-30 seconds to bring back the gooey, warm goodness.

Hi, I'm Kimberly!

Hi, I'm Kimberly.

A passionate food lover who believes in the magic of homemade deliciousness that spreads love and warmth. Join me on this culinary adventure as I prepare wonderful dishes and let’s spread some happiness together!

Kimberly the Zett Signature

If you want to get to know me better, click here!


Pecan Caramel Pie Cobbler
„Let’s make a piece of happiness“
Print
clock clock iconcutlery cutlery iconflag flag iconfolder folder iconinstagram instagram iconpinterest pinterest iconfacebook facebook iconprint print iconsquares squares iconheart heart iconheart solid heart solid icon
Pecan Caramel Pie Cobbler

Pecan Caramel Pie Cobbler


4.3 from 3 reviews

  • Author: Kimberly
  • Total Time: 75 min
  • Yield: 8 1x

Description

RECOMMENDED EQUIPMENT

  • baking dish (approx. 20×30 cm or similar)
  • mixing bowl
  • whisk or hand mixer
  • kettle (for boiling water)


Ingredients

Units Scale
  • 120 grams butter
  • 125 grams all-purpose flour
  • 125 grams white sugar
  • 3 tsp baking powder
  • 1/4 tsp salt
  • 170 milliliter full-fat cow milk
  • 1 tsp vanilla extract
  • 100 grams pecans
  • 50 grams brown sugar
  • 125 grams caramel candies
  • 250 milliliter boiling water
  • vanilla ice cream

Instructions

  1. Preheat the oven to 175°C / 350°F. Grab a baking dish, drop in the butter, and pop it into the oven for a few minutes and let it melt.
  2. In a bowl, combine flour, sugar, baking powder, and a pinch of salt. Stir in milk and a splash of vanilla extract until it’s all smooth, creamy, and totally lump-free.
  3. Carefully pull the now-buttery baking dish out of the oven. Pour the batter right over that melted butter. Trust the process – it looks weird now, but it’s all part of trust the process. Sprinkle pecans on top and follow up with a layer of brown sugar. Finally, add the caramel candies. Whole or crushed? Dealer’s choice.
  4. Next, get that kettle boiling and slowly pour the hot water over everything in the dish. Yes, everything. No stirring allowed! Just trust me on this one.
  5. Bake uncovered for 30–35 minutes or until the top is golden brown and smells like a caramel dream.
  6. Take it out and let it cool for about 30 minutes. Patience is key – the caramel sauce underneath thickens and gets all creamy during this time.
  7. Scoop it into bowls, drizzle with that caramel sauce hiding underneath, and top with a big ol’ scoop of vanilla ice cream.

  • Passive Time: 60 min
  • Cook Time: 15 min