Chocolate Peanut Oat Bites

Chocolate Peanut Oat Bites

Chocolate Peanut Oat Bites

Chocolate Peanut Oat Bites

January 29, 2024 by Kimberly

Indulge in Chocolate Peanut Oat Bites – a heavenly blend of rich chocolate, nutty peanuts, and wholesome oats, perfect for a deliciously satisfying sweet snack!

This website uses affiliate links which may earn commission for purchases made at no additional cost to you.

TOTAL TIME

70 min

SERVES

12 pieces

DIET

vegan

EVERY RECIPE DESERVES

A Little Love Letter

Experience the joy of snacking with this Chocolate Peanut Oat Bites, a delightful fusion of flavors that satisfies your sweet tooth while providing nourishment. These no-bake snack ideas are a perfect blend of rich chocolate, creamy peanut butter, and hearty oats, creating a treat that’s not only delicious but also health-conscious. Ideal for those seeking a quick energy boost or a vegan chocolate bite, these homemade energy bites are a crowd-pleaser.

They make a fantastic snack for any time of the day, be it a mid-morning break, an afternoon pick-me-up, or a post-workout treat. Their bite-sized nature makes them a convenient option for on-the-go snacking or for packing in lunchboxes. You can also serve them as a dessert at casual get-togethers or as a healthy alternative to traditional sweets. Their versatility and universally appealing flavor make them suitable for various dietary preferences, including gluten-free and vegan options.

Keep them in an airtight container in the refrigerator, where they can last for up to a week. This ensures that they remain fresh and retain their delightful texture. Perfect for meal prep or when you need a sweet and nutritious snack on hand, these Chocolate Peanut Oat Bites are your go-to for a quick, healthy, and satisfying treat.

Hi, I'm Kimberly!

Hi, I'm Kimberly.

A hopeless romantic when it comes to food. Every recipe I share is a love letter to food itself. I’m so glad you’re here. Make yourself at home and stay a while.

Love,
Kimberly

Kimberly the Zett Signature

If you want to get to know me better,
click here!


Chocolate Peanut Oat Bites

LET’S MAKE A PIECE OF HAPPINESS

Print
clock clock iconcutlery cutlery iconflag flag iconfolder folder iconinstagram instagram iconpinterest pinterest iconfacebook facebook iconprint print iconsquares squares iconheart heart iconheart solid heart solid icon
Chocolate Peanut Oat Bites

Chocolate Peanut Oat Bites


5 Stars 4 Stars 3 Stars 2 Stars 1 Star

No reviews

  • Author: Kimberly
  • Total Time: 65 min
  • Yield: 12 pieces

Description

GOOD TO HAVE ON HAND

  • small pot
  • medium-sized bowl
  • rectangular container
  • baking paper


Ingredients

Units Scale
  • 1.5 tbsp peanut butter
  • 60 milliliters maple syrup
  • 1/2 banana
  • 2 tbsp coconut oil
  • 2 tbsp cocoa powder
  • 90 grams rolled oats
  • 1/8 tsp salt

Instructions

  • Melt the coconut oil in the microwave or in a small pan.
  • Line a rectangular container with baking paper.
  • In a medium-sized bowl, mash half the banana with a fork. Mix the peanut butter and maple syrup with the banana.
  • Now add the coconut oil, cocoa powder and salt to the bowl and mix well to form a homogeneous mixture.
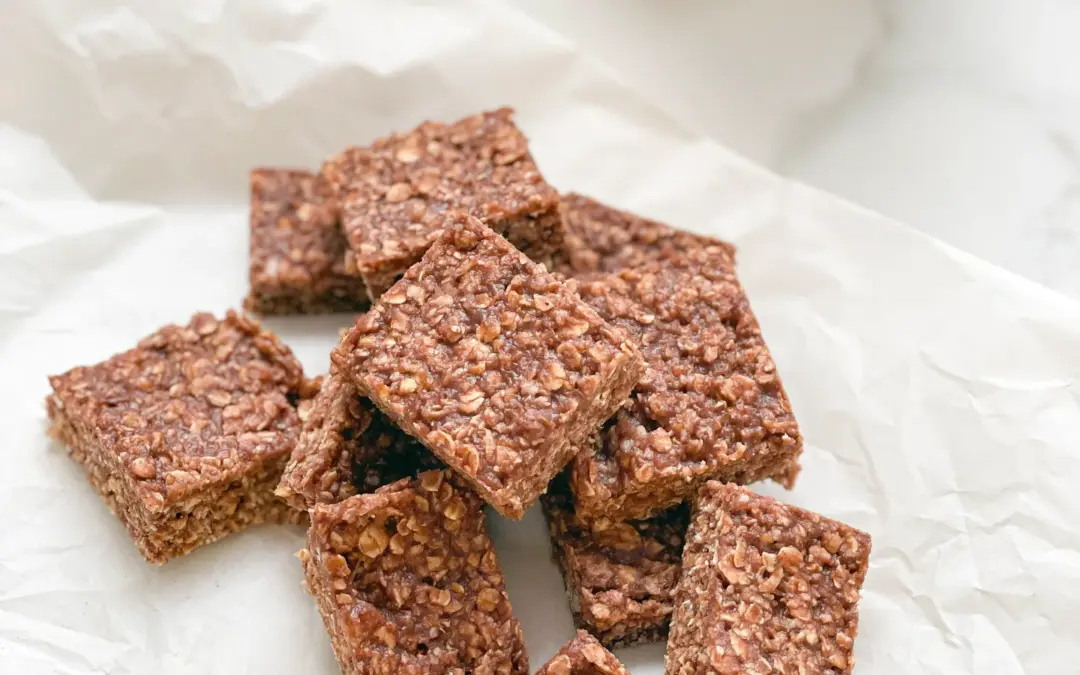
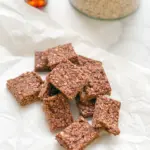
  • Pour the mixture onto the baking paper in the rectangular tin and spread out evenly.
  • Leave to harden in the freezer for approx. 1 hour and then cut into 12 equal pieces. Store the pieces in the fridge.
  • Passive Time: 60 min
  • Cook Time: 5 min

CRAVING MORE?

Follow along here & don’t forget to subscribe to my substack!

Classic Cucumber Salad

Classic Cucumber Salad

Classic Cucumber Salad

Classic Cucumber Salad

January 28, 2024 by Kimberly

Relish in the fresh, crisp taste of Classic Cucumber Salad, an effortlessly light and healthy dish, perfect for any meal or as a refreshing snack!

This website uses affiliate links which may earn commission for purchases made at no additional cost to you.

TOTAL TIME

30 min

SERVES

4 portions

DIET

vegan

EVERY RECIPE DESERVES

A Little Love Letter

Discover the timeless appeal of classic Cucumber Salad, a dish celebrated for its simplicity and freshness. This healthy salad, made with crisp cucumbers, is the epitome of a light side dish that complements any meal. Perfect for those seeking a nutritious vegetable salad that is both easy to prepare and delightfully satisfying.

Serving this classic Cucumber Salad is all about embracing its fresh and natural flavors. It’s an excellent addition to any table, be it for a casual lunch or a more formal dinner. This refreshing salad recipe pairs wonderfully with grilled meats, sandwiches, or as a standalone dish for a light meal. Its versatility also makes it a favorite in vegan salad ideas, appealing to various dietary preferences. For an enhanced experience, serve it chilled, allowing the flavors to meld together, creating a moreish, refreshing treat that’s sure to please any palate.

Keep it refrigerated in an airtight container to maintain its crispness and freshness. Ideally, it should be consumed within a day or two to enjoy its optimal taste and texture. This simple salad preparation ensures that you have a healthy, ready-to-eat option on hand.

Hi, I'm Kimberly!

Hi, I'm Kimberly.

A hopeless romantic when it comes to food. Every recipe I share is a love letter to food itself. I’m so glad you’re here. Make yourself at home and stay a while.

Love,
Kimberly

Kimberly the Zett Signature

If you want to get to know me better,
click here!


Classic Cucumber Salad

LET’S MAKE A PIECE OF HAPPINESS

Print
.tasty-recipe-responsive-iframe-container-10f26c4c { position: relative; overflow: hidden; padding-top: 177.62%; } .tasty-recipe-responsive-iframe-container-10f26c4c iframe { position: absolute; top: 0; left: 0; width: 100%; height: 100%; border: 0; } clock clock iconcutlery cutlery iconflag flag iconfolder folder iconinstagram instagram iconpinterest pinterest iconfacebook facebook iconprint print iconsquares squares iconheart heart iconheart solid heart solid icon
Classic Cucumber Salad

Classic Cucumber Salad


  • Author: Kimberly
  • Total Time: 30 min
  • Yield: 4

Description

GOOD TO HAVE ON HAND

  • Mandolin (or sharp knife)
  • sealable glass
  • salad bowl


Ingredients

SALAD
  • 1 cucumber
  • 1 small onion
  • chives
DRESSING
  • 1 garlic clove
  • 2 tbsp olive oil
  • 2 tbsp white wine vinegar
  • 1/2 tsp sugar
  • 1 tsp salt
  • chives

Instructions

  • Wash the cucumber thoroughly.
  • Slice the cucumber into very thin slices. Finely chop the onion.
  • For the dressing, pour the vinegar, oil, salt, sugar and crushed garlic into a sealable jar and shake well. Flavour the dressing and season with salt and ground pepper to taste.
  • Mix the cucumber slices and onion pieces with the dressing in a bowl and leave to stand in the fridge for 20 minutes.
  • Passive Time: 20 min
  • Cook Time: 10 min

CRAVING MORE?

Follow along here & don’t forget to subscribe to my substack!

Apple Slices with Almond Coconut Dip

Apple Slices with Almond Coconut Dip

Apple Slices with Almond Coconut Dip

Apple Slices with Almond Coconut Dip

January 26, 2024 by Kimberly

Enjoy a healthy treat with crisp Apple Slices and rich Almond Coconut Dip – a simple, delicious snack perfect for satisfying your sweet cravings!

This website uses affiliate links which may earn commission for purchases made at no additional cost to you.

TOTAL TIME

5 min

SERVES

1 portion

DIET

vegan

EVERY RECIPE DESERVES

A Little Love Letter

Dive into the delightful pairing of Apple Slices with Almond Coconut Dip, a healthy snack recipe that’s as nutritious as it is delicious. This easy fruit snack combines the sweet and crunchy apple with a creamy, nutty coconut flavor, creating a perfect balance of taste and texture. Ideal for anyone looking for a quick, tasty treat, this vegan almond dip with fresh apple treat is sure to be a crowd-pleaser.

Arrange the apple slices on a plate, and place the almond coconut dip in a bowl for an inviting snack platter. This combination is perfect for after-school snacks, party appetizers, or as a refreshing dessert alternative. You can also get creative by adding a sprinkle of cinnamon or a drizzle of honey over the apples for extra flair. This gluten-free snacking option is not only appealing to the eye but also to the palate, satisfying both sweet cravings and the desire for something crunchy.

Keep it in an airtight container in the refrigerator, where it will stay fresh for up to a week. As for the apple slices, it’s best to cut them fresh to maintain their crispness and prevent browning. This way, you can always enjoy the creamy dip and fresh apple slices at their best, ready to serve up a quick and delicious treat anytime.

Hi, I'm Kimberly!

Hi, I'm Kimberly.

A hopeless romantic when it comes to food. Every recipe I share is a love letter to food itself. I’m so glad you’re here. Make yourself at home and stay a while.

Love,
Kimberly

Kimberly the Zett Signature

If you want to get to know me better,
click here!


Apple Slices with Almond Coconut Dip

LET’S MAKE A PIECE OF HAPPINESS

Print
.tasty-recipe-responsive-iframe-container-4c44221c { position: relative; overflow: hidden; padding-top: 177.62%; } .tasty-recipe-responsive-iframe-container-4c44221c iframe { position: absolute; top: 0; left: 0; width: 100%; height: 100%; border: 0; } clock clock iconcutlery cutlery iconflag flag iconfolder folder iconinstagram instagram iconpinterest pinterest iconfacebook facebook iconprint print iconsquares squares iconheart heart iconheart solid heart solid icon
Apple Slices with Almond Coconut Dip

Apple Slices with Almond Coconut Dip


  • Author: Kimberly
  • Total Time: 5 min
  • Yield: 1

Description

GOOD TO HAVE ON HAND

  • sharp knife
  • chopping board
  • small bowl


Ingredients

  • 1 apple
  • 1 tbsp almond butter
  • 2 tbsp coconut milk
  • pinch of salt

Instructions

  • Cut the apple into slices.
  • In a small bowl, mix the almond butter with the coconut milk and a pinch of salt.
  • Arrange the apple slices and the sweet dip on a plate and enjoy.
  • Cook Time: 5 min

CRAVING MORE?

Follow along here & don’t forget to subscribe to my substack!

Pineapple Mint Juice

Pineapple Mint Juice

Pineapple Mint Juice

Pineapple Mint Juice

January 26, 2024 by Kimberly

Refresh your day with Pineapple Mint Juice, a tropical blend of sweet pineapple and cool mint – the perfect thirst-quencher for any time!

This website uses affiliate links which may earn commission for purchases made at no additional cost to you.

TOTAL TIME

10 min

SERVES

400 ml / 1.5 cups

DIET

vegan

EVERY RECIPE DESERVES

A Little Love Letter

Welcome to the refreshing world of Pineapple Mint Juice, a delightful tropical beverage that’s both energizing and soothing. This natural thirst quencher combines the sweet tang of pineapple with the cool, refreshing zing of mint, creating a perfect balance. Ideal for hot summer days or as a healthful pick-me-up, this homemade fruit juice is not only delicious but also packed with natural goodness, making it a favorite among health-conscious individuals and juice lovers alike.

Serving this Pineapple Mint Juice is all about capturing the essence of freshness. Serve it chilled or over ice for an instant cooling effect. The vibrant, sweet and minty flavor makes it a great companion for breakfast, a relaxing afternoon, or as a welcome drink for your guests. You can also add a splash of sparkling water for a fizzy twist or garnish with fresh mint leaves and pineapple slices for an extra touch of tropical elegance.

Keep it in an airtight bottle in the refrigerator, where it can stay fresh for up to 3-4 days. The flavors meld beautifully over time, ensuring that each sip is as delightful as the first. Remember, this natural beverage contains no preservatives, so enjoy it while it’s fresh and brimming with its unique mint-infused drink magic.

Hi, I'm Kimberly!

Hi, I'm Kimberly.

A hopeless romantic when it comes to food. Every recipe I share is a love letter to food itself. I’m so glad you’re here. Make yourself at home and stay a while.

Love,
Kimberly

Kimberly the Zett Signature

If you want to get to know me better,
click here!


Pineapple Mint Juice

LET’S MAKE A PIECE OF HAPPINESS

Print
.tasty-recipe-responsive-iframe-container-c7583989 { position: relative; overflow: hidden; padding-top: 177.62%; } .tasty-recipe-responsive-iframe-container-c7583989 iframe { position: absolute; top: 0; left: 0; width: 100%; height: 100%; border: 0; } clock clock iconcutlery cutlery iconflag flag iconfolder folder iconinstagram instagram iconpinterest pinterest iconfacebook facebook iconprint print iconsquares squares iconheart heart iconheart solid heart solid icon
Pineapple Mint Juice

Pineapple Mint Juice


  • Author: Kimberly
  • Total Time: 10 min
  • Yield: 1 DRINK (400ML OR 1.5 CUPS)

Description

GOOD TO HAVE ON HAND

  • sharp knife
  • chopping board
  • juicer (or blender & fine mesh strainer)


Ingredients

Units Scale
  • 1/2 pineapple
  • 4 apples
  • 15 grams mint

Instructions

PREPARATION WITH A JUICER

  1. Wash the apples and mint thoroughly. Cut the skin off the pineapple and cut the flesh into sticks. Place half of the pineapple in the juicer.
  2. Put the 4 apples into the juicer next.
  3. Add the fresh mint to the juicer last.
  4. Now pour all the juices obtained into a glass.


PREPARATION WITH A BLENDER & A FINE SIEVE

  1. Wash the apples and mint thoroughly. We need about half of the pineapple. Cut the skin off the pineapple and apples. Place the peeled pineapple and apples in the blender.
  2. Pluck the mint leaves and add to the blender.
  3. Puree everything for 30 seconds on the highest setting. Now pass the whole mixture through a fine sieve. If you like the pulp, you can of course skip this step.
  4. Pour the juice into a glass bottle.
  • Cook Time: 10 min

CRAVING MORE?

Follow along here & don’t forget to subscribe to my substack!

Grilled Romaine Salad with Lemon Yogurt Dressing & Garlic Croutons

Grilled Romaine Salad with Lemon Yogurt Dressing & Garlic Croutons

Grilled Romane Salad with Lemon Yogurt Dressing & Garlic Croutons

Grilled Romane Salad with Lemon Yogurt Dressing & Garlic Croutons

January 25, 2024 by Kimberly

Indulge in the unique taste of Grilled Romaine Salad, drizzled with zesty Lemon Yogurt Dressing and sprinkled with homemade Garlic Croutons – a true garden delight!

This website uses affiliate links which may earn commission for purchases made at no additional cost to you.

TOTAL TIME

25 min

SERVES

4 portions

DIET

vegetarian

EVERY RECIPE DESERVES

A Little Love Letter

Step into a world of fresh and zesty flavors with this Grilled Romaine Salad, a perfect blend of smoky, tangy, and crunchy textures. This healthy salad recipe becomes a gastronomic delight when grilled, bringing out a delicious charred flavor. Drizzled with this easy yogurt dressing and topped with homemade garlic croutons, this dish is a refreshing departure from your usual salad routine, ideal for health-conscious gourmets and vegetarian salad enthusiasts alike.

Serving this dish is all about embracing the freshness and warmth. The grilled romaine leaves, with their slightly wilted yet crisp texture, make a perfect base for the zesty lemon flavor of the lemon yogurt dressing. The addition of crunchy, golden garlic croutons adds a delightful contrast, making every bite a perfect harmony of flavors. Serve it as a standalone light lunch or as a sophisticated side to your main course.

If you have leftovers, keep the grilled romaine, dressing, and croutons separate. The lettuce can be refrigerated for up to two days, while the lemon yogurt dressing and garlic croutons can be stored for longer. This separation ensures that the croutons remain crunchy, and the lettuce stays fresh, allowing you to enjoy this zesty and healthy grilled romaine salad whenever you desire.

Hi, I'm Kimberly!

Hi, I'm Kimberly.

A hopeless romantic when it comes to food. Every recipe I share is a love letter to food itself. I’m so glad you’re here. Make yourself at home and stay a while.

Love,
Kimberly

Kimberly the Zett Signature

If you want to get to know me better,
click here!


Grilled Romane Salad with Lemon Yogurt Dressing & Garlic Croutons

LET’S MAKE A PIECE OF HAPPINESS

Print
.tasty-recipe-responsive-iframe-container-b9700948 { position: relative; overflow: hidden; padding-top: 177.62%; } .tasty-recipe-responsive-iframe-container-b9700948 iframe { position: absolute; top: 0; left: 0; width: 100%; height: 100%; border: 0; } clock clock iconcutlery cutlery iconflag flag iconfolder folder iconinstagram instagram iconpinterest pinterest iconfacebook facebook iconprint print iconsquares squares iconheart heart iconheart solid heart solid icon
Grilled Romaine Salad with Lemon Yogurt Dressing & Garlic Croutons

Grilled Romaine Salad with Lemon Yogurt Dressing & Garlic Croutons


  • Author: Kimberly
  • Total Time: 25 min
  • Yield: 4

Description

GOOD TO HAVE ON HAND

  • sharp knife
  • chopping board
  • cheese grater
  • sealable jar


Ingredients

Units Scale
SALAD
  • 2 romaine salads
  • 2 tbsp olive oil
  • pinch of salt
DRESSING
  • 4 tbsp olive oil
  • 1 tsp white wine vinegar
  • 1 tsp dijon mustard
  • 1 garlic clove
  • 3 tsp yogurt
  • 2 tbsp grated parmesan
  • 1 tsp lemon juice
  • 1 tsp capers
  • salt & pepper to taste
CROUTONS
  • 60 grams baguette
  • 2 tbsp olive oil
  • 1/8 tsp garlic powder
  • 1/8 tsp salt
  • 1/8 tsp pepper
TOPPINGS
  • chives
  • honey
  • 30 grams walnuts
  • 30 grams parmesan

Instructions

  1. Set the oven to the grill function at 250°C (480°F). Wash the romaine lettuce (leave as whole) thoroughly. Halve the lemon. Roughly chop the walnuts. Grate the parmesan. Cut the baguette into small cubes.
  2. For the dressing, place 1 tsp capers, 1 tsp Dijon mustard, 1 tsp lemon juice, 4 tbsp olive oil, 1 tsp white wine vinegar, 1 tbsp grated Parmesan, salt, pepper, 3 tsp yoghurt and 1 pressed garlic clove in a sealable jar. Shake everything well and set aside.
  3. Slice the romaine lettuce hearts lengthways into two halves. Place the hearts flat side up on one half of a baking tray. Spread 2 tablespoons of olive oil evenly over the lettuce, rub in well with your hands and season with a little salt.
  4. Place the diced baguette on the other side of the baking tray. Spread 2 tablespoons of olive oil and 1/8 teaspoon each of salt, ground pepper and garlic powder over the bread cubes. Mix well.
  5. Place the baking tray in the oven and grill for 5-7 minutes.
  6. Remove the baking tray from the oven and arrange the salad on large plates. Top with the croutons and drizzle with the dressing. Top with chopped walnuts, coarsely grated Parmesan slices, chives, a little honey and freshly ground black pepper.
  • Cook Time: 25 min

CRAVING MORE?

Follow along here & don’t forget to subscribe to my substack!

Roasted Eggplants with Parmesan Vinaigrette & Melted Anchovy Oil

Roasted Eggplants with Parmesan Vinaigrette & Melted Anchovy Oil

Roasted Eggplants with Parmesan Vinaigrette & Melted Anchovy Oil

Roasted Eggplants with Parmesan Vinaigrette & Melted Anchovy Oil

January 24, 2024 by Kimberly

Discover the delight of Roasted Eggplants, enhanced with savory Parmesan Vinaigrette and rich Melted Anchovy Oil – a simple yet exquisite culinary experience!

This website uses affiliate links which may earn commission for purchases made at no additional cost to you.

TOTAL TIME

25 min

SERVES

4 portions

DIET

omnivore

EVERY RECIPE DESERVES

A Little Love Letter

Embark on a culinary journey with this roasted eggplants, a dish that transforms simple ingredients into a symphony of flavors. This gourmet dish, featuring the subtle smokiness of perfectly roasted eggplants, is elevated with a luxurious Parmesan Vinaigrette and a unique melted Anchovy Oil. Ideal for both intimate dinners and special gatherings, it showcases the versatility and richness of eggplant in a new, exciting way.

Present the Roasted Eggplants warm, drizzled generously with the homemade Parmesan Vinaigrette. The Melted Anchovy Oil adds an unexpected depth, creating a savory experience that’s both heartwarming and sophisticated. Pair it with a light salad or crusty bread to absorb the exquisite flavors. It’s a flavorful vegetable dish that stands out, whether as a main course or a luxurious side.

Keep any leftovers in an airtight container, refrigerated. It maintains its deliciousness for up to one day, making it a convenient and healthy eggplant entree option. The flavors even deepen over time, offering a rich, savory experience with each bite. Reheat gently to preserve the delicate balance of flavors, and enjoy the convenience of a gourmet meal at any time.

Hi, I'm Kimberly!

Hi, I'm Kimberly.

A hopeless romantic when it comes to food. Every recipe I share is a love letter to food itself. I’m so glad you’re here. Make yourself at home and stay a while.

Love,
Kimberly

Kimberly the Zett Signature

If you want to get to know me better,
click here!


Roasted Eggplants with Parmesan Vinaigrette & Melted Anchovy Oil

LET’S MAKE A PIECE OF HAPPINESS

Print
.tasty-recipe-responsive-iframe-container-565b987f { position: relative; overflow: hidden; padding-top: 177.62%; } .tasty-recipe-responsive-iframe-container-565b987f iframe { position: absolute; top: 0; left: 0; width: 100%; height: 100%; border: 0; } clock clock iconcutlery cutlery iconflag flag iconfolder folder iconinstagram instagram iconpinterest pinterest iconfacebook facebook iconprint print iconsquares squares iconheart heart iconheart solid heart solid icon
Roasted Eggplants with Parmesan Vinaigrette & Melted Anchovy Oil

Roasted Eggplants with Parmesan Vinaigrette & Melted Anchovy Oil


  • Author: Kimberly
  • Total Time: 25 min
  • Yield: 4

Description

GOOD TO HAVE ON HAND

  • sharp knife
  • cutting board
  • medium-sized bowl
  • sealable jar
  • cheese grater
  • small pot


Ingredients

Units Scale
EGGPLANT
  • 2 eggplants
  • 4 tbsp olive oil
  • 1 tsp oregano
  • 1/4 tsp chili flakes
  • 1/8 tsp salt
  • 1/8 tsp pepper
PARMESAN VINAIGRETTE
  • 2 tbsp olive oil
  • 1 tsp white wine vinegar
  • 50 milliliters vegetable stock (5 tbsp)
  • 1 tsp honey
  • 1 tsp dijon mustard
  • 1 garlic clove
  • 2 tbsp creme fraiche
  • 2 tbsp grated parmesan
  • 1/8 tsp salt
  • 1/8 tsp pepper
ANCHOVY OIL
  • 2 tbsp olive oil
  • 4 anchovie filets
TOPPINGS
  • parsley
  • freshly grated pepper

Instructions

  • Wash the eggplants thoroughly and cut into chunks and finely grate the Parmesan.
  • Place the eggplant chunks in a medium bowl and mix with 4 tbsp olive oil, 1 tsp dried oregano, 1/4 tsp chili flakes, 1/8 tsp salt and 1/8 tsp ground pepper. Place the eggplant pieces on baking paper, spread evenly and bake in the oven at 230°C (450°F) for 15-20 minutes until crispy.
  • In the meantime, stir together the Parmesan vinaigrette. To do this, place the following ingredients in a sealable jar and shake well: 1 crushed garlic clove, 1 tsp white wine vinegar, 1 tsp Dijon mustard, 2 tbsp creme fraiche, vegetable stock, 2 tbsp olive oil, 2 tbsp grated Parmesan, 1 tsp honey, 1/8 tsp salt and 1/8 tsp ground pepper. Set aside.
  • Heat 2 tbsp olive oil in a small pan over a medium heat. Add the anchovy fillets and stir until the anchovies have dissolved in the oil.
  • Remove the eggplants from the oven and arrange on plates. Spread the vinaigrette over the eggplants and top with anchovy oil, parsley and freshly ground pepper.
  • Cook Time: 25 min

CRAVING MORE?

Follow along here & don’t forget to subscribe to my substack!