


Tomato Tarte Tatin

Tomato Tarte Tatin

Tomato Tarte Tatin

Tomato Tarte Tatin

June 15, 2024 by Kimberly

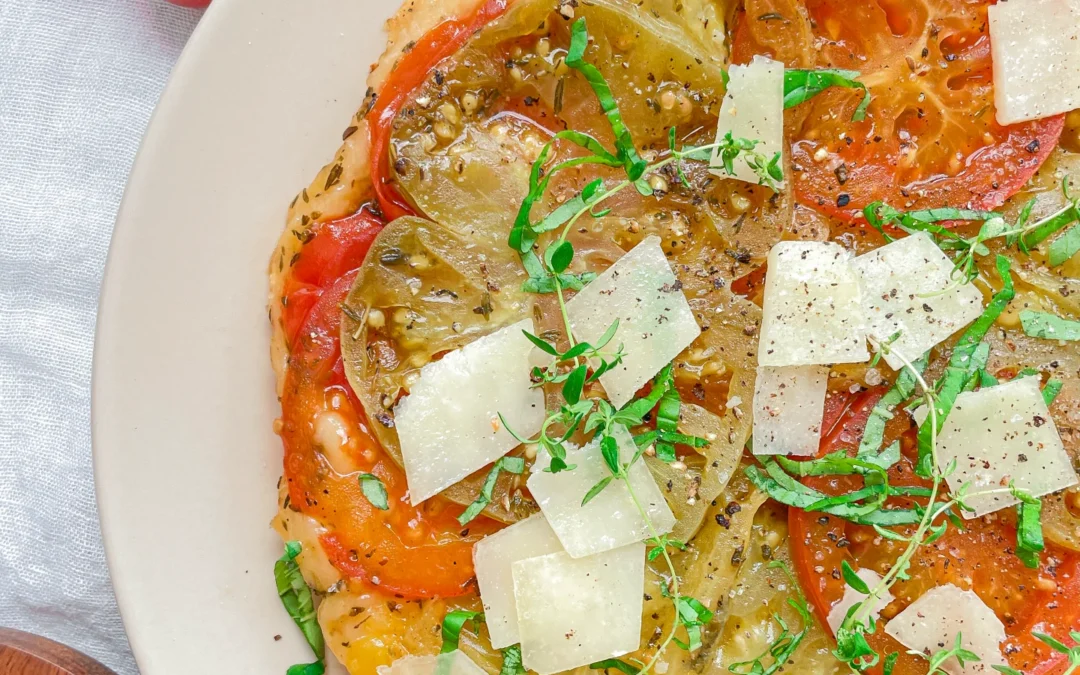
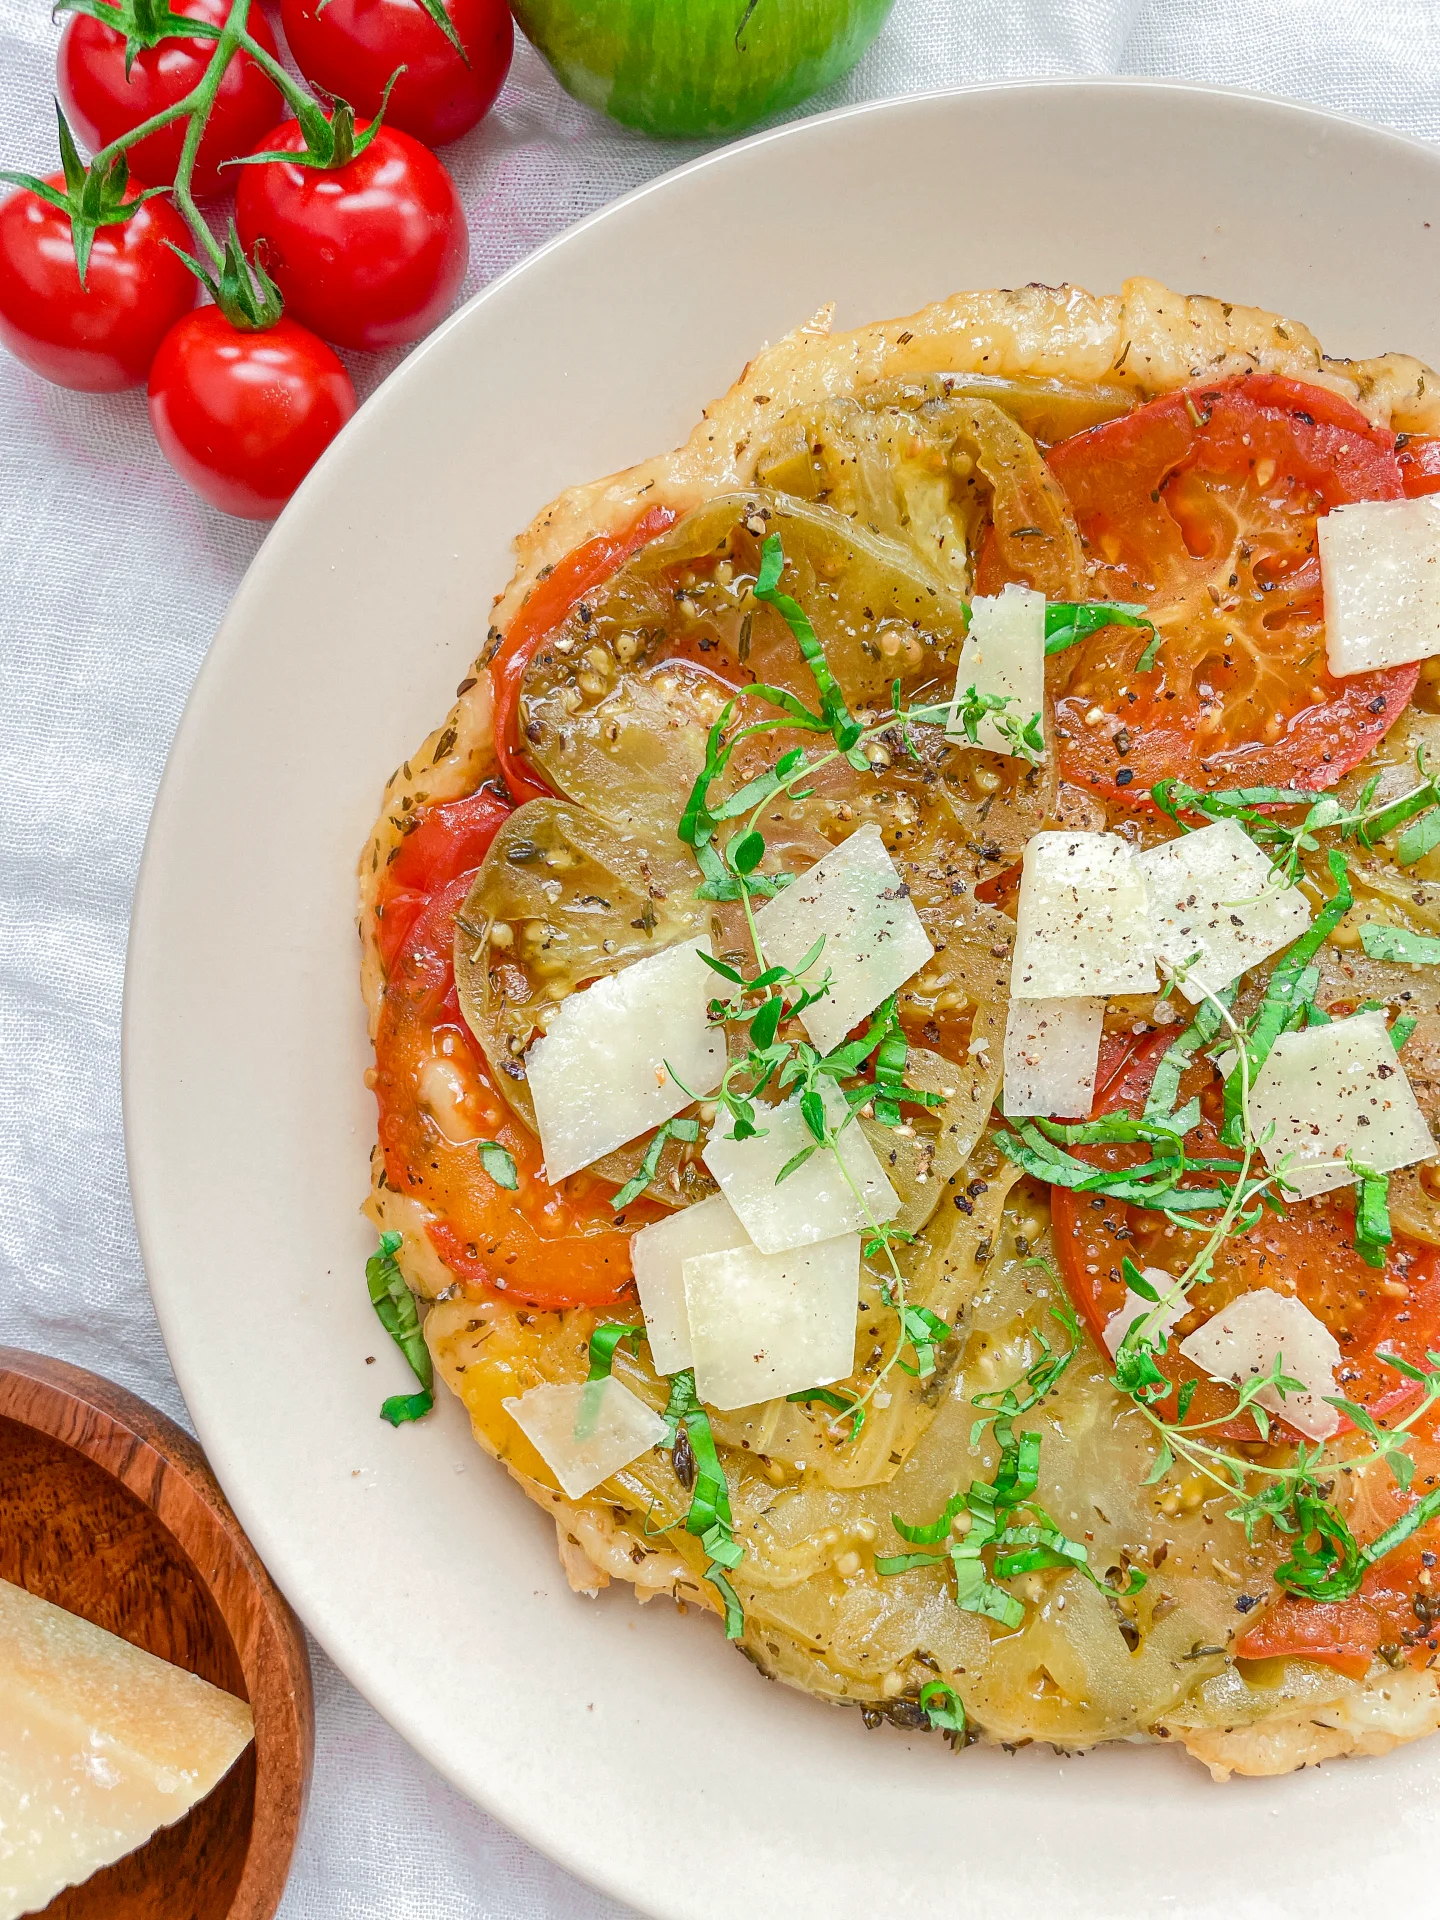
Flip your mealtime with a stunning Tomato Tarte Tatin! Sweet, savory, and beautifully caramelized, it’s a showstopper that turns any meal into a special occasion.

This website uses affiliate links which may earn commission for purchases made at no additional cost to you.

TOTAL TIME

45 min

SERVES

2 portions

DIET

vegetarian

EVERY RECIPE DESERVES

A Little Love Letter

Transform your table with the vibrant colors and lush flavors of a Tomato Tarte Tatin. This dish offers a delightful twist on the classic French dessert, turning tomatoes into the star of the show.

Serve this exquisite tart fresh out of the oven to enjoy its optimal flavor and texture. It pairs beautifully with a simple arugula salad dressed with balsamic vinegar and olive oil or a side of creamy goat cheese. Perfect for impressing guests at dinner parties or enjoying a luxurious weekend meal.

Cool any leftovers to room temperature before storing them in an airtight container in the refrigerator. This dish is best enjoyed within a couple of days to maintain its crisp pastry and juicy topping.

Hi, I'm Kimberly!

Hi, I'm Kimberly.

A hopeless romantic when it comes to food. Every recipe I share is a love letter to food itself. I’m so glad you’re here. Make yourself at home and stay a while.

Love,
Kimberly

Kimberly the Zett Signature

If you want to get to know me better,
click here!


Tomato Tarte Tatin
Tomato Tarte Tatin

LET’S MAKE A PIECE OF HAPPINESS

Print
clock clock iconcutlery cutlery iconflag flag iconfolder folder iconinstagram instagram iconpinterest pinterest iconfacebook facebook iconprint print iconsquares squares iconheart heart iconheart solid heart solid icon
Tomato Tarte Tatin

Tomato Tarte Tatin


5 Stars 4 Stars 3 Stars 2 Stars 1 Star

No reviews

  • Author: Kimberly
  • Total Time: 45 min
  • Yield: 2 1x

Description

GOOD TO HAVE ON HAND

  • sharp knife
  • cutting board
  • garlic press
  • oven-safe pan
  • large plate


Ingredients

Units Scale
  • 1 puff pastry dough
  • 4 big tomatoes
  • 2 garlic cloves
  • 1/2 tsp dried thyme
  • 3 tbsp olive oil
  • 1 tbsp honey
  • salt & pepper to taste
  • 1 tsp fresh thyme
  • 30 grams parmesan

Instructions

  1. Take the puff pastry out of the fridge. Set aside.
  2. Preheat the oven to 220°C (428°F).
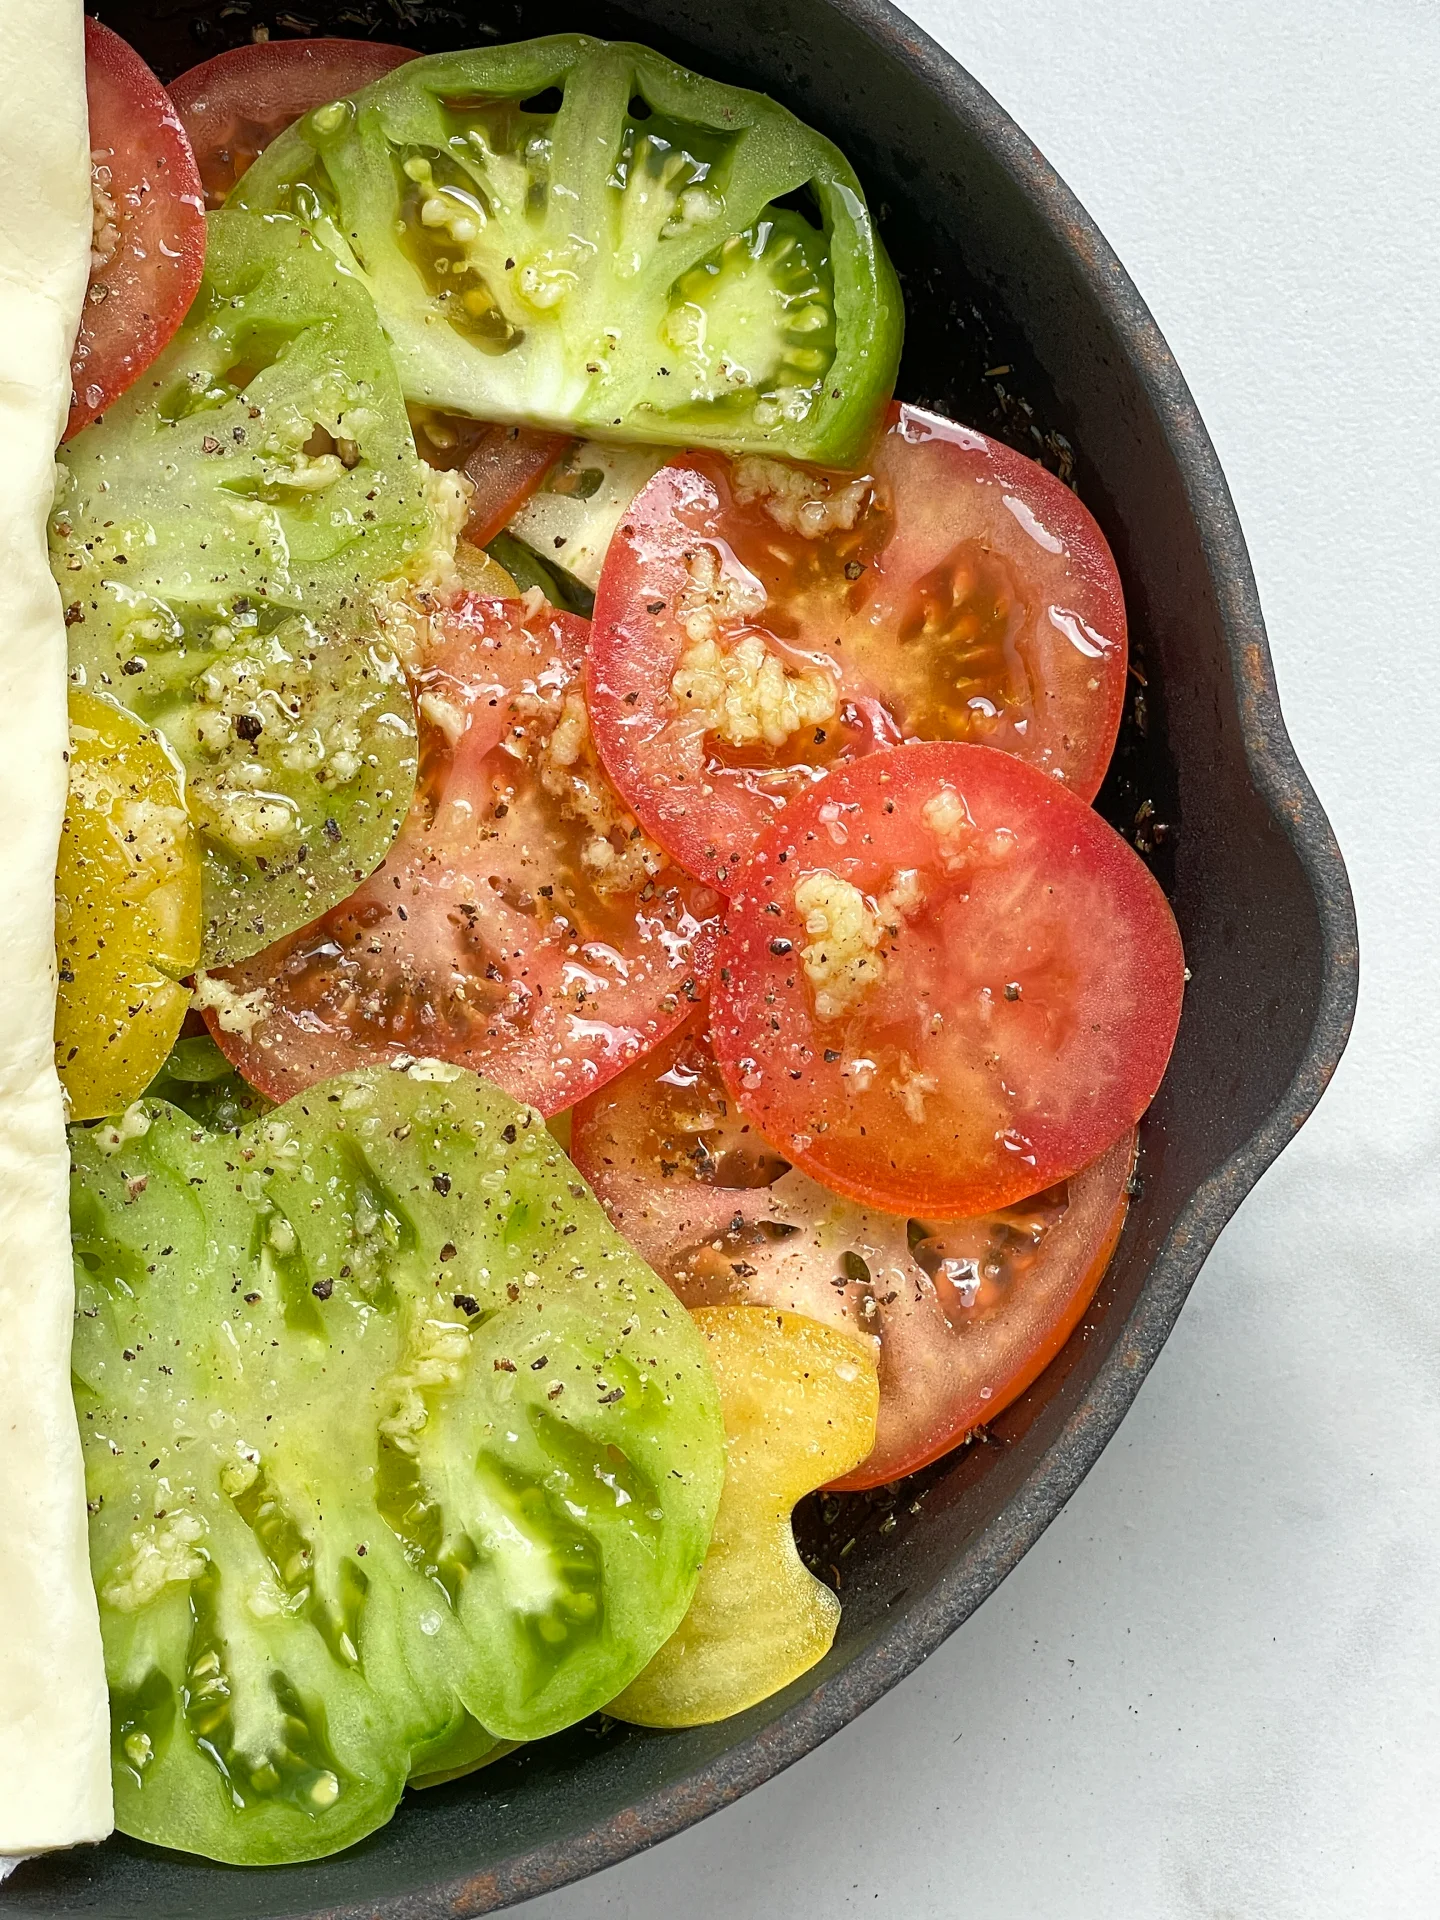
  3. Wash the tomatoes and slice them finely from the bottom. Peel and finely chop or press the garlic and mix it into a small bowl with 1-2 tablespoons of olive oil. Set everything aside.
  4. Roll out the puff pastry and place the oven-safe pan on top. Trace a circle around the pan and cut out the puff pastry accordingly. Set the pastry circle aside. Don’t discard the remaining pastry. You can either make a second layer of pastry for the Tarte Tatin or cut it into squares, place a cube of feta in the middle, wrap it up, and bake until golden brown in the oven. Topped with a bit of honey, thyme, and salt, you quickly create a simple snack 🙂
  5. Heat the pan and briefly sauté honey, olive oil, dried thyme, and salt until bubbles form. Then distribute the tomato slices in the pan, brush them with the garlic oil, and let them caramelize for about 1-2 minutes. Remove from the heat, top with freshly ground pepper, and lay the puff pastry circle on top. Tuck the edges slightly inward and press firmly. Prick a few holes in the pastry with a fork.
  6. Bake the pan in the oven on the bottom rack uncovered for about 25 minutes.
  7. In the meantime, coarsely grate or slice the Parmesan and pluck the fresh thyme leaves from their stems. Set aside.
  8. Remove the pan from the oven and let it cool for a few minutes. Then place a plate larger than the pan over the pan and quickly invert to turn out the Tarte Tatin onto the plate.
  9. Top the Tarte Tatin with Parmesan, fresh thyme, and pepper, and serve immediately. Enjoy your piece of happiness!

Notes

The calorie information may vary depending on the product used, country and region.

  • Passive Time: 25 min
  • Cook Time: 20 min
CRAVING MORE?

Follow along here & don’t forget to subscribe to my substack!

Sabich Sandwich

Sabich Sandwich

Sabich Sandwich

Sabich Sandwich

June 6, 2024 by Kimberly

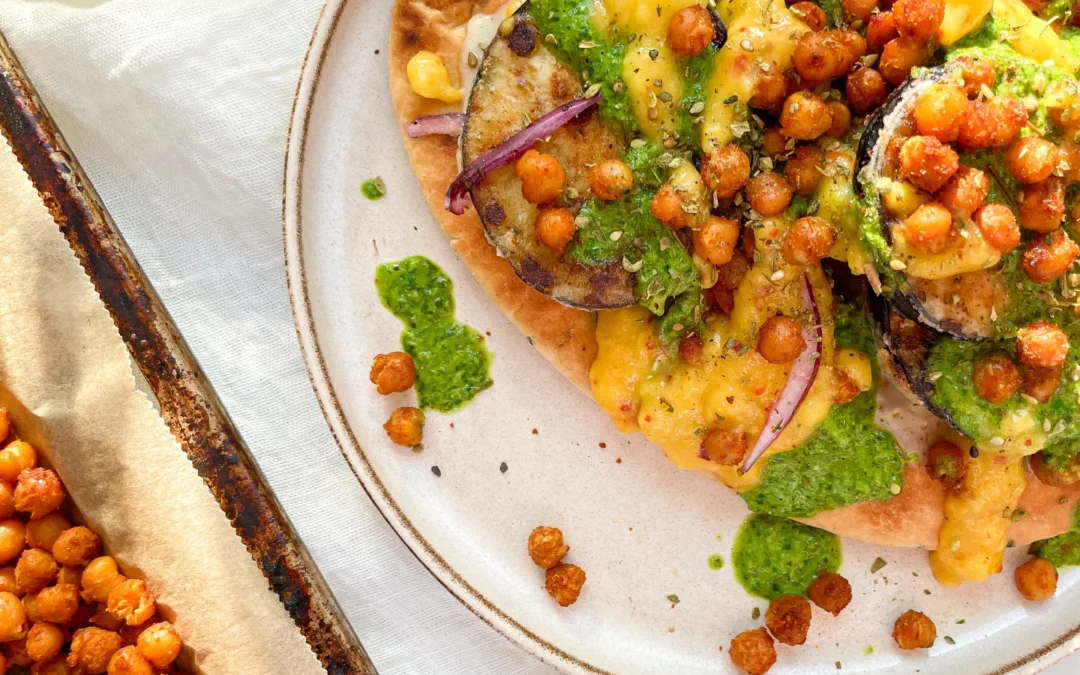
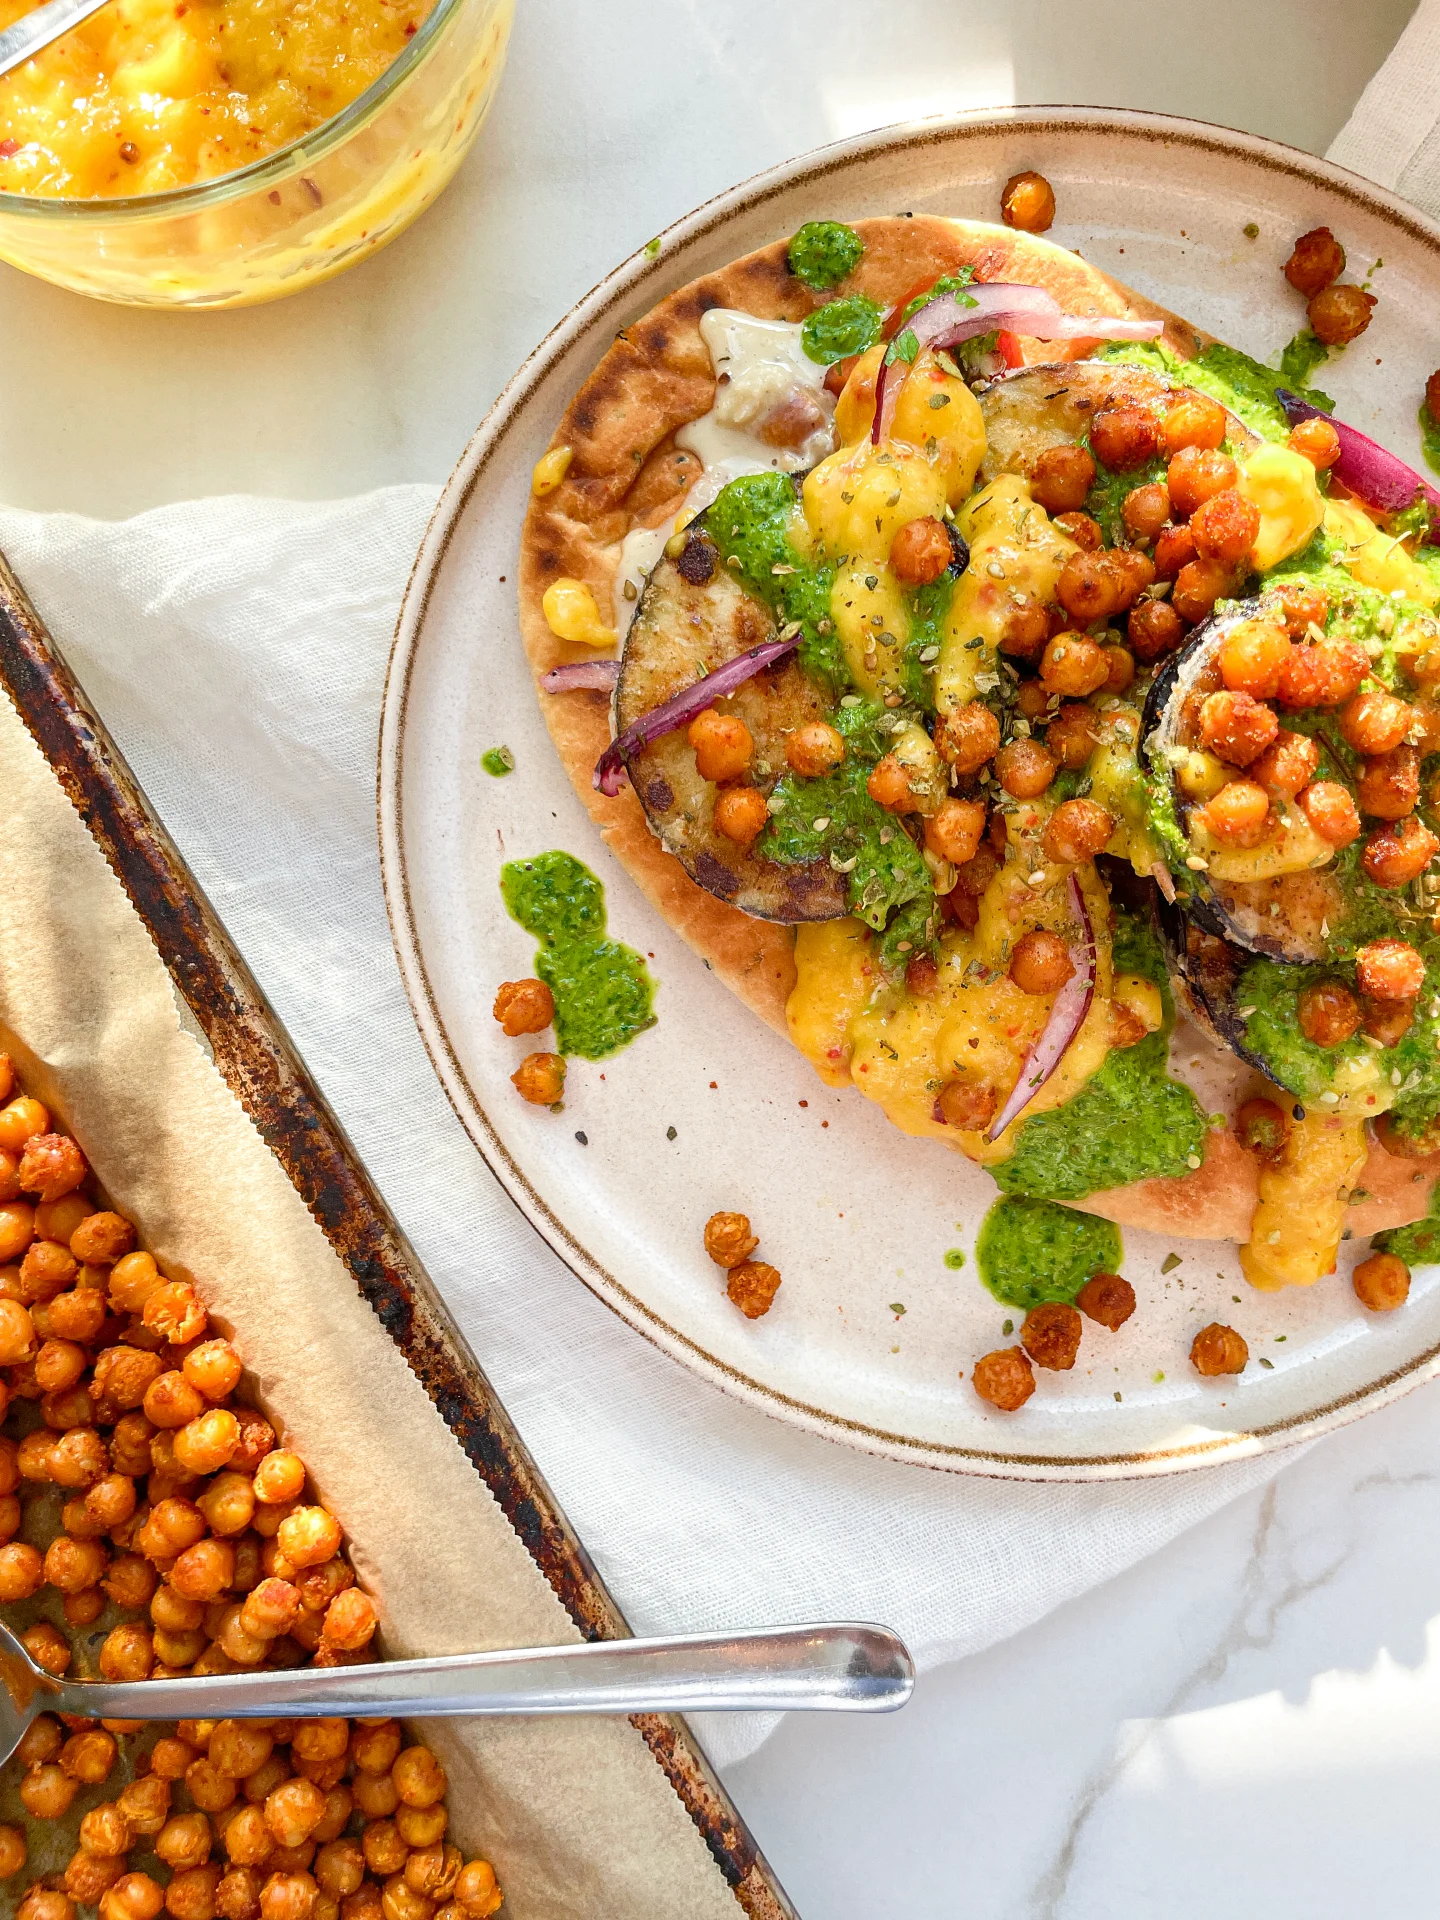
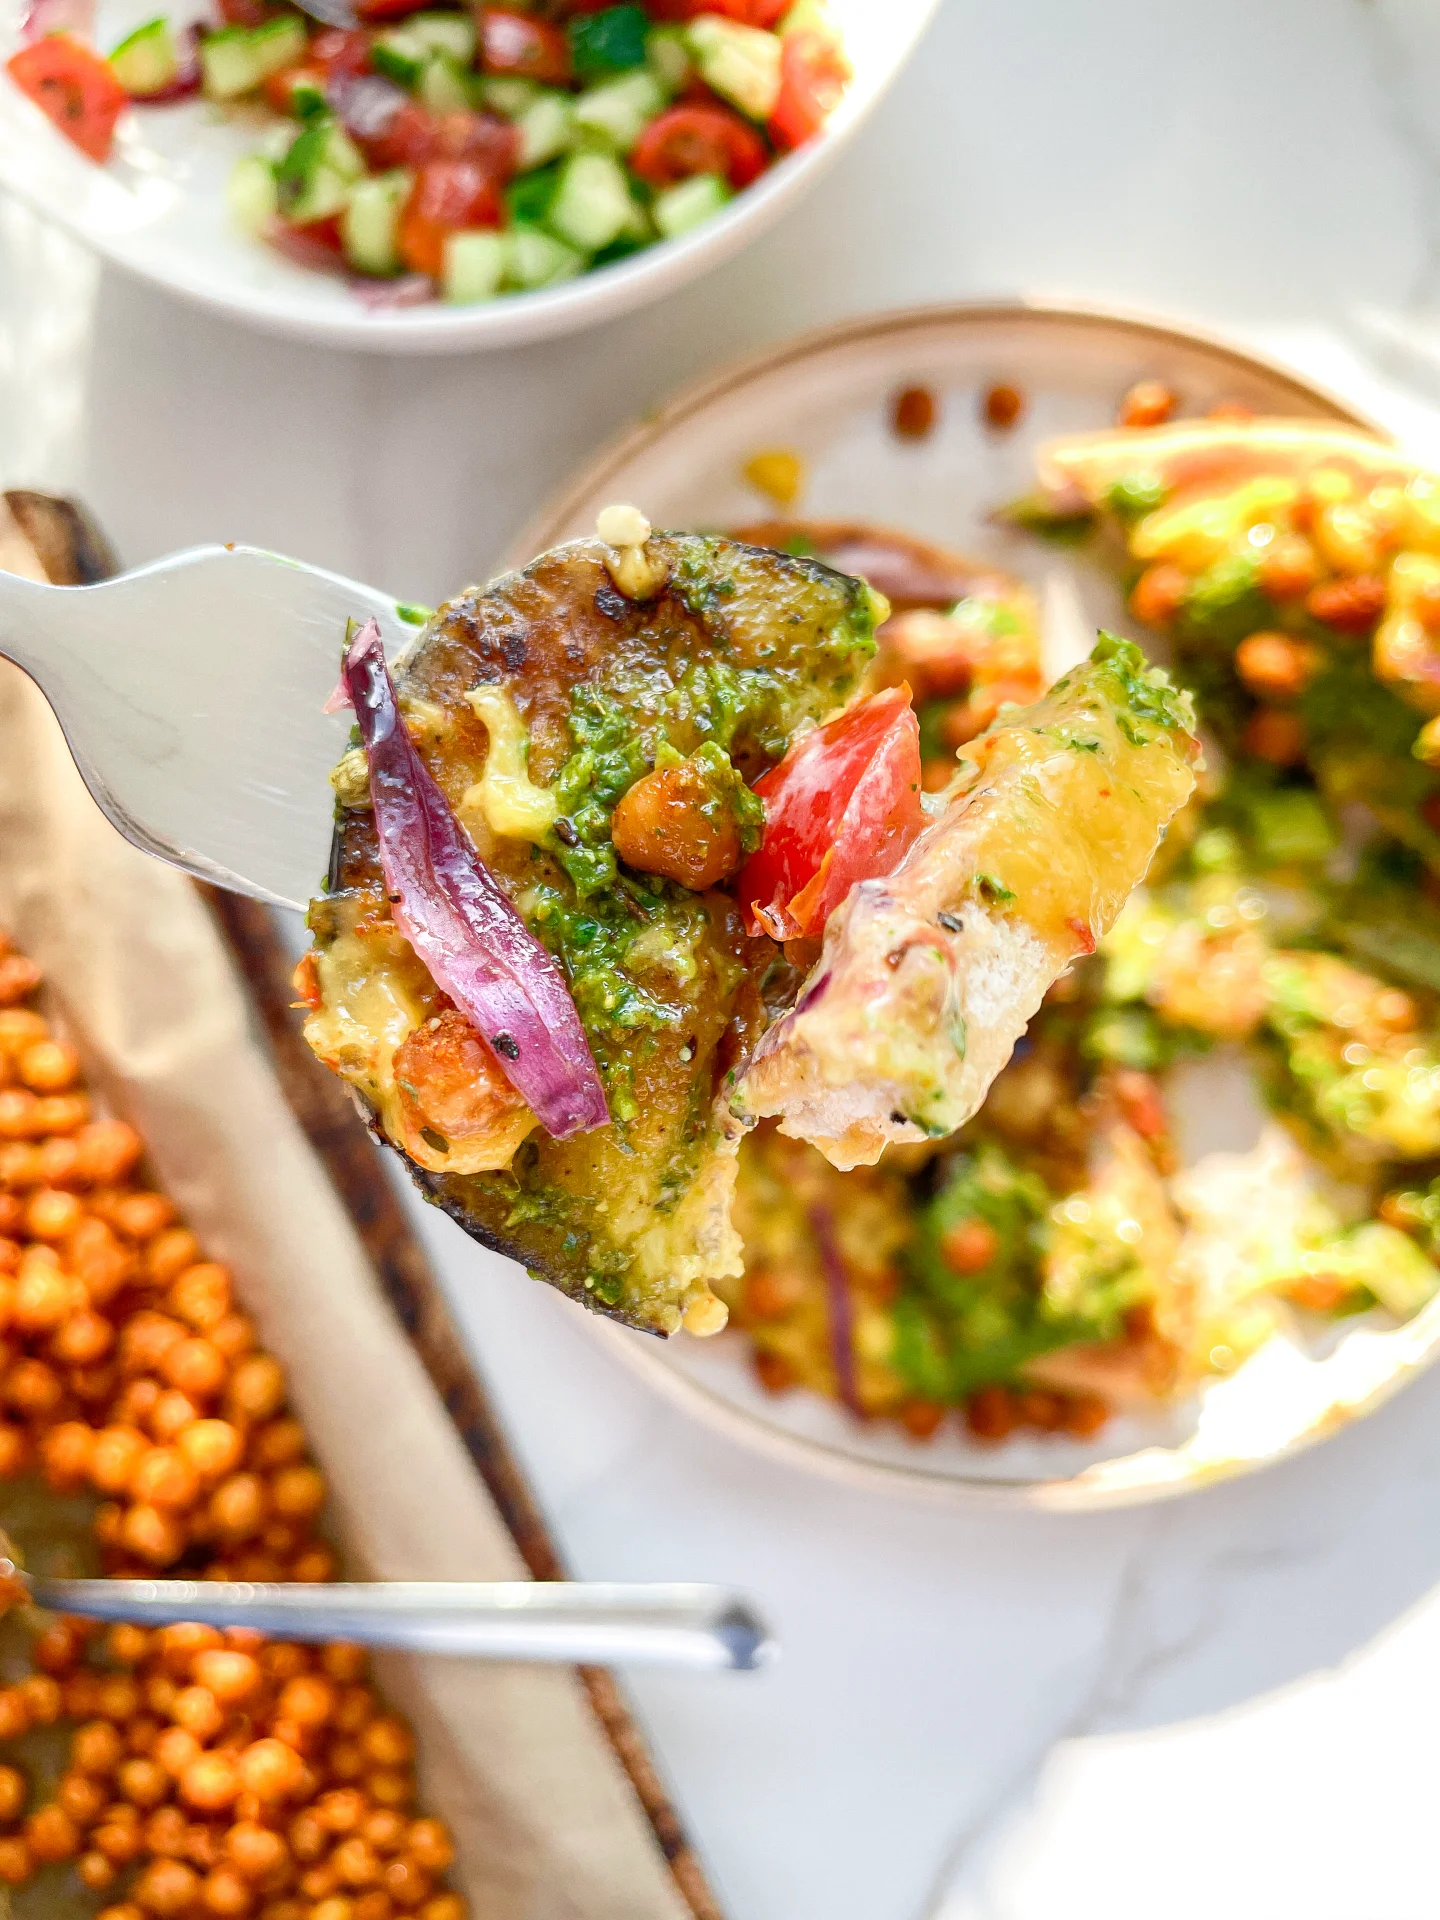
Dive into the ultimate Sabich sandwich: crispy eggplant, fresh tomato cucumber salad, creamy tahini, spicy zhough, tangy mango sauce and crunchy chickpeas. Pure flavor explosion!

This website uses affiliate links which may earn commission for purchases made at no additional cost to you.

TOTAL TIME

40 min

SERVES

2 sandwiches

DIET

vegan

EVERY RECIPE DESERVES

A Little Love Letter

Meet your new favorite sandwich: the Sabich. Inspired by Yottam Ottolenghi this Middle Eastern delight packs a punch with crispy eggplant, fresh tomato cucumber salad, creamy tahini, spicy zhoug, tangy mango sauce, and crunchy chickpeas. It’s a vegan feast that’s not only incredibly delicious but also super easy to make. Perfect for lunch or dinner, this Sabich sandwich is all about bold flavors and textures.

Start with a warm bread, then layer on the crispy eggplant, followed by the tomato cucumber salad. Drizzle with tahini sauce and add a spoonful of zhoug for that spicy kick. Top it off with chickpeas and a splash of mango sauce. Wrap it up and enjoy! It’s best served fresh and warm, making it a perfect quick meal.

Store any leftover components separately in airtight containers. The crispy eggplant and salad can stay fresh in the fridge for up to two days. When ready to eat, reheat the eggplant in the oven and assemble your sandwich fresh for the best taste.

Hi, I'm Kimberly!

Hi, I'm Kimberly.

A hopeless romantic when it comes to food. Every recipe I share is a love letter to food itself. I’m so glad you’re here. Make yourself at home and stay a while.

Love,
Kimberly

Kimberly the Zett Signature

If you want to get to know me better,
click here!


Sabich Sandwich
Sabich Sandwich

LET’S MAKE A PIECE OF HAPPINESS

Print
clock clock iconcutlery cutlery iconflag flag iconfolder folder iconinstagram instagram iconpinterest pinterest iconfacebook facebook iconprint print iconsquares squares iconheart heart iconheart solid heart solid icon
Sabich Sandwich

Sabich Sandwich


  • Author: Kimberly
  • Total Time: 40 minutes
  • Yield: 2 1x

Description

GOOD TO HAVE ON HAND

  • small bowl
  • garlic press
  • sharp knife
  • cutting board
  • hand blender (or food processor)
  • mortar & pestle
  • medium bowl
  • 3 small bowls
  • sieve
  • large pan


Ingredients

Units Scale
TAHINI SAUCE
  • 2 tbsp tahini
  • 2 tbsp lemon juice
  • 1 tsp maple syrup
  • 1 garlic clove
  • salt & pepper to taste
MANGO SAUCE
  • 1 ripe mango
  • 1/8 tsp chili flakes
ZHOUG
  • 10 grams fresh cilantro
  • 5 grams fresh parsley
  • 1 jalapeno
  • 2 tbsp olive oil
  • 2 tbsp lime juice
  • 4 tbsp cold water
  • 1 garlic clove
  • 5 cardamom capsules
  • 3 cloves
  • 1/2 tsp cumin
  • pinch of pepper
TOMATE CUCUMBER SALAD
  • 100 grams tomatoes
  • 100 grams cucumber
  • 1 small red onion
  • 1 tbsp olive oil
  • 1 tbsp lemon juice
  • some parsley leaves
ROASTED CHICKPEAS
  • 130 grams drained chickpeas
  • 1/2 tbsp olive oil
  • 1/4 tsp cumin
  • 1/4 tsp smoked paprika
  • 1/8 tsp salz
  • 1/8 tsp curry
  • 1/8 tsp garlic powder
  • 1/8 tsp onion powder
EGGPLANT SLICES
  • 1 eggplant
  • 2 tbsp cornstarch
  • 2 tbsp ghee/clarified butter
OTHER INGREDIENTS
  • 2 pita breads

Instructions

  1. For the tahini sauce, mix tahini and water in a small bowl until smooth. Press in one peeled garlic clove, add maple syrup and lemon juice, and mix well. Season with salt and pepper and set aside.
  2. For the mango sauce, peel the mango and blend the soft flesh in a tall container with a hand blender until creamy, adding a bit of water if needed. Add chili flakes to taste and stir. Set aside.
  3. For the Zhoug, first grind the 3 cloves and the contents of 5 cardamom pods in a mortar. Put this powder in a tall container that fits the hand blender, and add the following: cilantro leaves, parsley leaves, 4 tablespoons of cold water, 2 tablespoons of olive oil, 2 tablespoons of lime juice, 1/2 teaspoon of cumin, 1 jalapeno without the stem, and 2 peeled garlic cloves. Blend everything into a pesto-like paste and set aside.
  4. For the tomato-cucumber salad, wash the tomatoes and cucumber well. Cut both into small, even pieces and put them in a medium bowl. Peel the red onion, cut it into thin strips, and add to the bowl. Finely chop a few parsley leaves and add them too. Finally, add 1 tablespoon of olive oil and 1 tablespoon of lemon juice and mix well. Set aside.
  5. For the roasted chickpeas, preheat the oven to 200°C / 392°F. Rinse the chickpeas thoroughly under running water and let them drain. In a medium bowl, mix together the spice blend: 1/2 tablespoon of olive oil, 1/4 teaspoon of cumin, 1/4 teaspoon of smoked paprika, 1/8 teaspoon of salt, 1/8 teaspoon of curry powder, 1/8 teaspoon of dried garlic, and 1/8 teaspoon of dried onion. Put the chickpeas in a clean kitchen towel and gently rub them dry, removing any loose skins. Mix the chickpeas with the spice paste in the bowl until they’re well coated. Spread the chickpeas on a baking sheet lined with parchment paper and roast in the oven for 20-25 minutes. Place the pita breads in the oven for the last 10 minutes.
  6. Finally, prepare the eggplant slices. Wash and dry the eggplant, then cut it into slices about 1 cm thick. Spread 2 tablespoons of cornstarch on a small plate and coat the eggplant slices on both sides, shaking off any excess. Fry the slices in a hot pan with 2 tablespoons of clarified butter until crispy on both sides, then let them drain on a paper towel.
  7. To assemble, spread tahini sauce on each piece of bread, add tomato-cucumber salad, then a few eggplant slices, and top with Zhoug and mango sauce. Finally, sprinkle the roasted chickpeas on top. Enjoy your delicious creation!

Notes

The calorie information may vary depending on the product used, country and region.

  • Cook Time: 40 min

CRAVING MORE?

Follow along here & don’t forget to subscribe to my substack!

Garlic Herb Pull Apart Bread

Garlic Herb Pull Apart Bread

Garlic Herb Pull Apart Bread

Garlic Herb Pull Apart Bread

May 30, 2024 by Kimberly

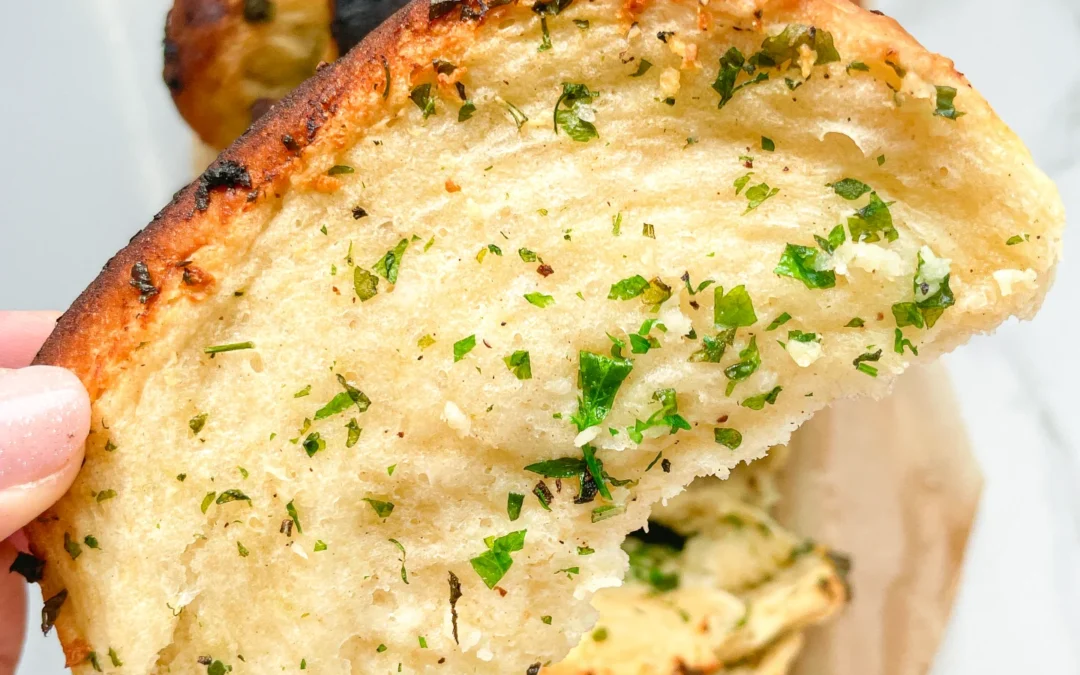
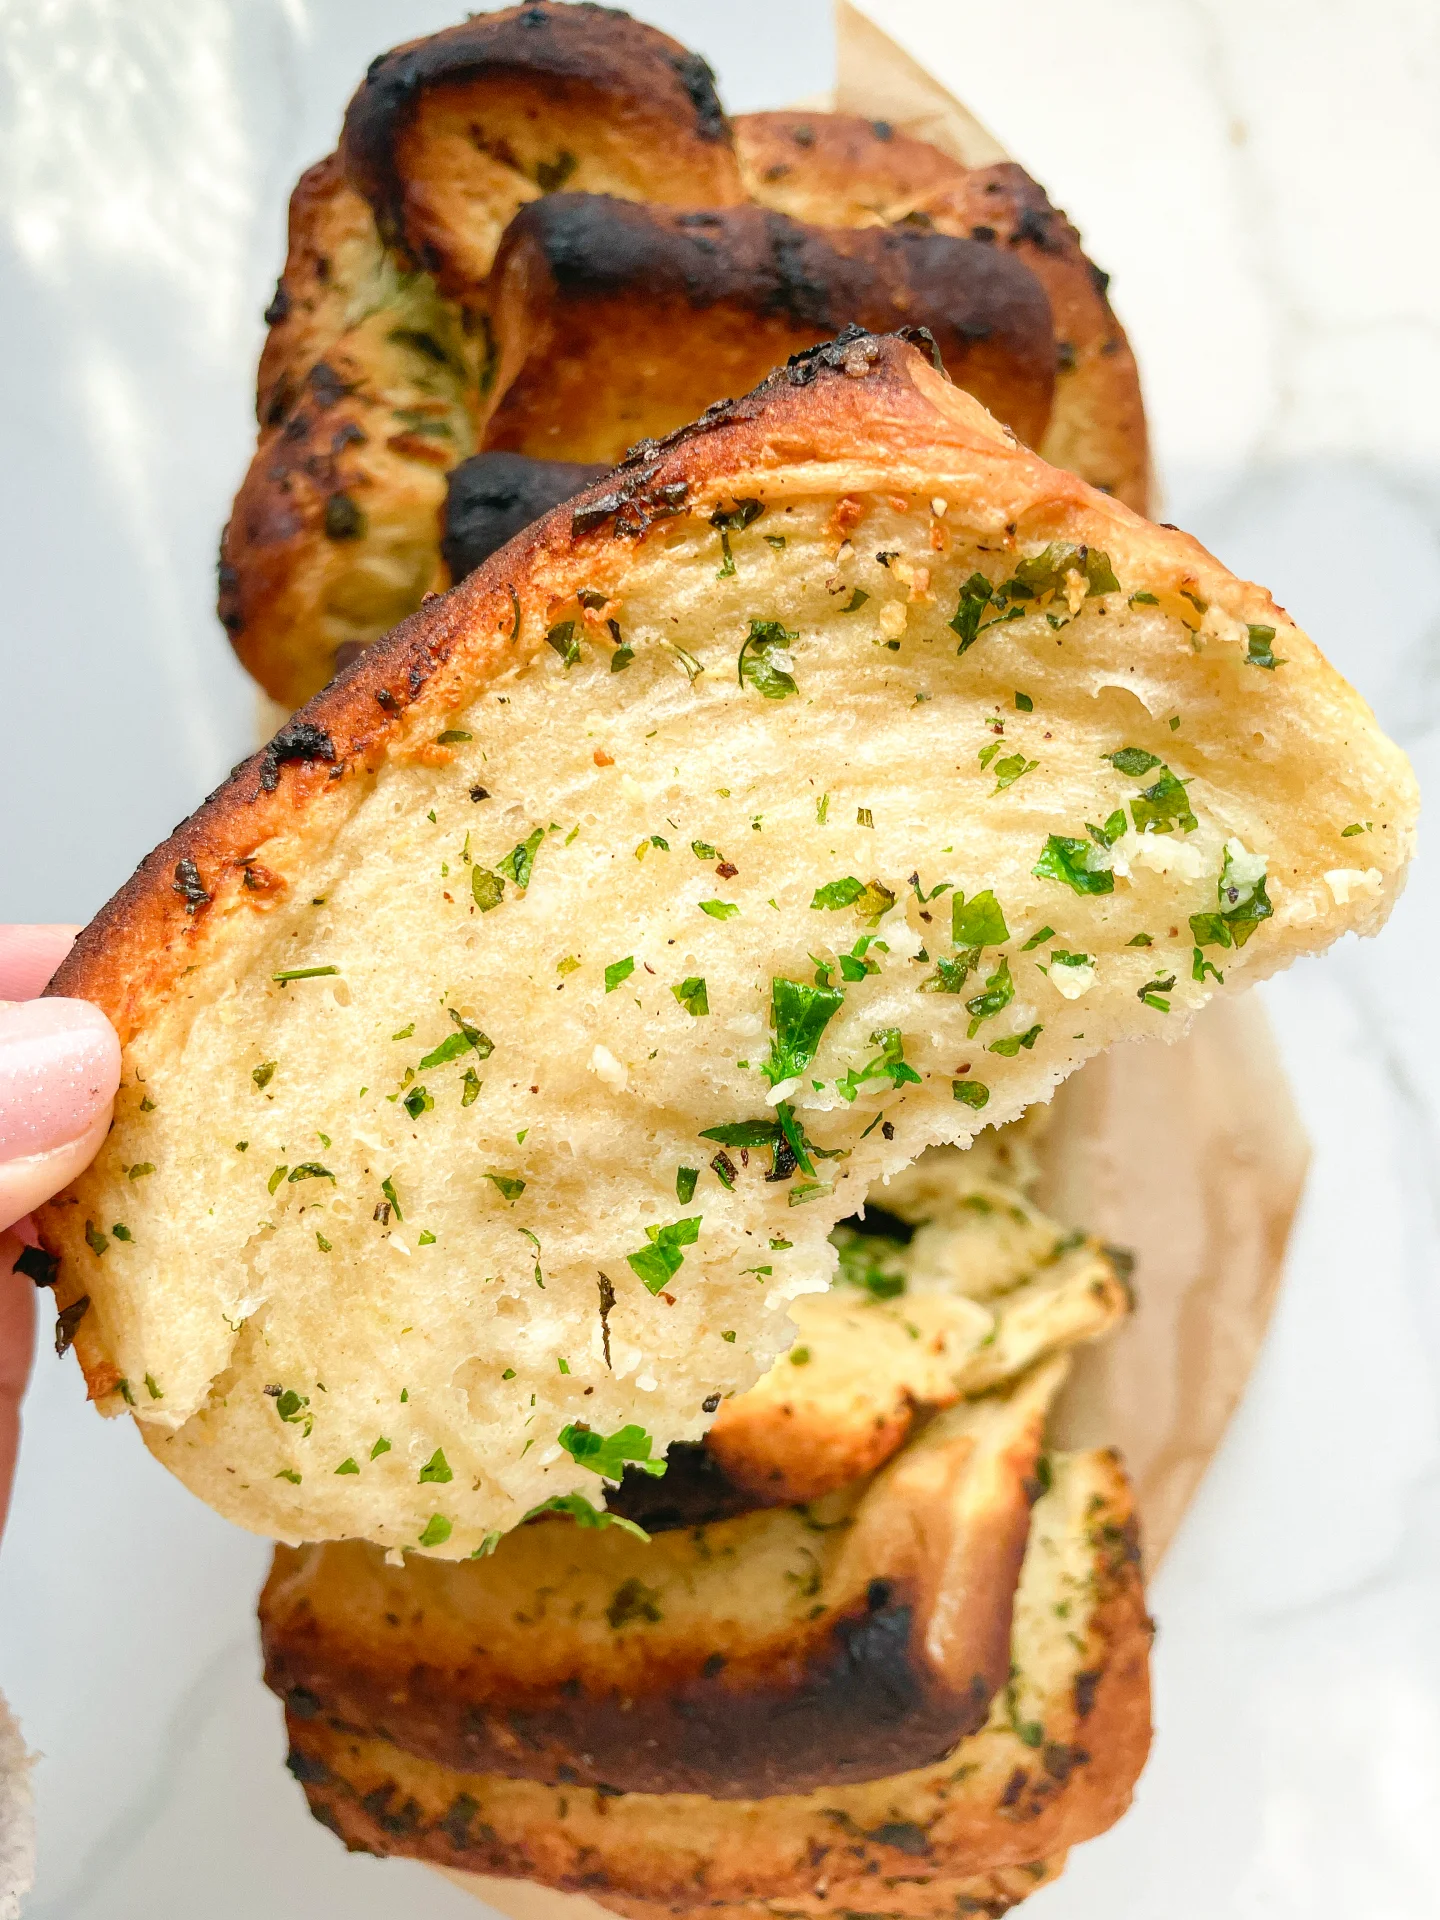
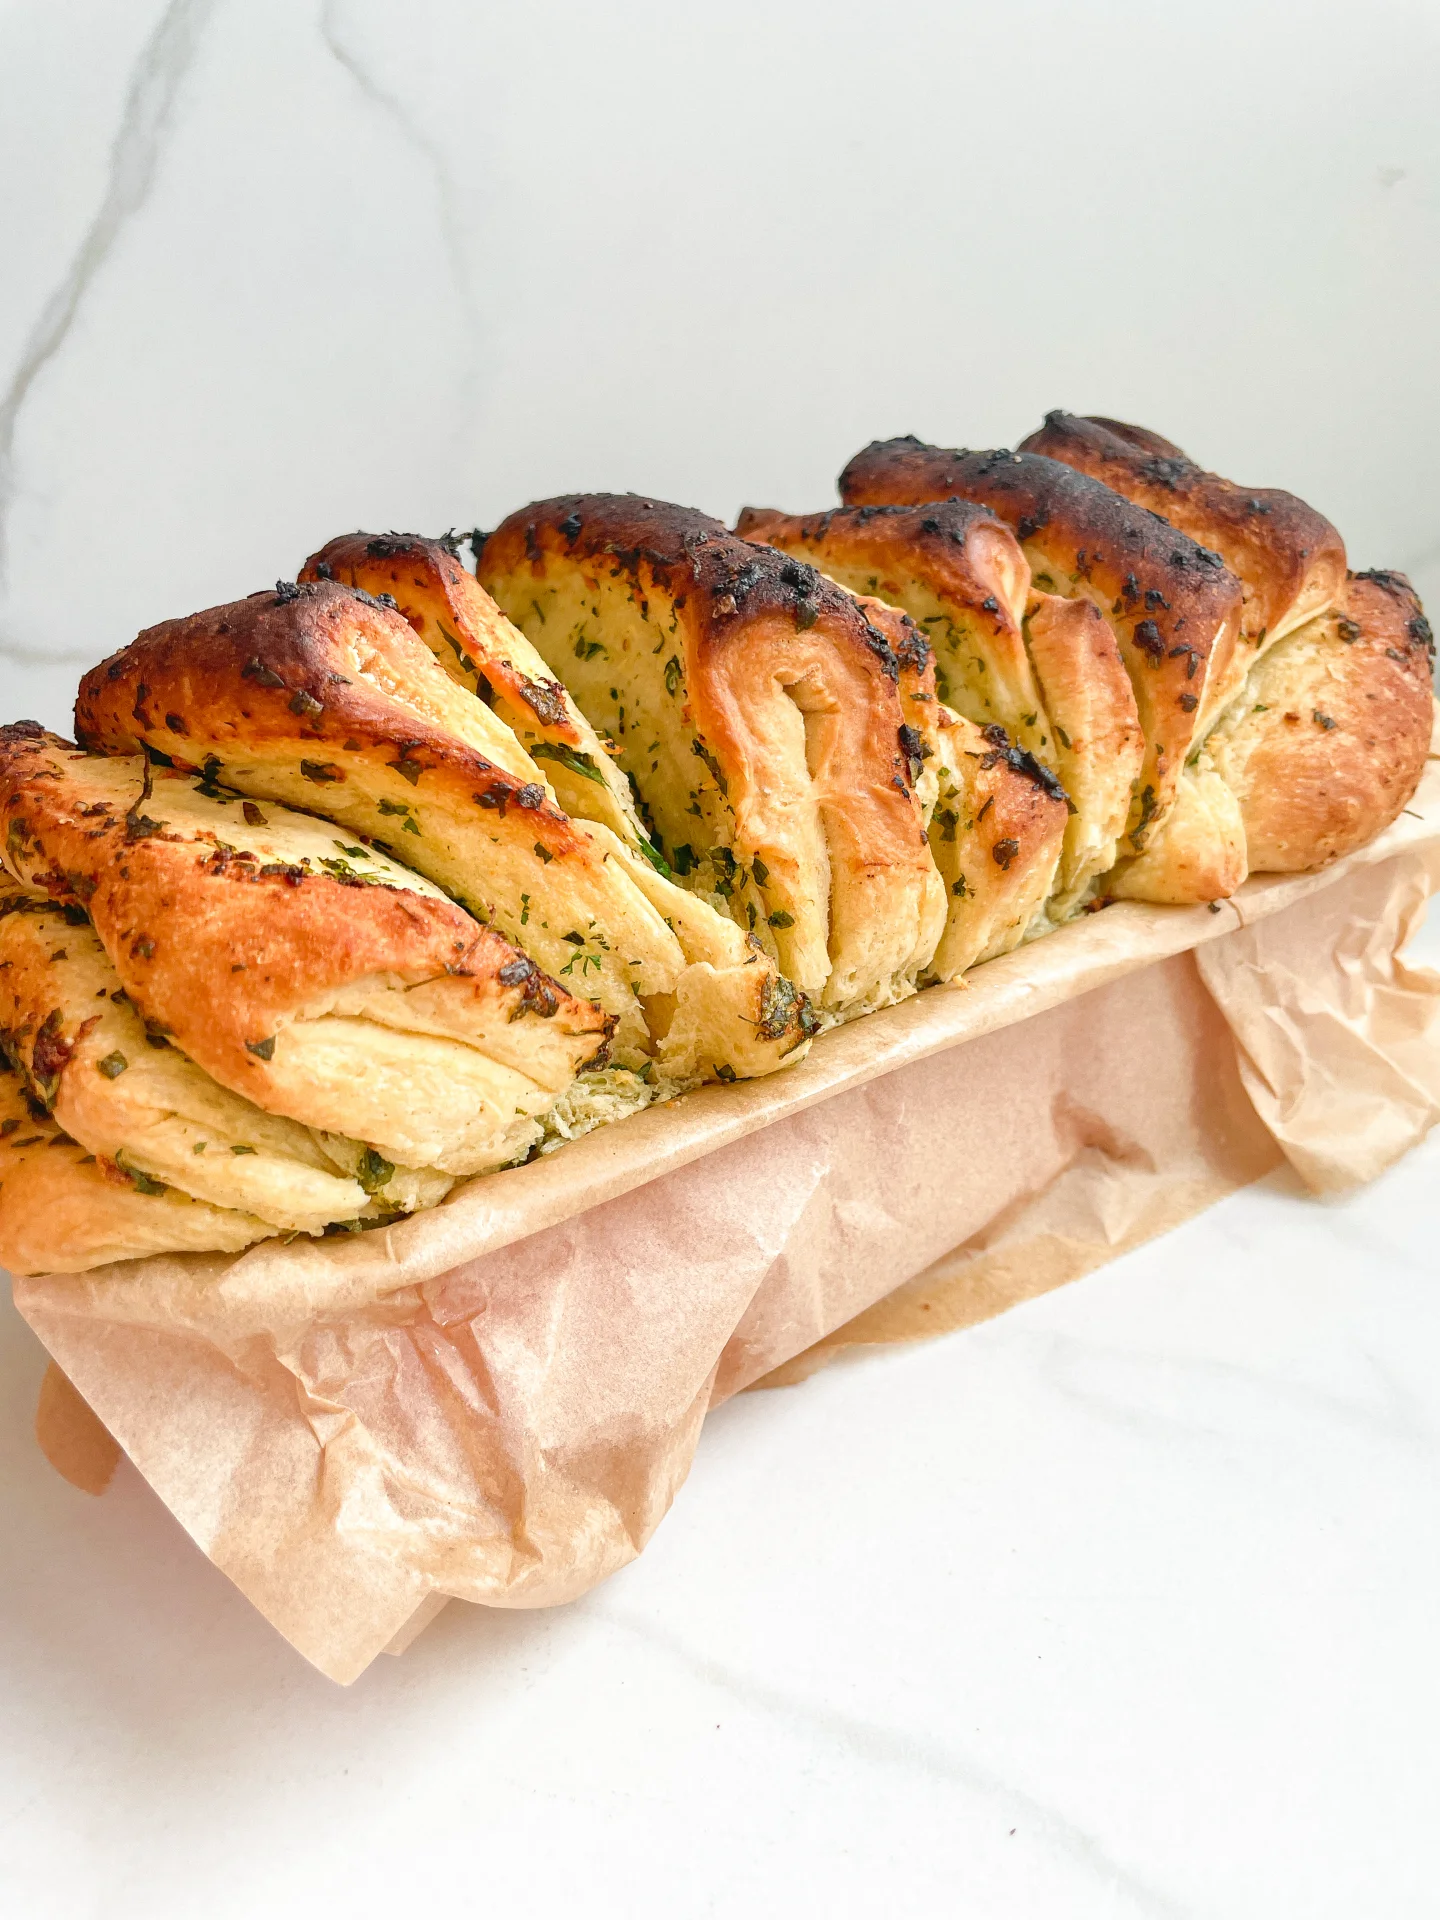
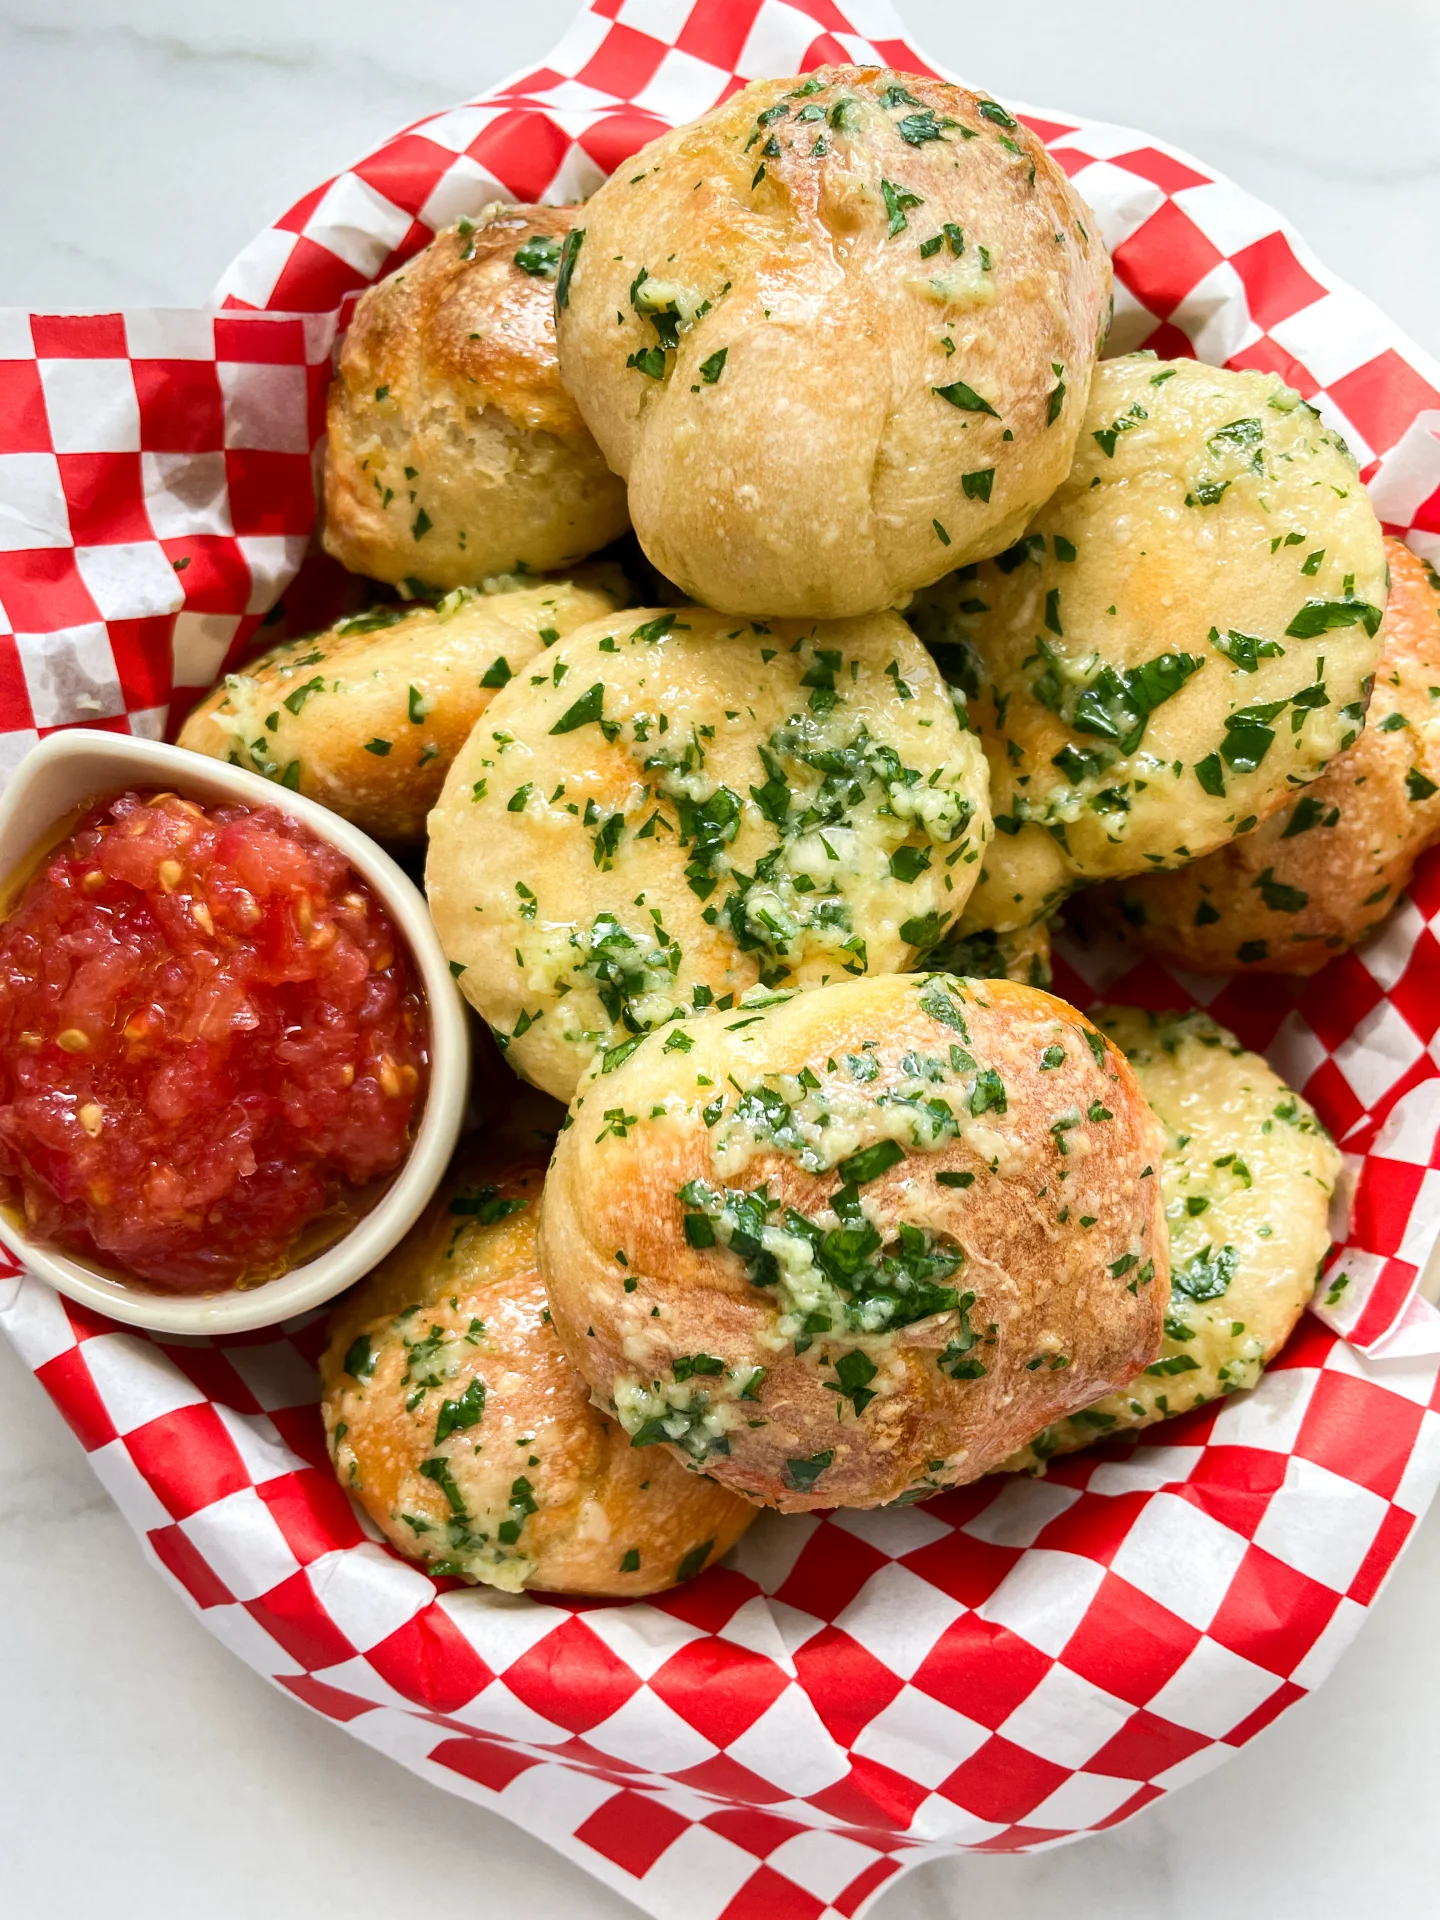
Garlic Herb Pull Apart Bread is the perfect addition to any meal, bringing together the flavors of fresh garlic and herbs in a soft, pull-apart bread.

This website uses affiliate links which may earn commission for purchases made at no additional cost to you.

TOTAL TIME

2 hrs + 50 min

SERVES

10 portions

DIET

vegetarian

EVERY RECIPE DESERVES

A Little Love Letter

Garlic Herb Pull Apart Bread is the perfect addition to any meal, bringing together the flavors of fresh garlic and herbs in a soft, pull-apart bread. This bread is not only delicious but also incredibly fun to eat, making it a hit at parties and family gatherings.

Serve this mouthwatering Garlic Herb Pull Apart Bread as an appetizer at your next party or alongside a big salad. It’s also perfect for dipping into soups and stews, or simply enjoy it on its own. The combination of herbs and garlic makes every bite a delightful experience.

To store your leftover Garlic Herb Pull Apart Bread, wrap it tightly in aluminum foil and keep it at room temperature for up to 2 days. For longer storage, place it in an airtight container and refrigerate for up to 4 days. Reheat in the oven to bring back its fresh-baked taste and texture.

Hi, I'm Kimberly!

Hi, I'm Kimberly.

A hopeless romantic when it comes to food. Every recipe I share is a love letter to food itself. I’m so glad you’re here. Make yourself at home and stay a while.

Love,
Kimberly

Kimberly the Zett Signature

If you want to get to know me better,
click here!


Garlic Herb Pull Apart Bread

LET’S MAKE A PIECE OF HAPPINESS

Print
clock clock iconcutlery cutlery iconflag flag iconfolder folder iconinstagram instagram iconpinterest pinterest iconfacebook facebook iconprint print iconsquares squares iconheart heart iconheart solid heart solid icon
Garlic Herb Pull Apart Bread

Garlic Herb Pull Apart Bread


5 from 1 review

  • Author: Kimberly
  • Total Time: 2 hours 50 min
  • Yield: 10 1x

Description

GOOD TO HAVE ON HAND

  • baking pan (I used a 28x8cm / 11”x3” loaf pan)
  • large bowl
  • measuring cup
  • plastic wrap (or kitchen towel)
  • small bowl
  • sharp knife
  • cutting board
  • garlic press
  • rolling pin


Ingredients

Units Scale
DOUGH
  • 600 grams all-purpose flour
  • 42 grams fresh yeast
  • 2 tsp sugar
  • 2 tsp salt
  • 50 milliliters oil of your choice (I used cold-pressed rapeseed oil)
  • 350 milliliters lukewarm water
FILLING
  • 5 garlic cloves
  • 30 grams fresh herbs (I used thyme, oregano, basil, rosemary & parsley)
  • 125 grams soft butter
  • salt & pepper

Instructions

  1. For the dough, mix flour, sugar, and salt in a large bowl. In a measuring cup, measure out the lukewarm water, crumble in the fresh yeast, and stir until the yeast dissolves. Add the yeast water and olive oil to the flour-sugar-salt mixture and mix until a sticky dough forms. Cover the bowl with plastic wrap or a damp towel and set aside for 10 minutes.
  2. With a wet hand, grab one side of the dough, lift it up, and fold it into the middle. Repeat with the other three sides. Let the dough rest for another 10 minutes, then repeat the folding process and let the dough rise, covered, for 1 hour.
  3. Meanwhile, prepare the filling. Finely chop the herbs and peel the garlic cloves, then either finely chop them or use a garlic press. In a small bowl, mix the softened butter, herbs, garlic, salt, and pepper into a paste and set aside (do not refrigerate, the butter should remain spreadable). Prepare the baking pan by either greasing it with a bit of butter or lining it with parchment paper, and set aside.
  4. After the dough has risen for an hour, perform one final round of folding and let it rise, covered, for another hour.
  5. Turn the dough out onto a clean, lightly floured surface and roll it out into a rectangle about 1/2” thick. Spread the butter-garlic-herb paste evenly over the dough. Cut the dough into strips about 8cm / 3” wide. Fold each strip like an accordion and place them upright in the baking pan with the buttered side facing up. Repeat with all the strips, pressing the dough snugly into the pan. Preheat the oven to 200°C / 392°F. Bake the dough for about 30 minutes. Serve warm or let cool. And now enjoy this piece of happiness 🙂

Notes

The calorie information may vary depending on the product used, country and region.

  • Passive Time: 2 hours 30 min
  • Cook Time: 20 min

CRAVING MORE?

Follow along here & don’t forget to subscribe to my substack!

Classic Scones

Classic Scones

Classic Scones

Classic Scones

May 26, 2024 by Kimberly

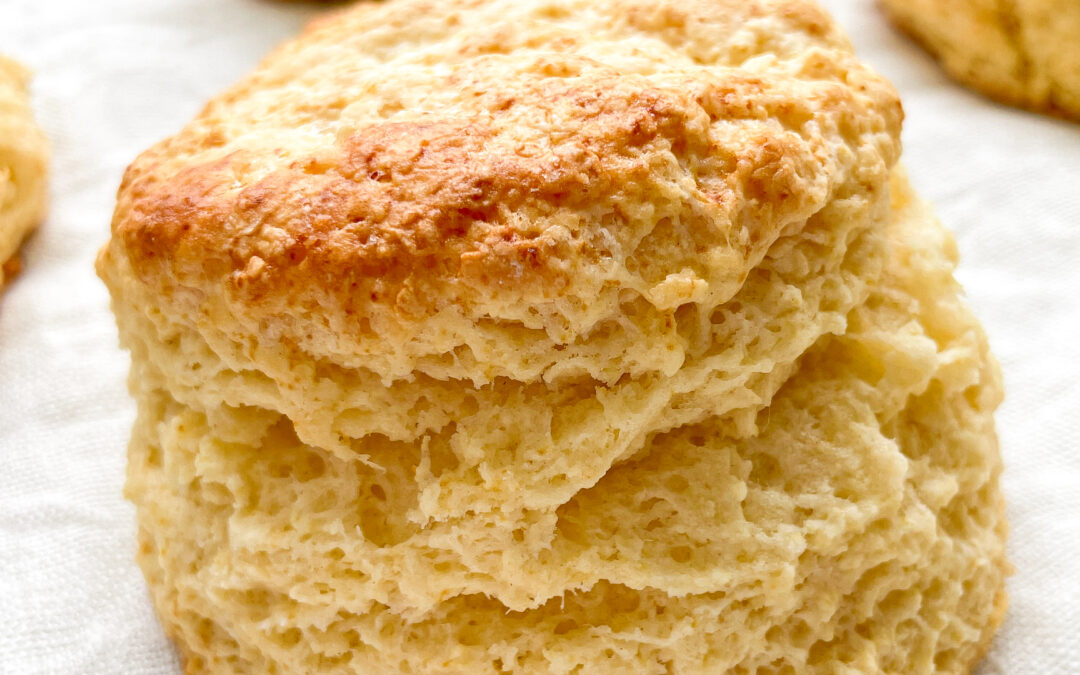
Indulge in the simple pleasure of classic scones – tender, buttery delights perfect for any tea time or breakfast. Bake a batch today and experience homemade comfort!

This website uses affiliate links which may earn commission for purchases made at no additional cost to you.

TOTAL TIME

40 min

SERVES

10 scones

DIET

vegetarian

EVERY RECIPE DESERVES

A Little Love Letter

Dive into the delightful world of classic scones, a quintessential British treat beloved across the globe. These buttery, flaky delights are the perfect companion to your afternoon tea or a cozy morning breakfast. With just a few simple steps, you can bring the taste of authentic English tea time into your home, impressing guests and treating yourself to a timeless culinary tradition.

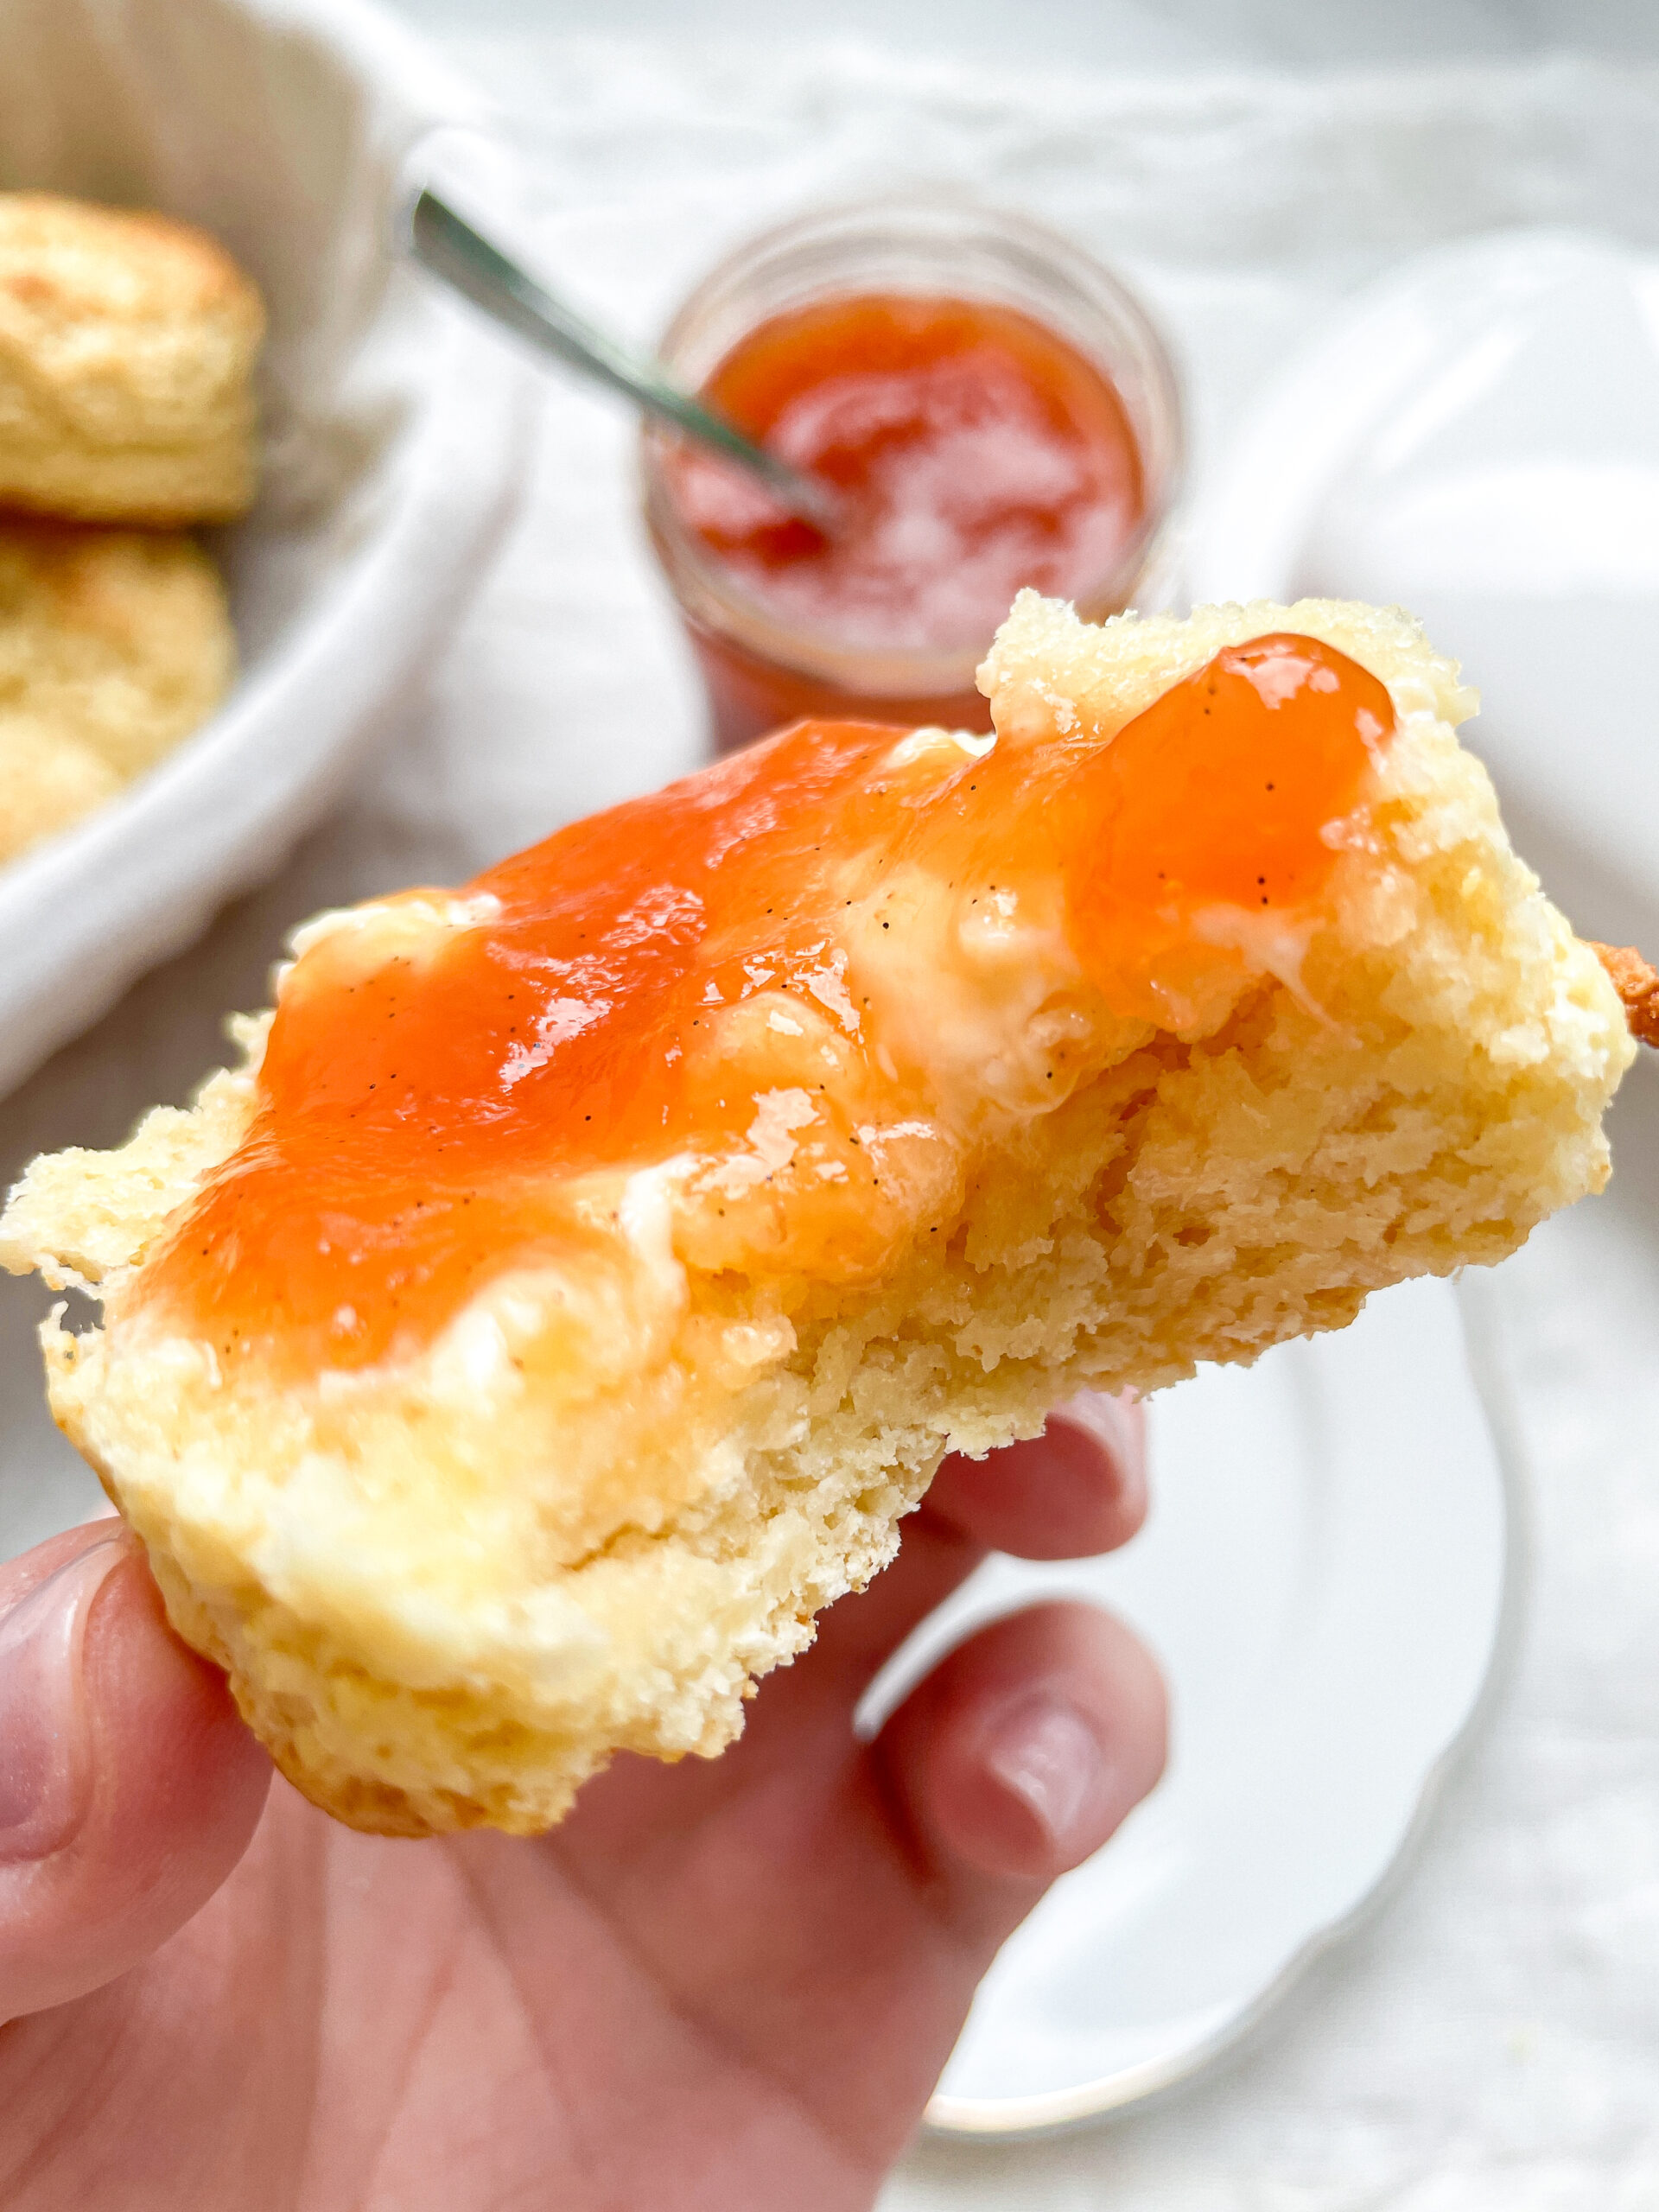
Serve these classic scones fresh and warm, straight from the oven. Split them open and slather with clotted cream and strawberry jam for a traditional experience. Alternatively, enjoy them plain with a hot cup of tea or coffee. These versatile treats can also be customized with add-ins like raisins or chocolate chips, making each batch uniquely delicious and perfectly suited to your taste preferences.

Store leftover scones in an airtight container at room temperature for up to two days. For longer storage, wrap them tightly and freeze for up to three months. Simply reheat to regain that freshly baked warmth and texture.

Hi, I'm Kimberly!

Hi, I'm Kimberly.

A hopeless romantic when it comes to food. Every recipe I share is a love letter to food itself. I’m so glad you’re here. Make yourself at home and stay a while.

Love,
Kimberly

Kimberly the Zett Signature

If you want to get to know me better,
click here!


Classic Scones
Classic Scones

LET’S MAKE A PIECE OF HAPPINESS

Print
clock clock iconcutlery cutlery iconflag flag iconfolder folder iconinstagram instagram iconpinterest pinterest iconfacebook facebook iconprint print iconsquares squares iconheart heart iconheart solid heart solid icon
Classic Scones

Classic Scones


5 from 1 review

  • Author: Kimberly
  • Total Time: 40 min
  • Yield: 10 1x

Description

GOOD TO HAVE ON HAND

  • box grater
  • medium-sized bowl
  • glass or small bowl
  • dough scraper / spatula
  • round cutter
  • pastry brush


Ingredients

Units Scale
  • 300 grams all-purpose flour
  • 35 grams white sugar
  • 4 tsp baking powder
  • 1/4 tsp salt
  • 90 grams butter
  • 1 egg
  • 160 milliliters milk
  • 2 tbsp milk for brushing

Instructions

PREPARATIONS

  • Place the butter in the freezer for 15 minutes.
  • Line a baking sheet with parchment paper.
  • Preheat the oven to 200°C/392°F.

INSTRUCTIONS

  1. In a medium-sized bowl, mix flour, sugar, baking powder, and salt. Grate the cold butter into the dry ingredients using a box grater.
  2. In a glass, whisk together the milk and egg and add to the other ingredients. Stir with a spoon until the mixture just comes together. Then, place the dough onto a clean work surface and fold it a few times with a dough scraper or a spatula, so that the dough comes together. It’s important not to use your hands for this, as the butter will soften too much, causing the dough to spread out during baking.
  3. Roll the dough into a rectangle about 30×20 cm and cut as many scones as possible using a round cutter. Fold the dough again and continue cutting out scones until all the dough is used. If you don’t have a cutter, you can also cut the dough into triangles. This amount of dough makes about 10 scones.
  4. Place the scones on the prepared baking sheet, spaced a little apart. Pour 2 tablespoons of milk into the glass and use the brush to spread it over the scones.
  5. Bake the scones in the oven for about 12 minutes. Then remove from the oven and enjoy immediately or let cool.

Notes

The calorie information may vary depending on the product used, country and region.

  • Prep Time: 2 min
  • Passive Time: 27 min
  • Cook Time: 10 min

CRAVING MORE?

Follow along here & don’t forget to subscribe to my substack!

Spicy Salmon Fried Sushi Rolls

Spicy Salmon Fried Sushi Rolls

Spicy Salmon Fried Sushi Rolls

Spicy Salmon Fried Sushi Rolls

May 24, 2024 by Kimberly

Spicy salmon meets crispy, fried perfection in this delightful dish. With a kick of heat, rich flavors, and a comforting texture, every bite offers a cozy yet exciting sushi experience.

This website uses affiliate links which may earn commission for purchases made at no additional cost to you.

TOTAL TIME

1 hr + 15 min

SERVES

4 portions

DIET

omnivore

EVERY RECIPE DESERVES

A Little Love Letter

Imagine if your favorite spicy tuna roll and a sizzling tempura dish had a delicious rendezvous. Sounds intriguing, right? Well, let me introduce you to Crispy Spicy Salmon Sushi Rolls. They’re bursting with the bold flavors of traditional sushi but transformed into a delightful fried sensation. Wrapped in a light, crispy coating with a kick of spicy salmon nestled inside, you’ve just discovered your new favorite dish. Perfect for any gathering or a tantalizing meal at home!

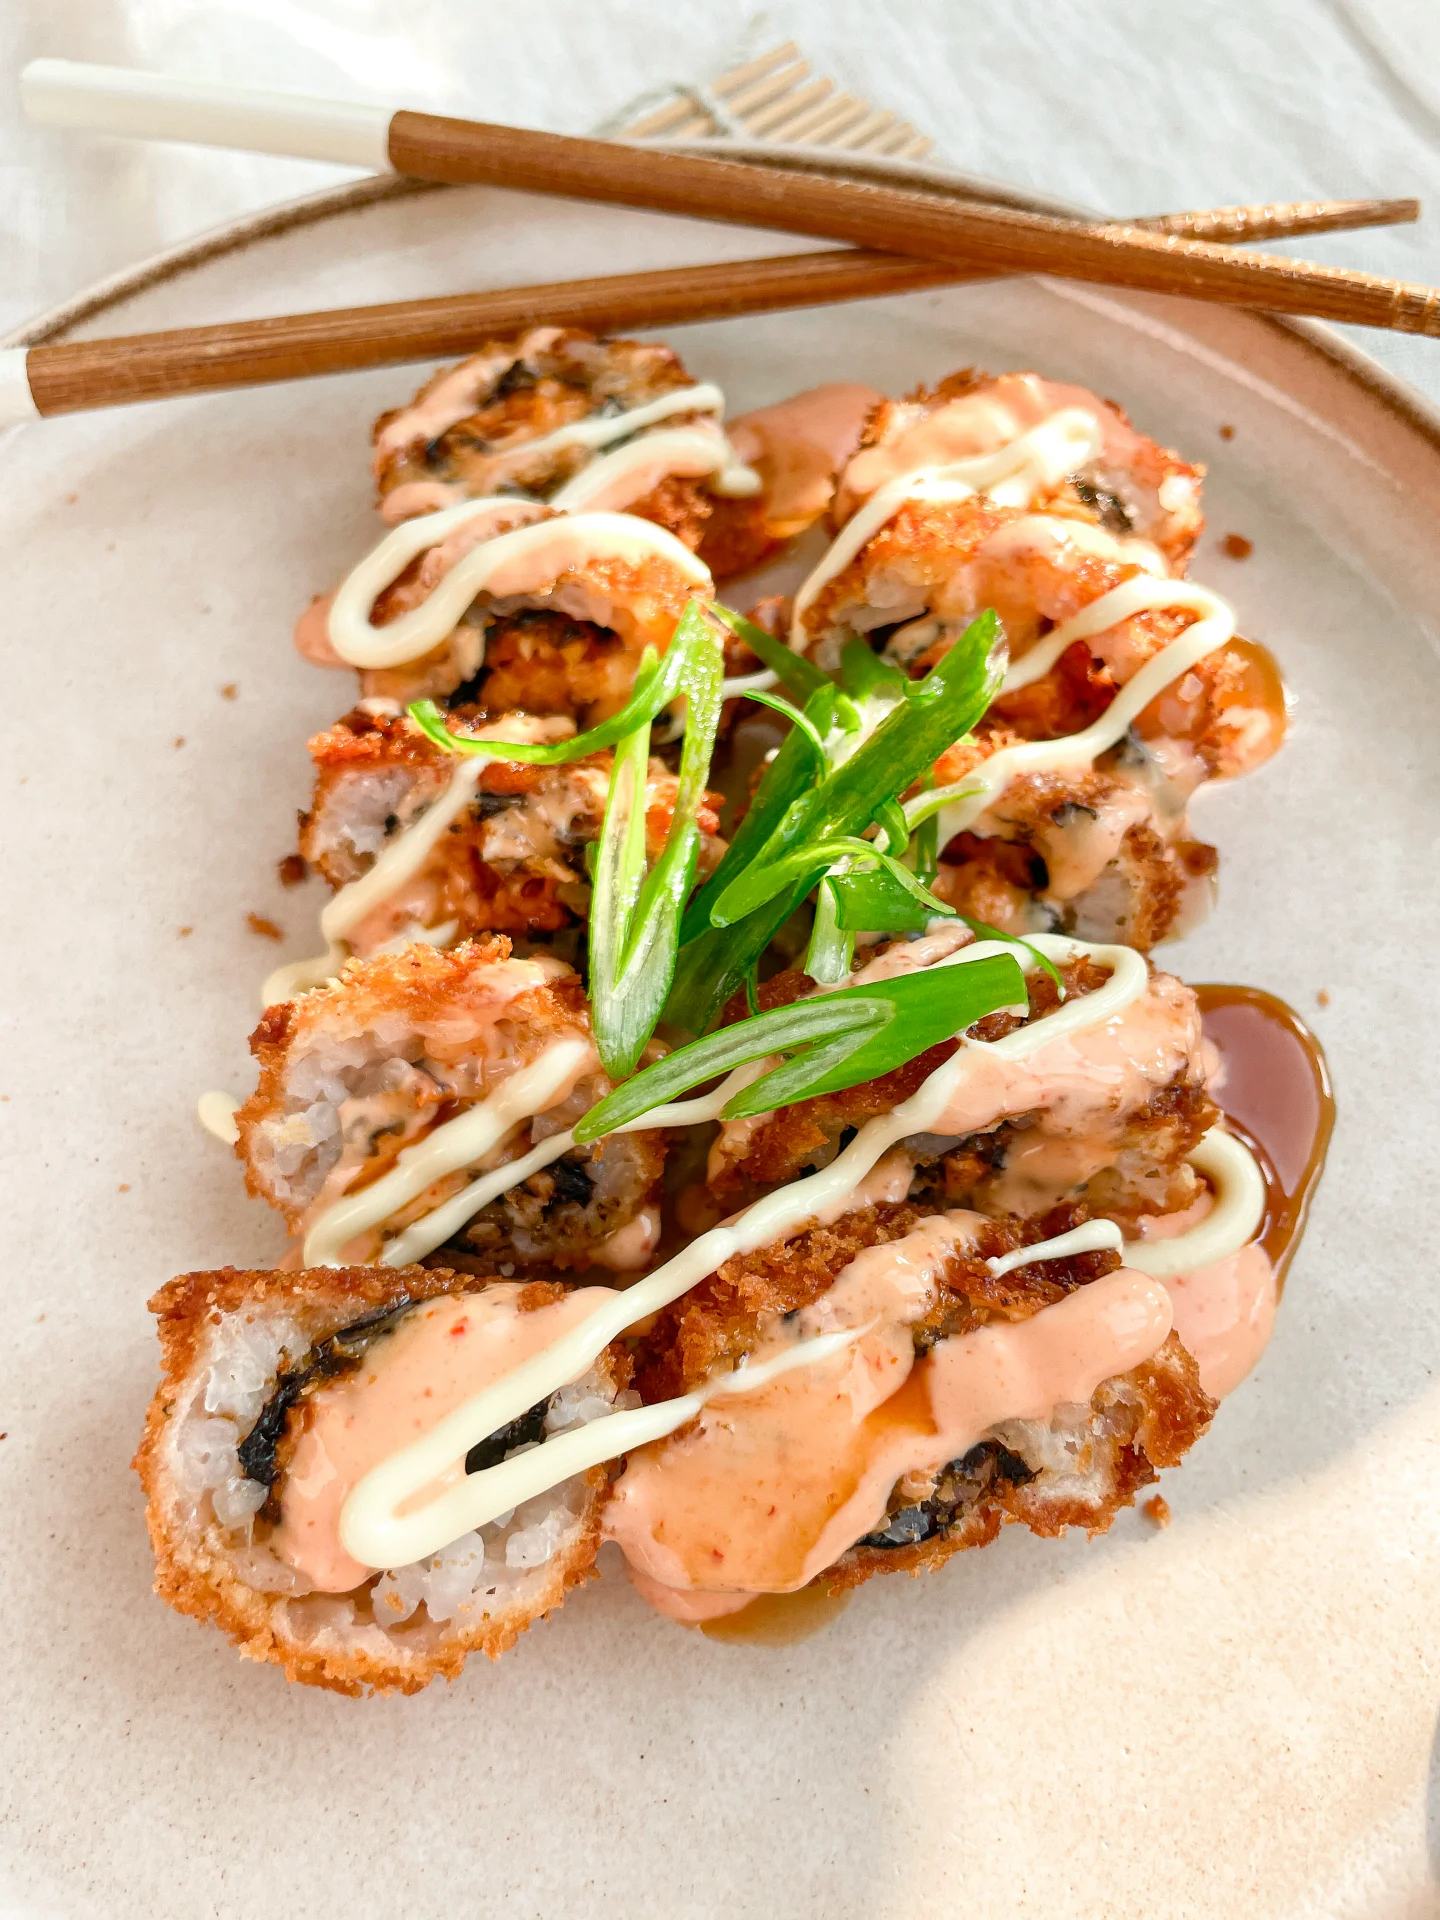
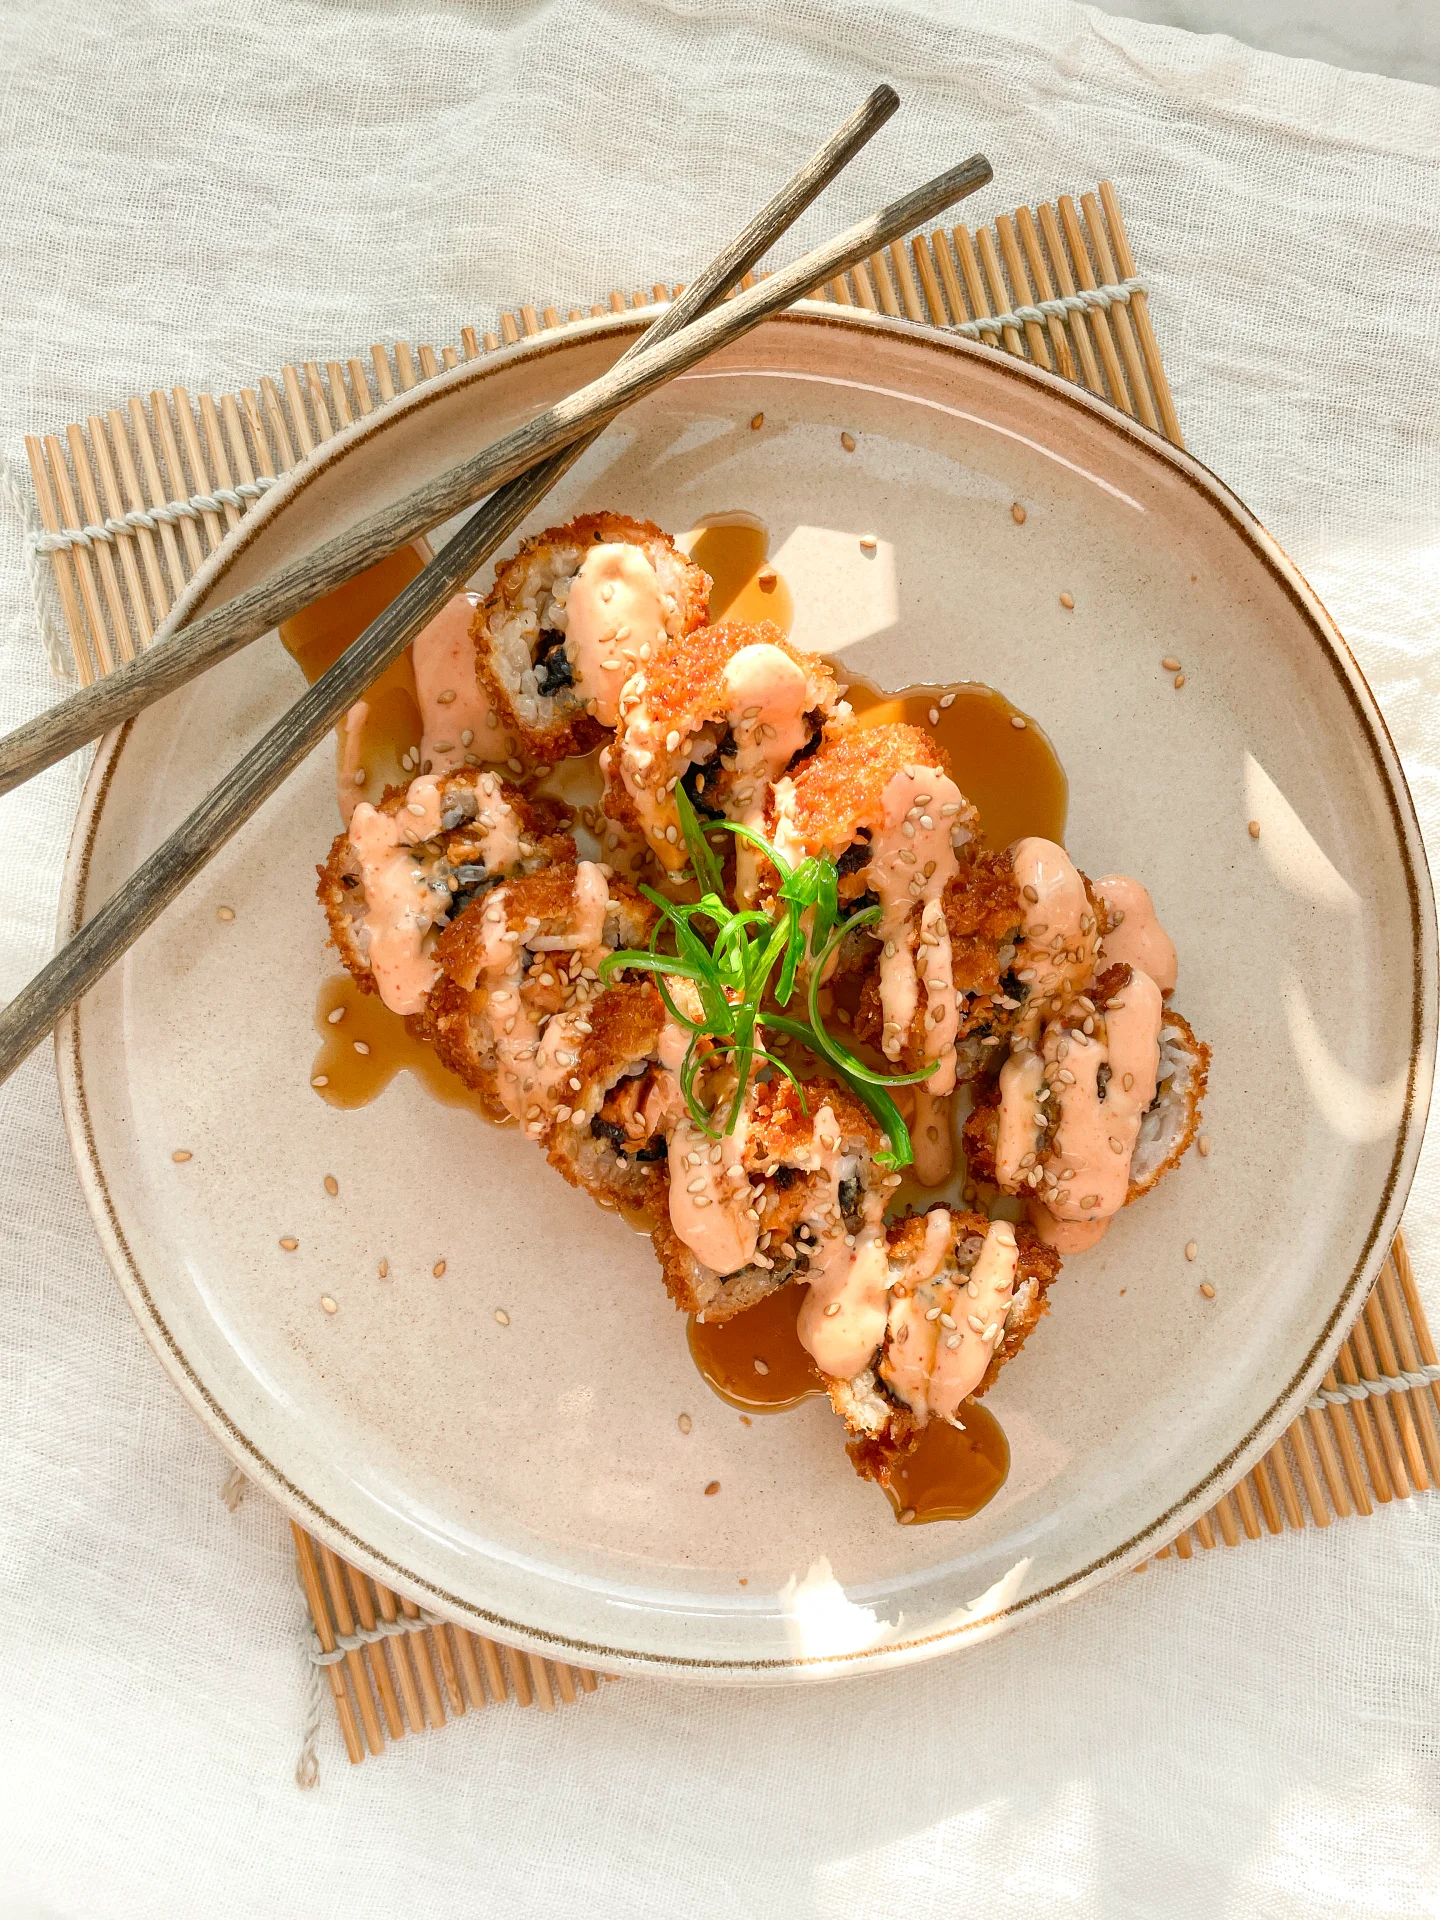
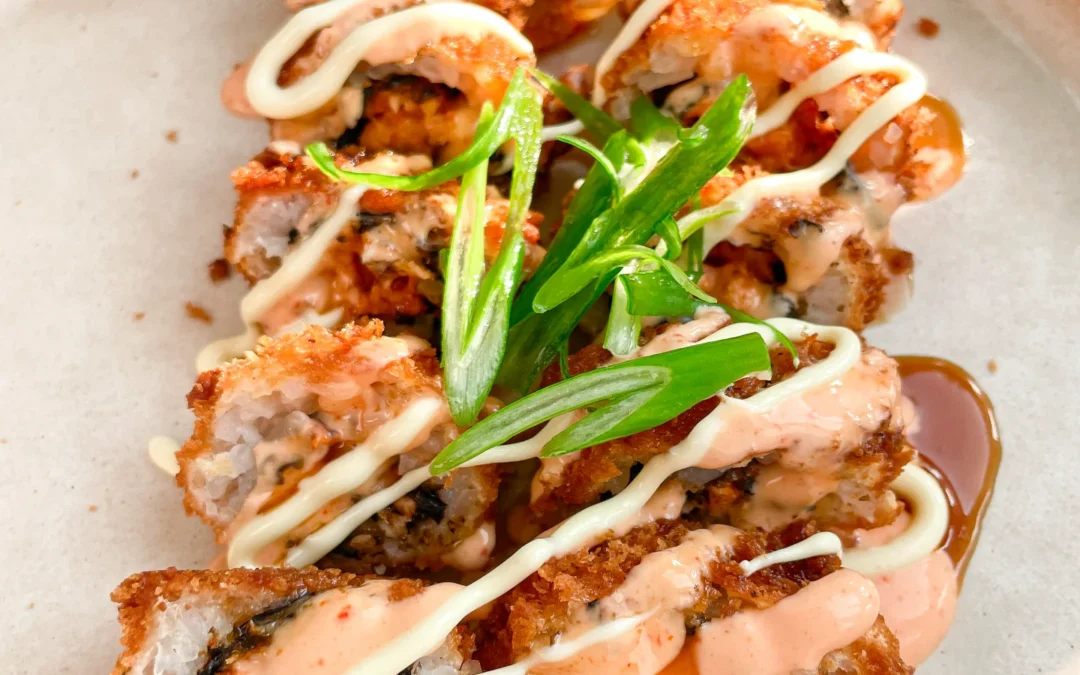
Serve these deep-fried spicy salmon rolls hot and crispy. Cut each roll into six even pieces for easy sharing. Drizzle them generously with the two sauces – a spicy mayo-Sriracha sauce and a sweet and savory soy-mirin sauce. For the final touch, sprinkle sesame seeds and thinly sliced spring onions over the top for a beautiful contrast in color and a burst of freshness. These rolls are packed with flavor, but if you enjoy a bit more heat, they also pair wonderfully with a dab of wasabi. This delightful combination of textures and tastes makes them a standout dish at any gathering.

Due to their crispy nature, it’s best to enjoy these spicy salmon rolls fresh. Once fried, they tend to lose their crunchiness if stored, so they are not recommended for later consumption. However, if you find yourself with leftovers, you can briefly re-fry them to bring back some of the crispiness. But really, these rolls are so delicious, consider it the perfect excuse to indulge and enjoy them all in one sitting!

Hi, I'm Kimberly!

Hi, I'm Kimberly.

A hopeless romantic when it comes to food. Every recipe I share is a love letter to food itself. I’m so glad you’re here. Make yourself at home and stay a while.

Love,
Kimberly

Kimberly the Zett Signature

If you want to get to know me better,
click here!


Spicy Salmon Fried Sushi Rolls

LET’S MAKE A PIECE OF HAPPINESS

Print
clock clock iconcutlery cutlery iconflag flag iconfolder folder iconinstagram instagram iconpinterest pinterest iconfacebook facebook iconprint print iconsquares squares iconheart heart iconheart solid heart solid icon
Spicy Salmon Fried Sushi Rolls

Spicy Salmon Fried Sushi Rolls


5 from 1 review

  • Author: Kimberly
  • Total Time: 75 min
  • Yield: 4 1x

Description

GOOD TO HAVE ON HAND

  • sharp knife
  • cutting board
  • rice cooker (or pot)
  • three small pots (or one that you wash twice)
  • two small bowls
  • squeeze bottles (or tablespoons)
  • two medium-sized bowls
  • bamboo rolling mat (called Makisu)
  • plastic wrap
  • large bowl
  • whisk
  • drinking glass
  • two flat dishes
  • two forks
  • foam spoon


Ingredients

Units Scale
SUSHI RICE
  • 150 grams sushi rice
  • 2 tbsp rice vinegar
  • 1 tbsp white sugar
  • 1/2 tsp salt
LIGHT SAUCE
  • 50 grams mayonnaise
  • 10 grams Sriracha (or any other hot sauce you like)
DARK SAUCE
  • 50 grams soy sauce
  • 50 grams Mirin
  • 50 grams white sugar
TEMPURA BATTER
  • 100 grams all-purpose flour
  • 100 grams corn starch
  • 1 egg
  • 100 milliliters ice-cold water
  • 1/2 tsp salt
FILLING
  • 150 grams salmon filet
  • 2 tbsp Sriracha (or any other hot sauce you like)
OTHER INGREDIENTS
  • 2 full-sized Nori sheets
  • 70 grams Panko (or regular bread crumbs)
  • 500 milliliters deep-frying oil
  • sesame seeds
  • spring onions

Instructions

  1. Let’s start with the sushi rice: Wash the rice under cold water until the water runs clear. This is important as it removes all the starch and prevents the rice from becoming mushy. Now, place the rice in a rice cooker or pot and add 400ml (1 + 2/3 cup) of water. I use a little less than 1:1.5 ratio rice to water, as there’s still water left on the rice from washing. Let the rice cook.
  2. To get that authentic sushi flavor, the rice will be soaked in a sauce. For this, heat rice vinegar, sugar, and salt in a small pot until the sugar and salt have dissolved. Set aside to cool. As it cools, the sauce will thicken slightly.
  3. Now, let’s prepare the salmon filling. Rinse the salmon under cold water, dry it, then chop it into rough cubes. In a bowl, mix it with Sriracha, and it’s ready. Keep the salmon chilled until use.
  4. By now, the rice should be cooked. Transfer it to a medium-sized bowl and pour over the rice vinegar-sugar-salt sauce. Mix everything until the sauce is distributed and absorbed by the rice. Let the rice cool completely.
  5. Meanwhile, prepare the topping sauces. For the light sauce, simply mix mayonnaise and Sriracha, thinning it with a bit of water to make it easier to spread. For the dark sauce, heat soy sauce, Mirin, and sugar in a small pan or pot until the sugar dissolves. Set aside to cool. Once the sauce is cold, it will thicken a bit. I like to pour the sauces into squeeze bottles, but you can also spoon them over the sushi later or use them for dipping. Keep the sauces chilled until use.
  6. In the meantime, you can prepare your work surface. Take a bamboo rolling mat, also known as Makisu, and wrap it on both sides with a layer of plastic wrap. Press the ends well onto the mat. Then fill a medium-sized bowl with a little water, as you’ll need it for your fingers to prevent the rice from sticking to them. Then you’ll need a cutting board and a sharp knife to halve the rolls. Finally, halve your Nori sheets and set them aside.
  7. Once the rice is cold, you can start rolling. Place the Makisu with the sticks horizontally in front of you. Place a Nori sheet with the shiny, smooth side down on the bamboo mat. Dip your fingers in the water and take about 1 heaped tablespoon of rice, spreading it with your fingers on the Nori sheet. It takes a bit of practice to handle the rice, but just take your time and moisten your fingers again if it becomes difficult to spread the rice. I press and push it in the direction I want it. I leave about 1/2-1cm (0.2″-0.4″) free at the top edge of the Nori sheet. When the rice is evenly distributed, turn the Nori sheet over so that the rice side is now facing down. Place a strip of the salmon filling in the center of the Nori sheet, a bit more than a finger thick. Now roll the Nori sheet so that the bottom end lands directly over the salmon filling. Then press everything tightly from the outside, then close the roll with a twist and press again. Take the finished sushi roll and halve it on the cutting board. Proceed the same way with the other rolls and set them aside.
  8. Now prepare the tempura batter. Mix flour, cornstarch, and salt in a large bowl. In a glass, stir the egg and ice-cold water starting with 100ml (3.5 oz) of water, and pour it into the dry ingredients. Quickly whisk everything until it’s creamy. If the batter is too thick, add 1 tablespoon of water and stir. We aim for a creamy-thick consistency. Better too thick than too thin, so really only adjust the water carefully. It also depends on how much liquid the egg brings. Pour the batter into a flat dish. Do the same with the Panko.
  9. Now you can bread the rolls. Take two forks and place the first roll in the tempura batter, distributing the batter over the entire roll. You can also gently turn it. Lift it up and let the excess batter drip off. Now place the roll directly into the Panko and press it onto the roll with the forks. You should now have a compact roll where the batter adheres well and nothing drips. Bread the rolls one by one and set aside.
  10. Now heat the frying oil to 190°C/375°F in a small, deep pot. Make sure to use enough oil so that the rolls can be completely submerged. I used solid vegetable fat in block form. Once the temperature is reached, place two rolls at a time into the oil. Be careful as the oil may bubble when the rolls are added. It’s best to use a foam spoon for this. The temperature will then drop to about 175°C/347°F. Fry the rolls in the oil for a total of 5 minutes. Each roll only absorbs about 10g (1/3 oz) of fat. I weighed the fat before and after 😀 This is because the fat is hot enough to instantly seal the crust. That’s why it’s also important to bring the fat to the right temperature. If the fat is too cold, the roll absorbs more fat and becomes soggy and not crispy.
  11. When the rolls are done frying, remove them from the fat and let them drain on a rack and cool slightly. Cut the rolls into 6 pieces each and arrange them on a plate. Next, drizzle the light and dark sauces over the rolls in a zigzag direction. Finally, you can sprinkle some sesame and finely chopped spring onions as a topping.

Notes

The calorie information may vary depending on the product used, country and region.

  • Passive Time: 20 min

  • Cook Time: 55 min

CRAVING MORE?

Follow along here & don’t forget to subscribe to my substack!

Vegan Dumplings in Sesame Miso Soup

Vegan Dumplings in Sesame Miso Soup

Vegan Dumplings in Sesame Miso Soup

Vegan Dumplings in Sesame Miso Soup

May 6, 2024 by Kimberly

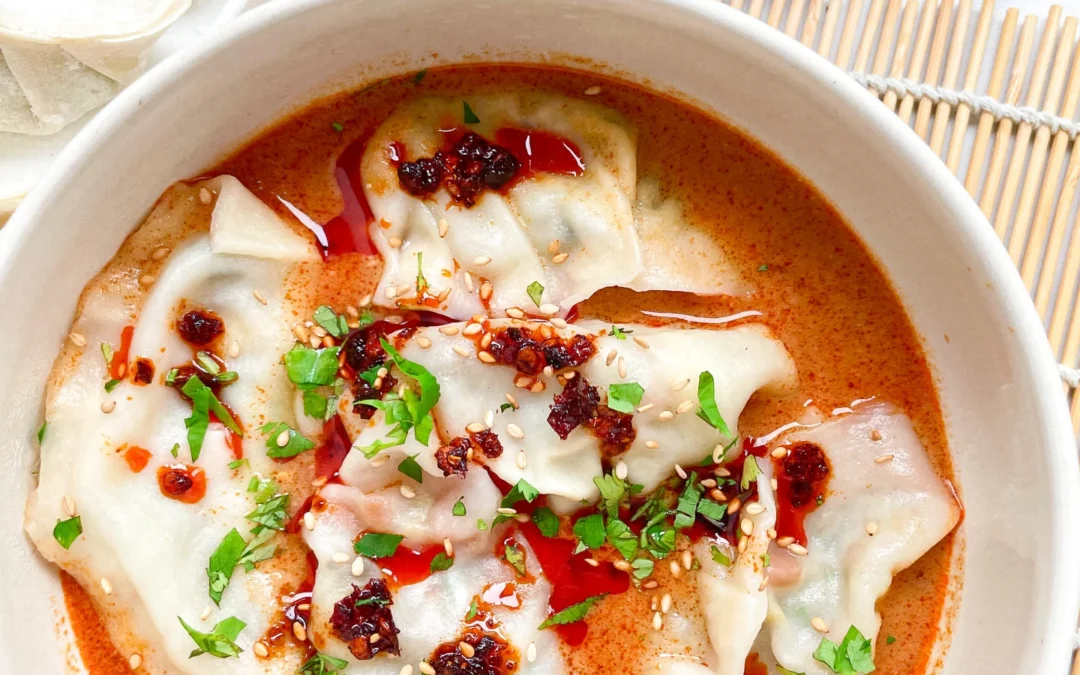
Indulge in a comforting bowl full of flavor, perfect for cozy nights. Healthy, hearty, and absolutely delicious!

This website uses affiliate links which may earn commission for purchases made at no additional cost to you.

TOTAL TIME

1 hr + 30 min

SERVES

4 bowls

DIET

vegan

EVERY RECIPE DESERVES

A Little Love Letter

Savor the warmth and richness of these vegan Dumplings in Sesame Miso Soup, a delightful dish that combines hearty plant-based dumplings with a savory miso broth. This soup is not only nourishing but also packed with exquisite flavors that will satisfy both vegans and non-vegans alike. It’s a perfect choice for those seeking a comforting meal that’s both healthful and satisfying.

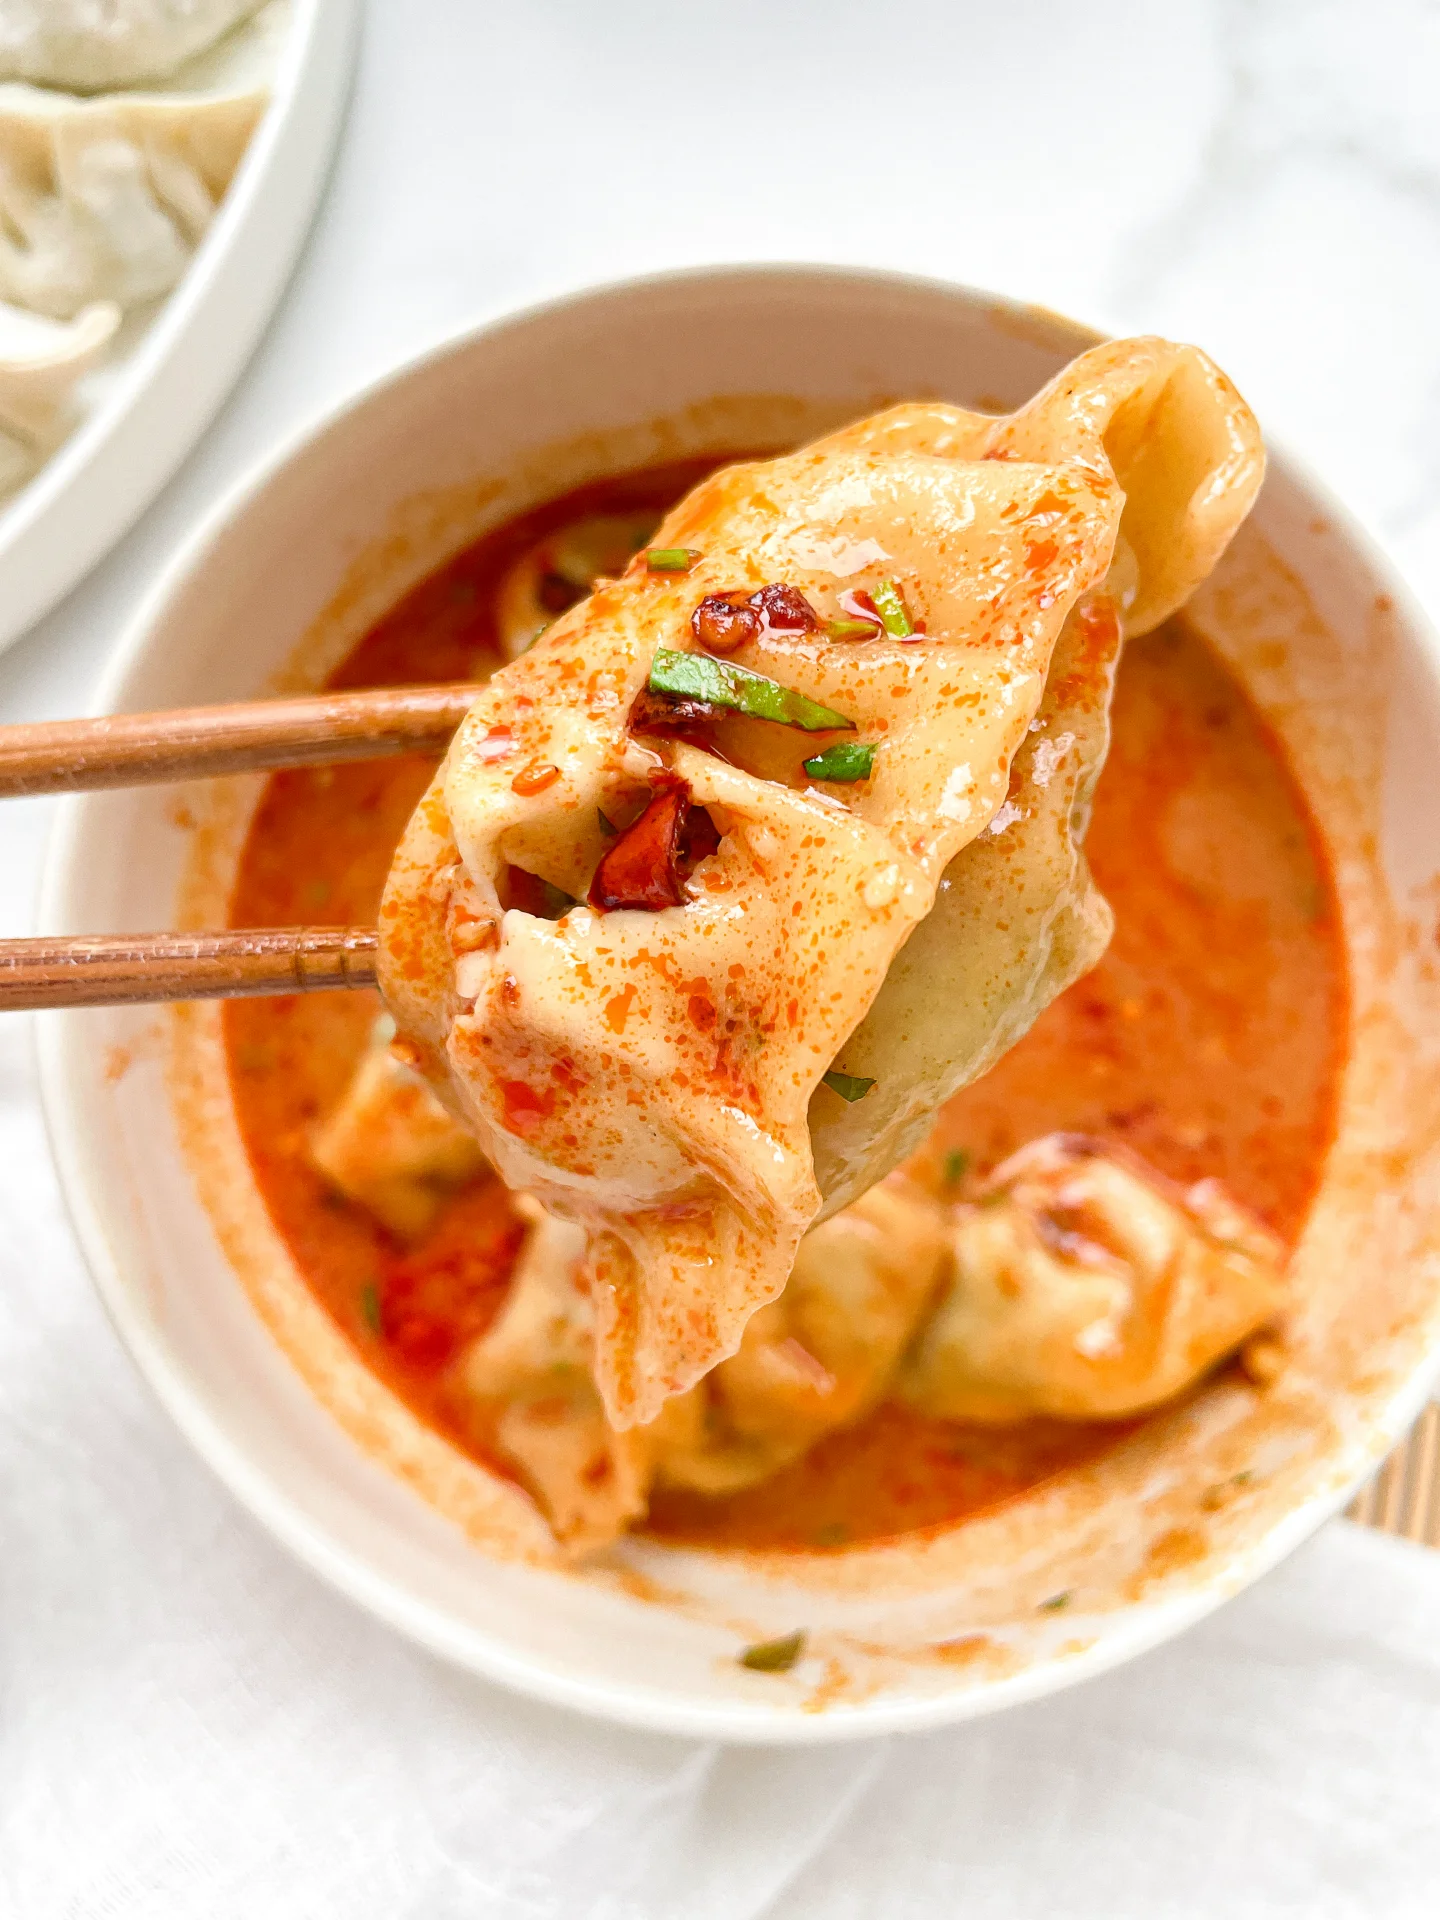
Serve this aromatic Sesame Miso Soup hot, with its soft, tender dumplings soaking up the flavorful broth. Garnish with chopped green onions or cilantro, a sprinkle of sesame seeds, and a drizzle of crispy chili oil for an extra touch of luxury.

Store leftovers in an airtight container in the refrigerator for up to 2 days. Reheat gently to preserve the flavors and textures of the dumplings and broth. Freezing is not recommended as it may affect the soup’s quality.

Hi, I'm Kimberly!

Hi, I'm Kimberly.

A hopeless romantic when it comes to food. Every recipe I share is a love letter to food itself. I’m so glad you’re here. Make yourself at home and stay a while.

Love,
Kimberly

Kimberly the Zett Signature

If you want to get to know me better,
click here!


Vegan Dumplings in Sesame Miso Soup

LET’S MAKE A PIECE OF HAPPINESS

Print
clock clock iconcutlery cutlery iconflag flag iconfolder folder iconinstagram instagram iconpinterest pinterest iconfacebook facebook iconprint print iconsquares squares iconheart heart iconheart solid heart solid icon
Vegan Dumplings in Sesame Miso Soup

Vegan Dumplings in Sesame Miso Soup


  • Author: Kimberly
  • Total Time: 90 min
  • Yield: 4 1x

Description

RECOMMENDED EQUIPMENT

  • sharp knife
  • cutting board
  • vegetable peeler
  • salad spinner
  • large frying pan
  • two medium-sized pots
  • large plate

Ingredients

Units Scale
FILLING
  • 200 grams mushrooms
  • 200 grams napa cabbage
  • 3 spring onions
  • 1 carrot
  • 1/2 tsp ginger
  • 3 garlic cloves, grated
  • 1 tbsp cilantro
  • 1 tbsp clarified butter
  • 1 tbsp soy sauce
  • 1/4 tsp sesame oil
  • 1/8 tsp ground white pepper
SESAME MISO SOUP
  • 800 milliliters water
  • 6 tbsp tahini
  • 4 tbsp white miso paste
  • 2 tbsp crispy chili oil
  • 2 tbsp soy sauce
  • 2 tbsp rice vinegar
  • 2 tsp ginger, grated
  • 2 tsp sugar
  • 2 garlic cloves, grated
TOPPINGS
  • cilantro
  • crispy chili oil
  • sesame seeds

Instructions

PREPARATIONS

  • Prepare dumpling wrappers or defrost store-bought ones.
  • Peel and finely chop or grate the ginger. Set aside.
  • Peel and finely chop or press the garlic cloves. Set aside.
  • Clean the mushrooms and dice them into small pieces. Set aside.
  • Chop the napa cabbage into small pieces and wash it. Set aside.
  • Peel and finely dice the carrots. Set aside.
  • Pluck the cilantro leaves from the stems and finely chop them. Set aside.
  • Separate the green and white parts of the green onions and slice both into fine rings. Set aside.

INSTRUCTIONS

  1. Heat a large pan over medium heat and add 1 tablespoons of clarified butter. Start by sautéing the white parts of the green onions, ginger, and garlic for a few minutes. Next, add the carrot pieces and sauté for a few more minutes. Then, add the mushroom pieces, mix well, and finally add the napa cabbage. Let the napa cabbage cook until soft, then stir everything together. Remove the pan from the heat and let it cool.
  2. Once the mixture has cooled down, add 2 tablespoons of chopped cilantro, the green parts of the green onions, 1/4 teaspoon of ground white pepper, 2 tablespoons soy sauce, and 1/2 tablespoon sesame oil. Mix everything well.
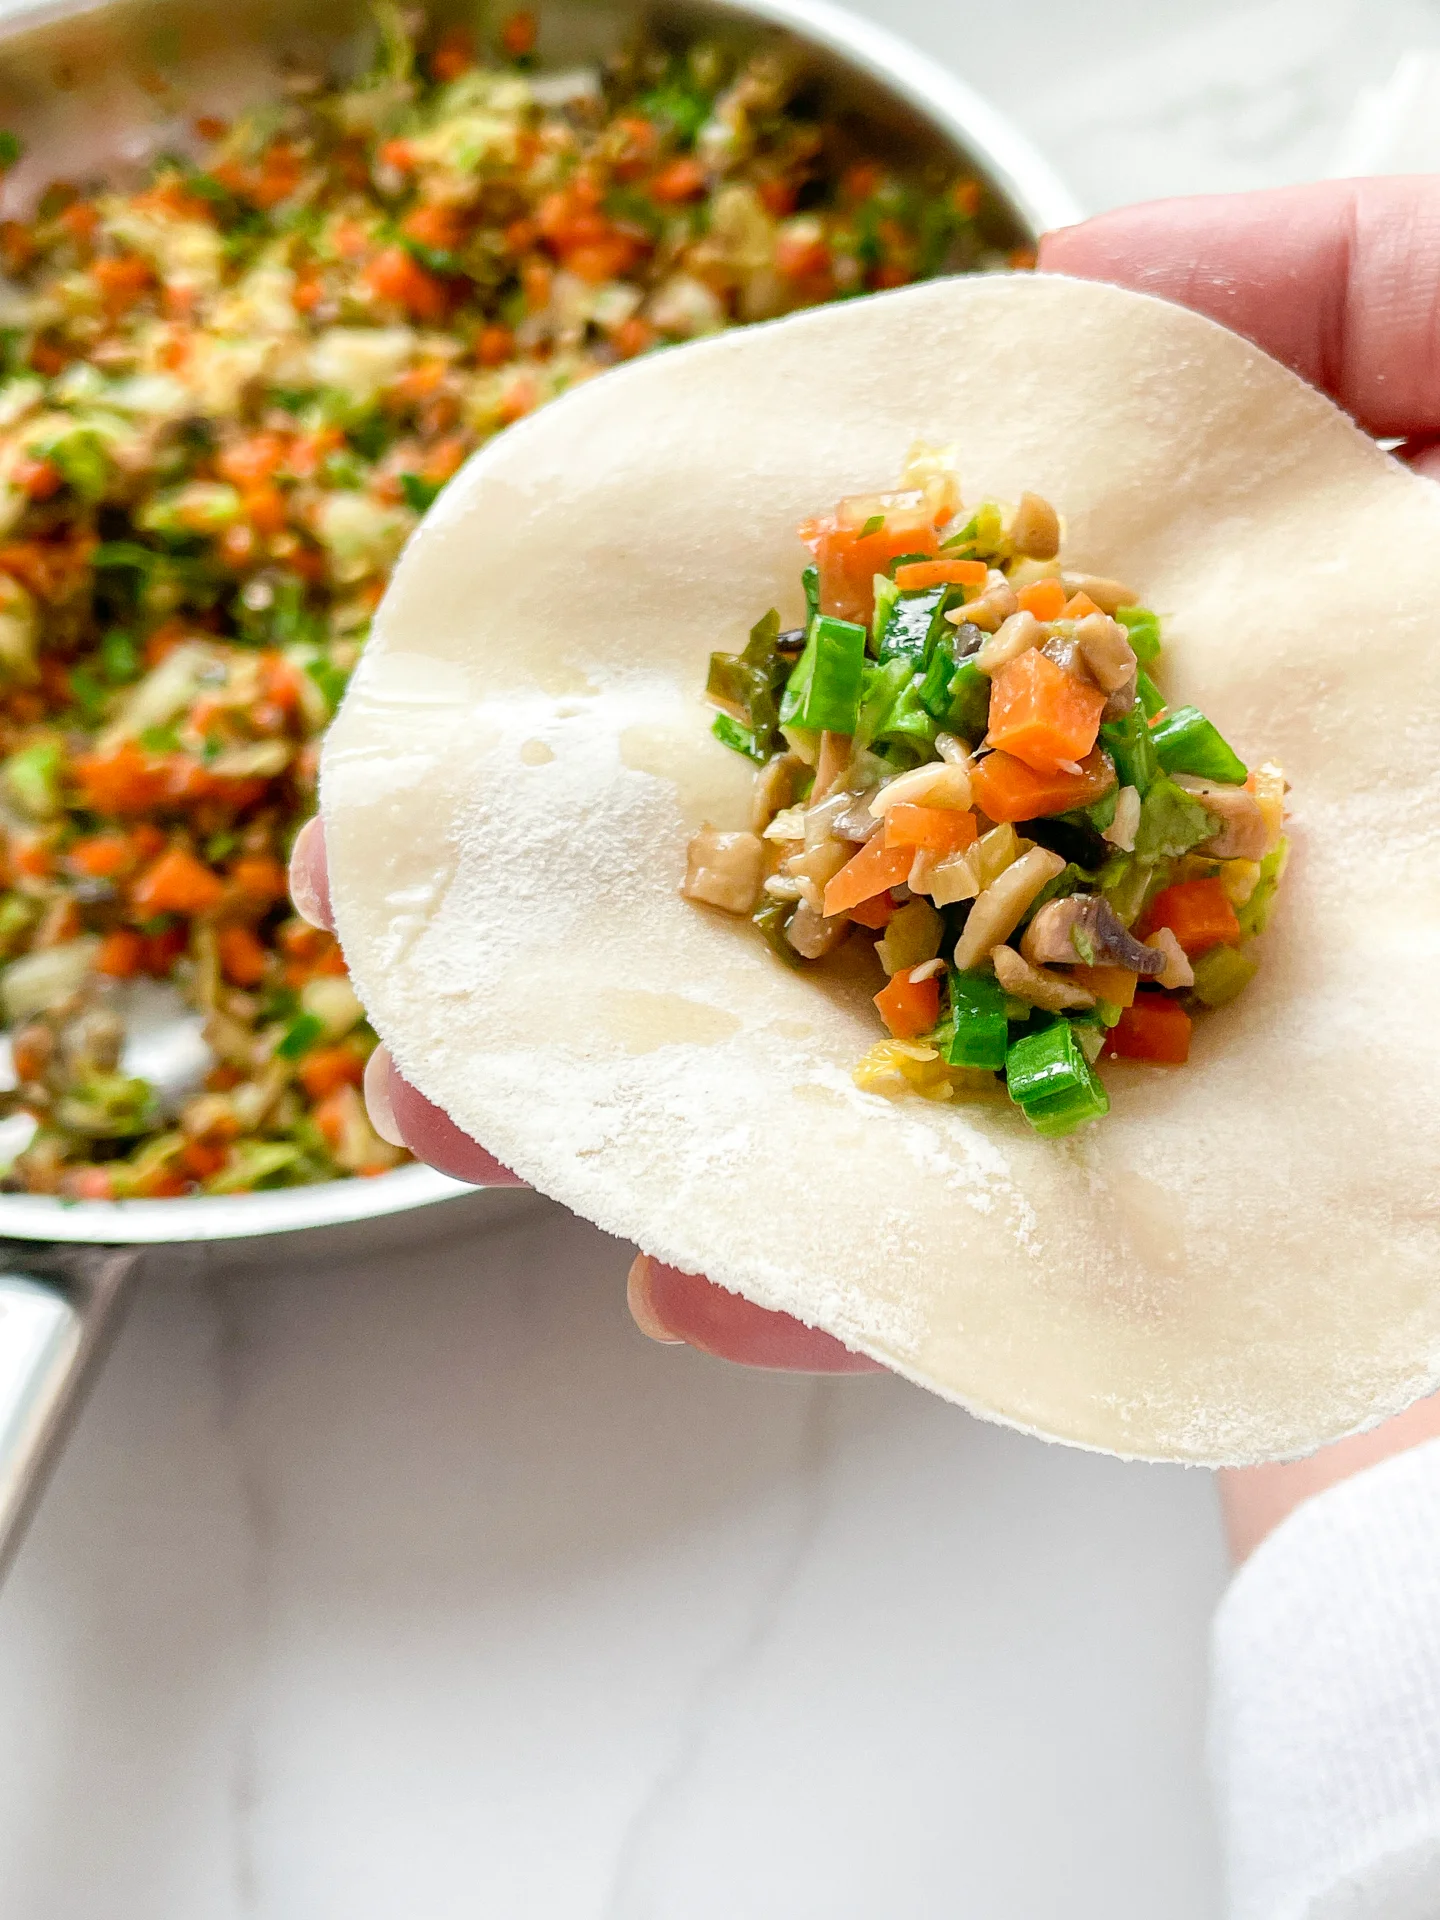
  3. Set up your vegetable filling, the dumpling wrappers, and a small bowl of cold water. Also, prepare a large plate dusted with a little flour where you can place your finished dumplings. Now, put on your favorite series or podcast and start filling your dumplings.
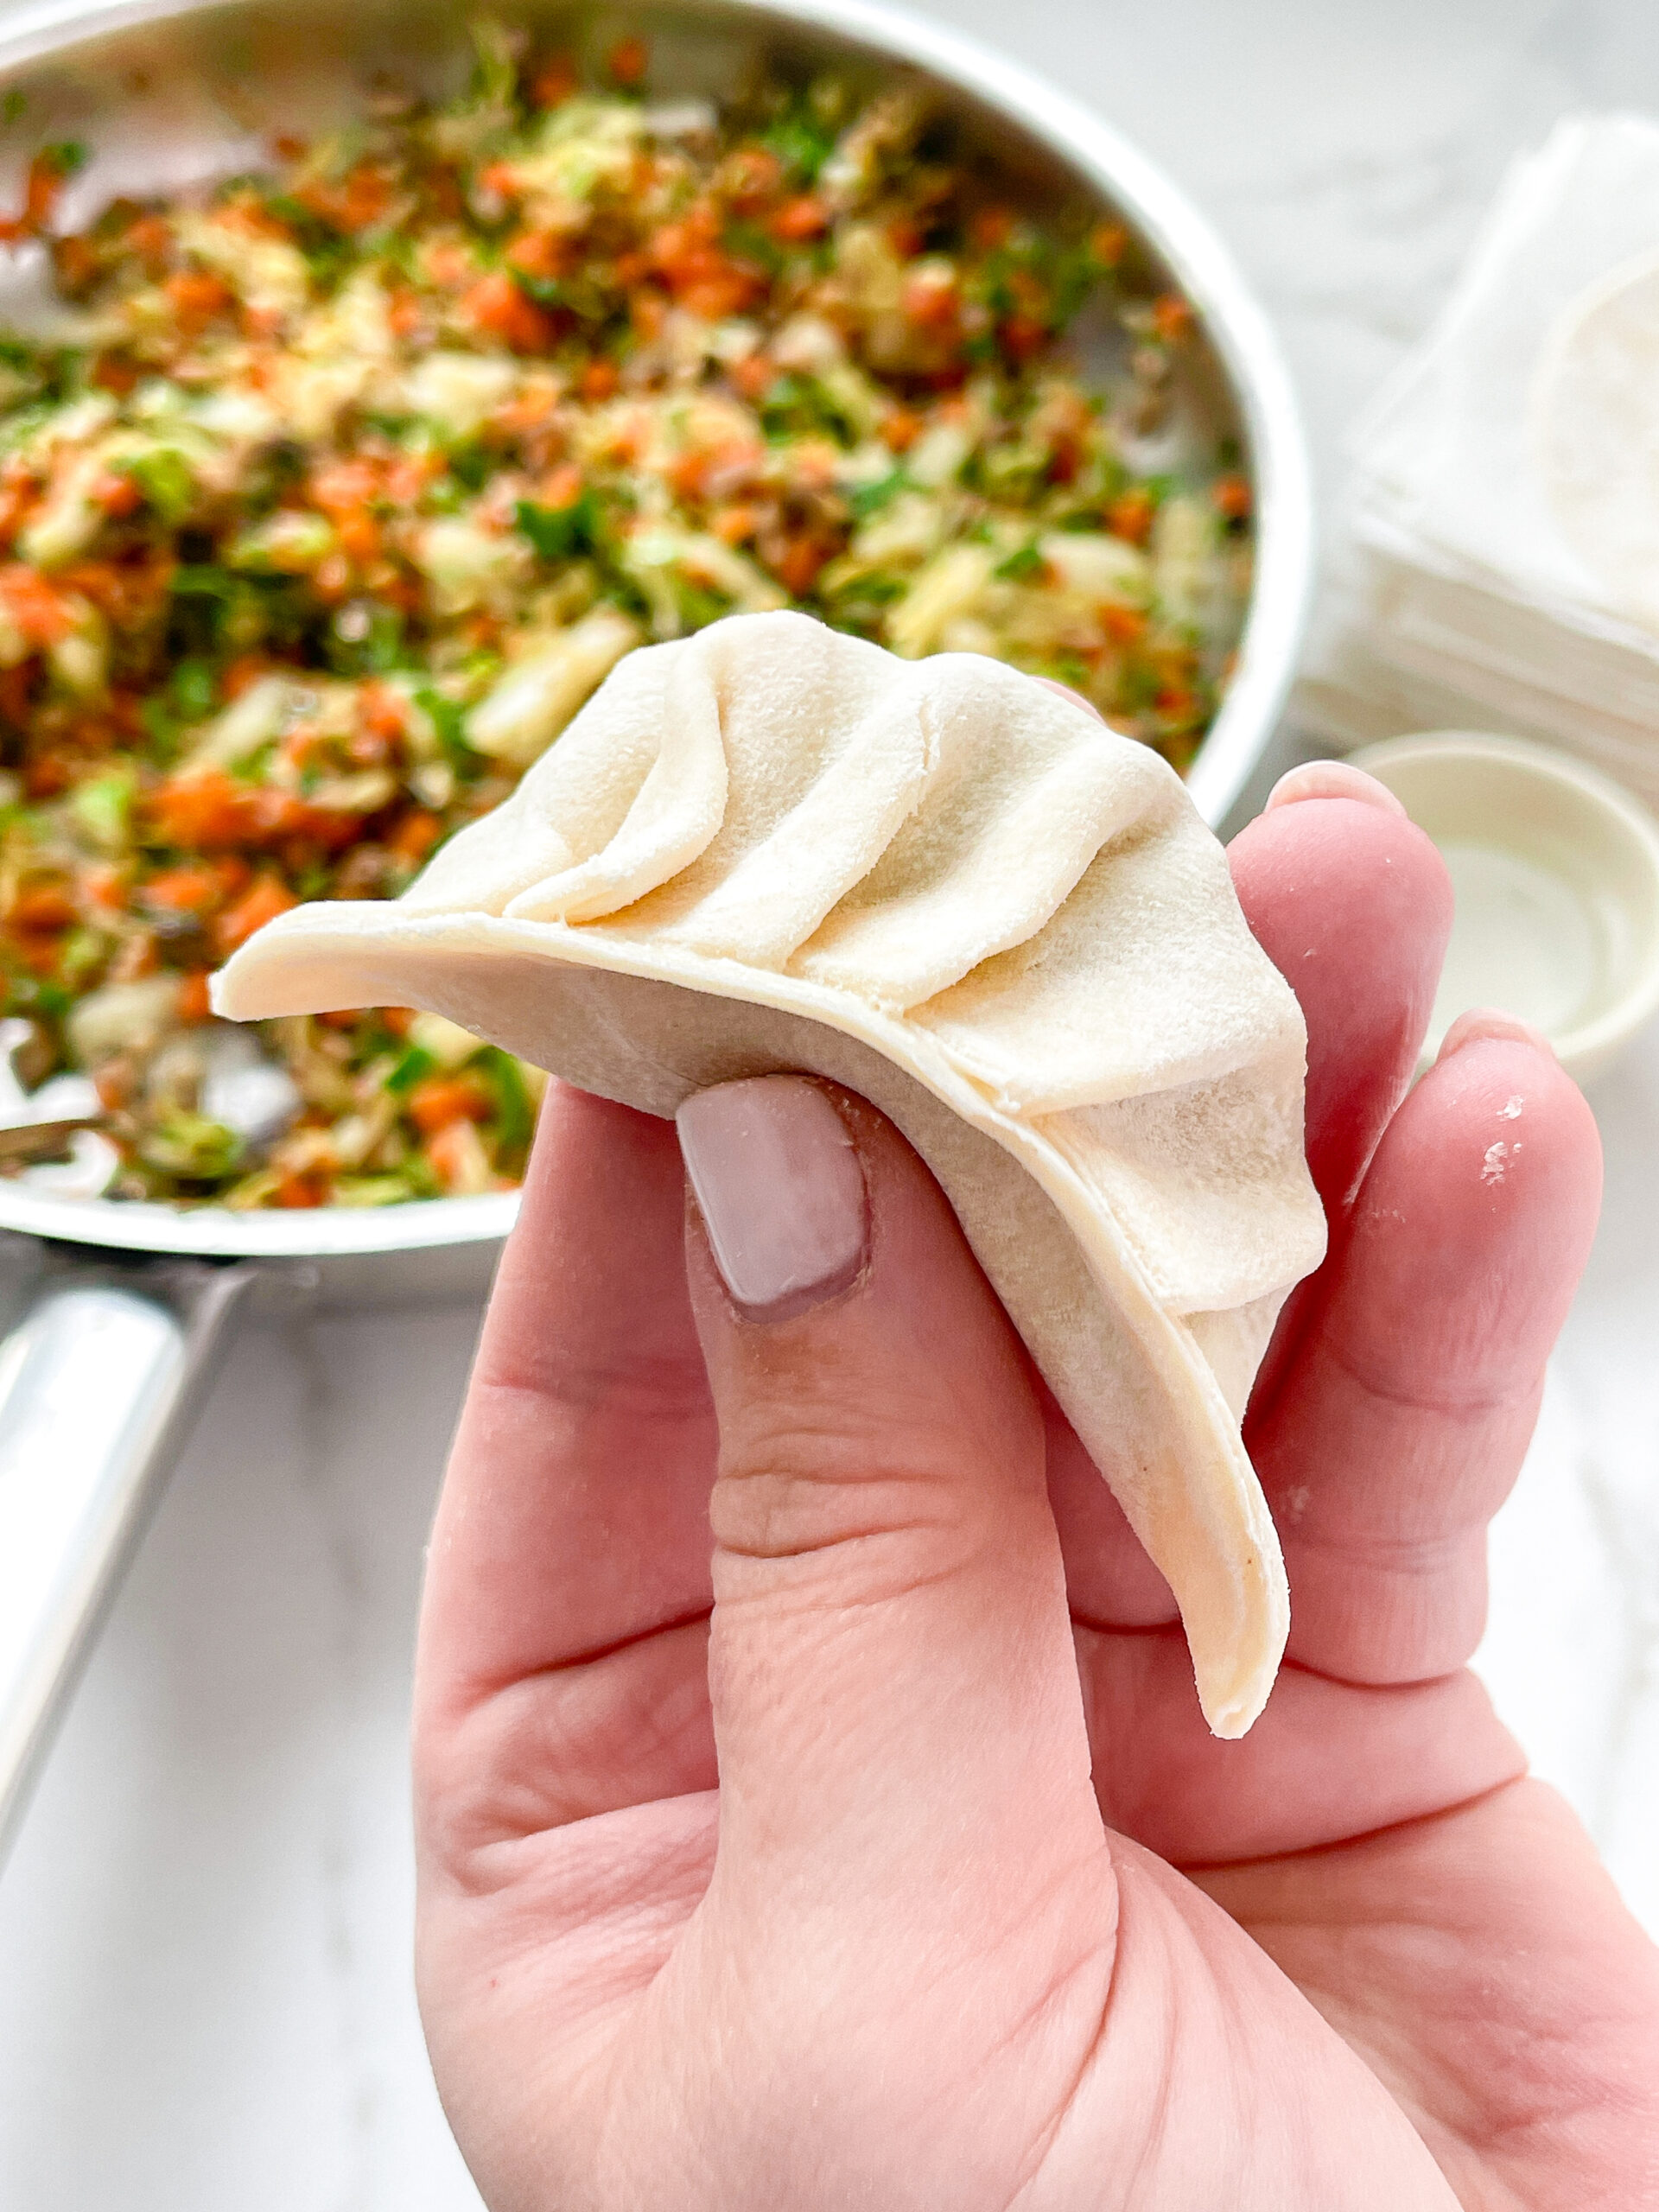
  4. Take a wrapper and place about 1-1.5 teaspoons of the vegetable mixture in the center. Dip a finger in the water and moisten the edge of the upper half of the wrapper. Fold the wrapper like a taco shell upwards and press the left tip of the wrapper with your left hand. Now, with the right hand’s index finger and thumb, hold the closed tip with your left thumb, place a small fold at the top edge against the backside of the wrapper and press it firmly. Continue this until the wrapper is completely closed and you have a finished dumpling in your hand. Place the finished dumpling on the floured plate. This folding technique might take a little practice. For a visual demonstration, just scroll down to my video at the end of the recipe. Continue this process until all the dumpling wrappers and filling are used up.
  5. Fill a medium-sized pot with enough water to fill just over half the pot. Bring the water to a boil.
  6. Meanwhile, you can prepare the Sesame Miso Soup in the other pot. Add the following ingredients to the pot: tahini, white miso paste, soy sauce, rice vinegar, sugar, crispy chili oil, water, and grated garlic and ginger. Bring everything to a simmer over medium heat. Keep the soup on a low flame on the stove.
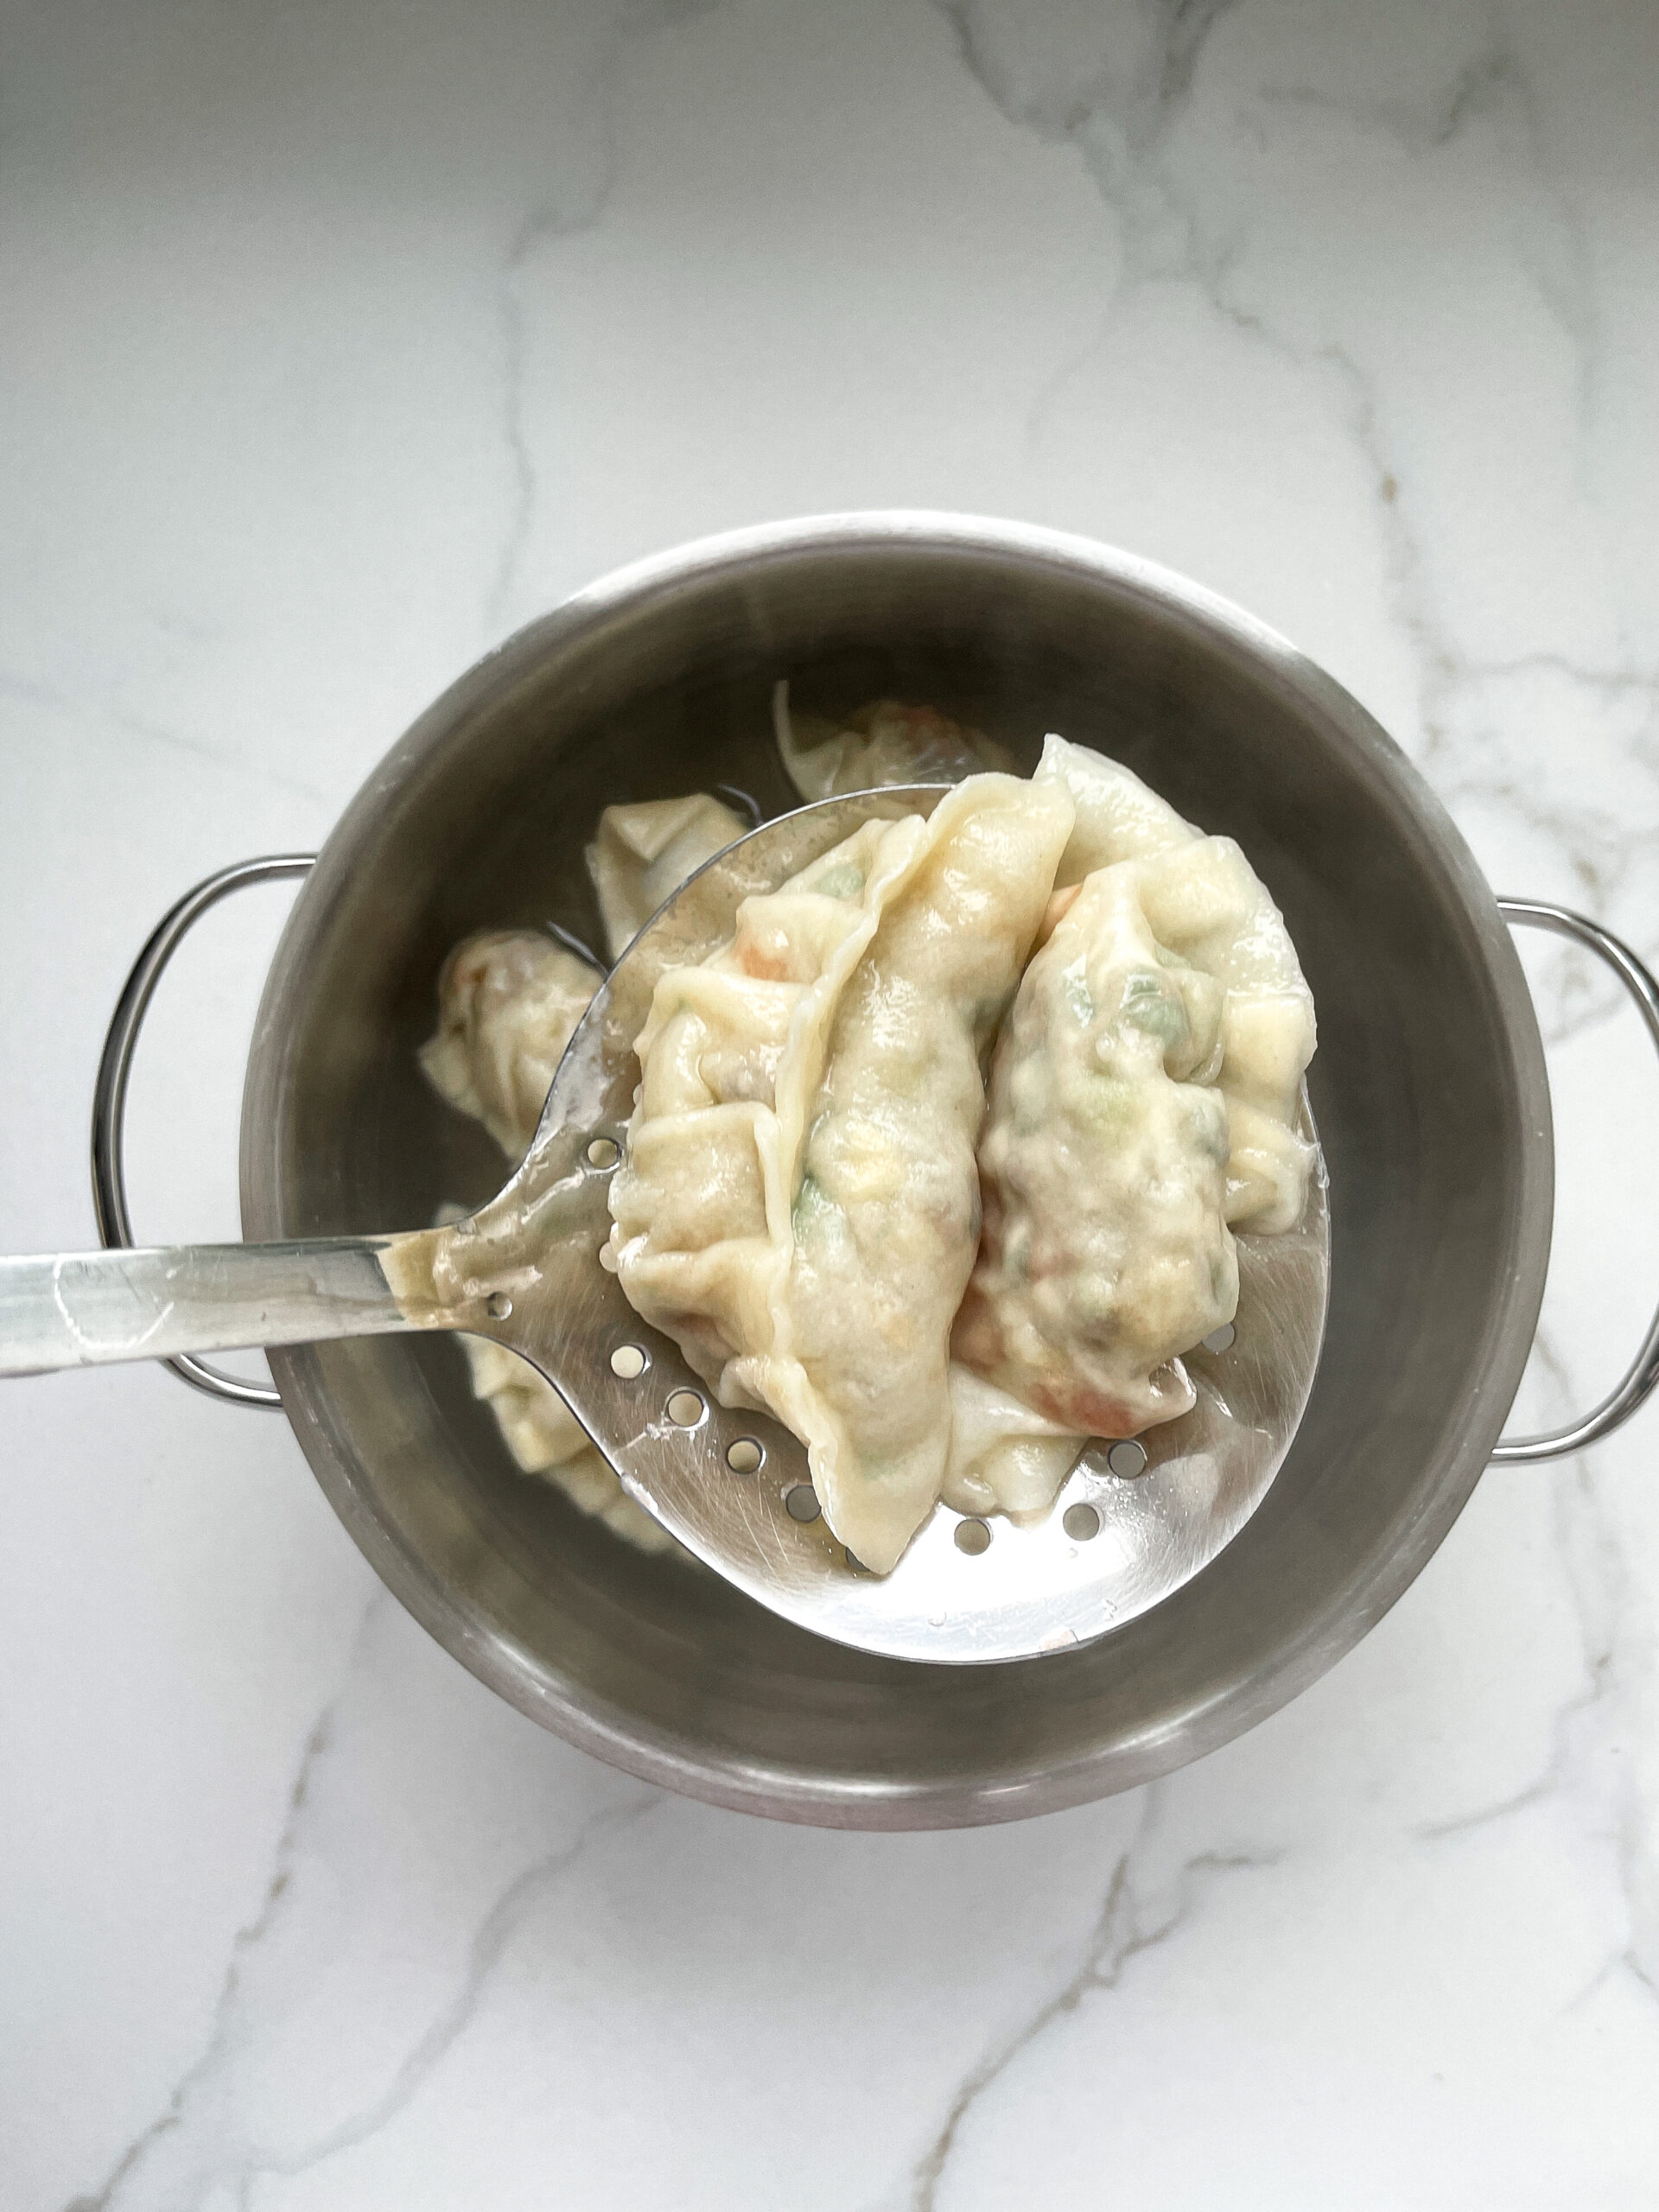
  7. Once the water in the other pot is boiling, turn it down slightly and add 6-8 dumplings depending on the size of your pot and let them cook for about 8 minutes. Since dumplings expand while cooking, do not overcrowd your pot. Once the dumplings become translucent and the filling is clearly visible, they are done. Place the dumplings in the bowls in which you want to serve them. Continue this for all dumplings until all are cooked.
  8. Once all dumplings are ready, evenly distribute the soup from the other pot over the dumplings. Top each bowl with some cilantro, Crispy Chili Oil, and toasted sesame seeds.
  • Passive Time: 20 min
  • Cook Time: 70 min
CRAVING MORE?

Follow along here & don’t forget to subscribe to my substack!