


Description
GOOD TO HAVE ON HAND
- sharp knife
- cutting board
- large pan
Ingredients
Units Scale
FILLING
- 400 grams lean minced beef
- 1 tbsp olive oil
- 1 tsp chili flakes
- 1/2 tsp oregano
- 1/2 cumin
- 1/2 garlic powder
- 1/2 onion powder
- 1/2 tsp salt
- 1/2 cayenne pepper
- 1/2 ground black pepper
- 1 tbsp tomato paste
- 250 milliliters beef stock
- 125 grams shredded mozzarella
- 125 grams shredded cheddar
- 6 medium-sized tortillas
- 3 tsp olive oil
- 2 limes
- cilantro
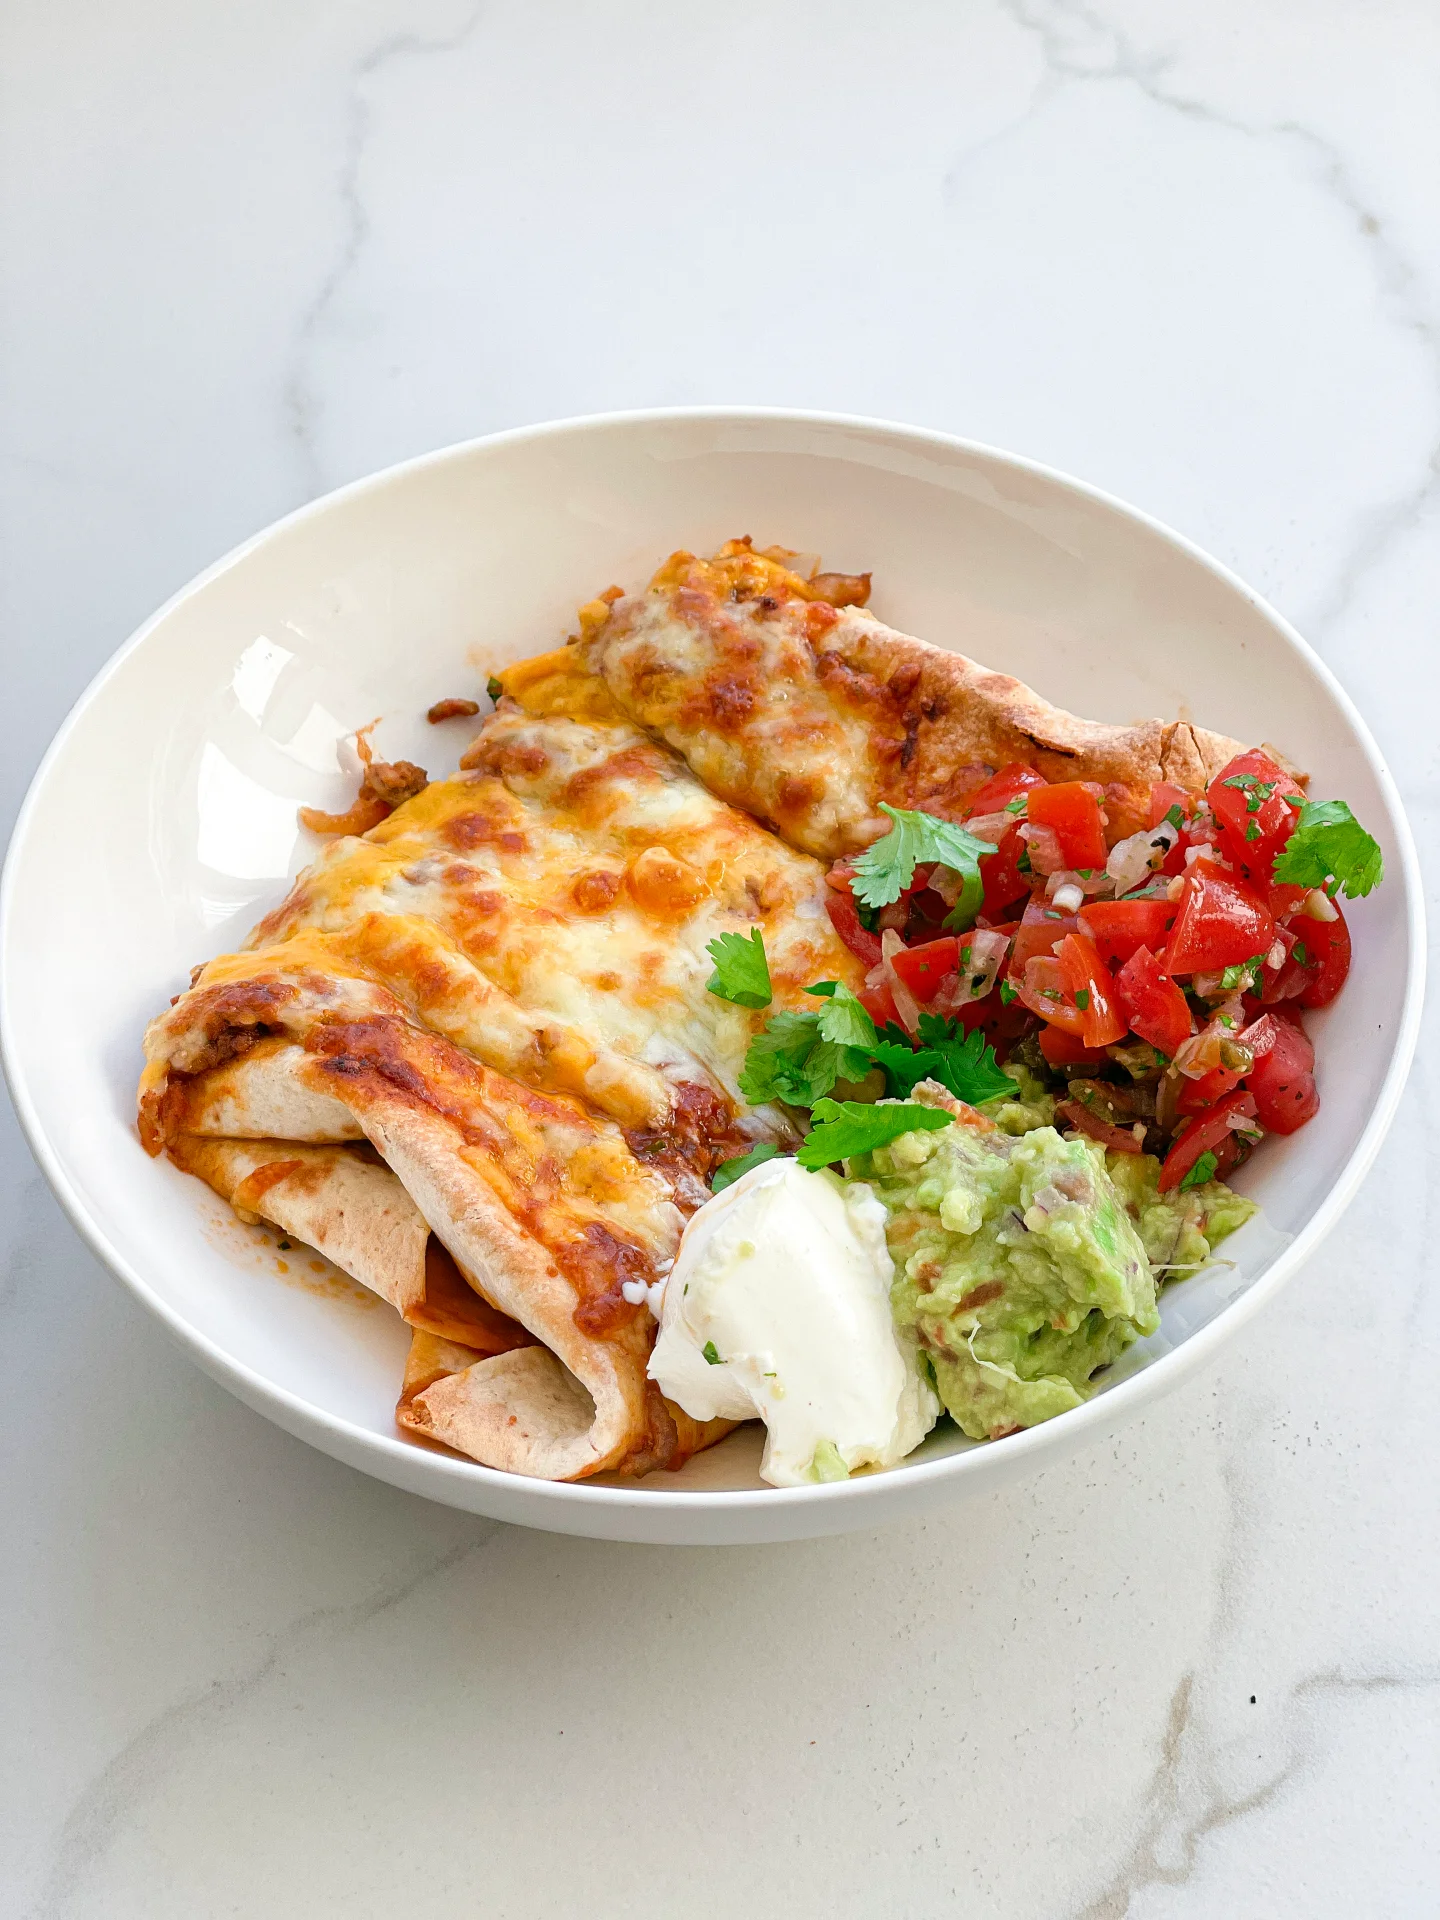
- 200 grams creme fraiche
- 200 grams salsa
Instructions
- Wash the cilantro, pluck the leaves from the stems, and roughly chop them.
- Wash the limes and cut them into quarters.
- Mix the grated mozzarella and grated cheddar in a bowl.
- Heat a large pan over medium heat and add 1 tbsp olive oil. Put the ground beef into the pan and season it with 1 teaspoon of chili powder, and ½ teaspoon each of oregano, cumin, garlic powder, onion powder, cayenne pepper, salt, and pepper. Cook the meat until it forms a dark crust at the bottom of the pan. Then add 1 heaping tablespoon of tomato paste to the meat, mix everything together, and let it cook for 1-2 minutes. Pour beef broth into the pan to deglaze it, scrape off the crust from the bottom, and let everything simmer for about 10 minutes until the broth forms a creamy sauce around the meat.
- Meanwhile, lay out 6 tortilla wraps side by side and spread half of the cheese on one half of each tortilla, leaving the other half free.
- Spread the meat directly from the pan onto the cheese on each tortilla. Wipe the pan clean and place it back on the stove.
- Now, spread the second half of the cheese on top of the meat and use a spoon to distribute the filling to the edge of half of each tortilla. Fold the empty half of the tortilla over the filled half. Press down firmly.
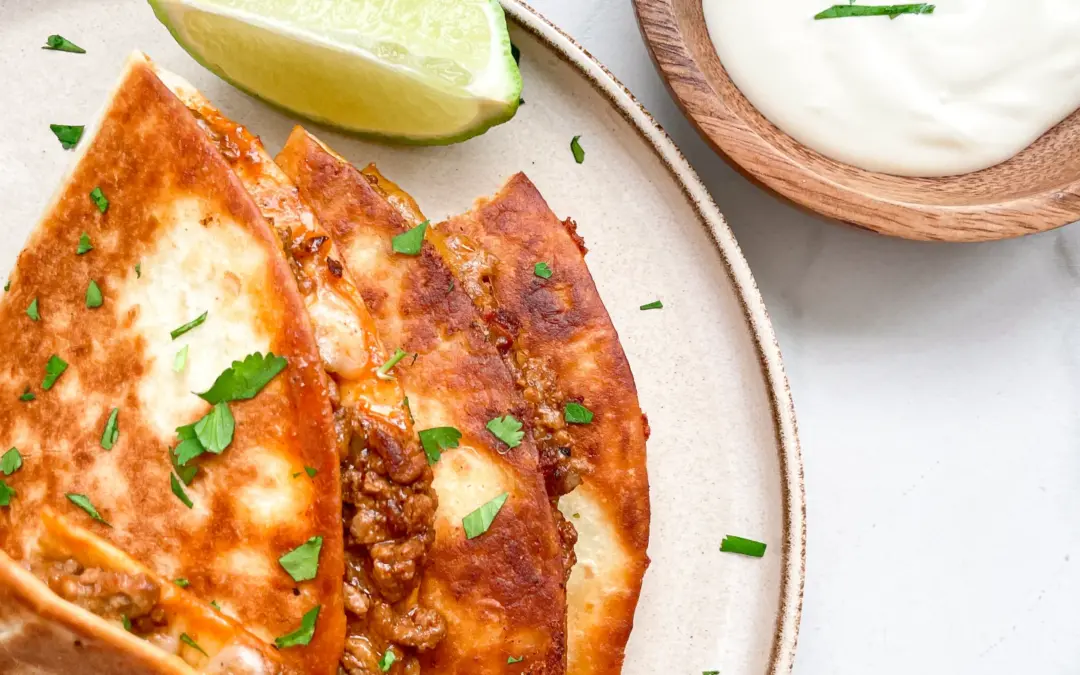
- Cook two of the filled quesadillas side by side in the pan with 1 teaspoon of olive oil on both sides over medium heat until the tortilla becomes crispy golden brown and the cheese inside is melted. Remove from the pan and cut in half.
- Place three pieces of the quesadillas on each plate, along with two lime wedges, and sprinkle with cilantro. Serve with your favorite salsa and sour cream for dipping.
- Cook Time: 30 min