Juicy Pan-Fried Pork Dumplings

Juicy Pan-Fried Pork Dumplings

Juicy Pan-Fried Pork Dumplings

Juicy Pan-Fried Pork Dumplings

March 12, 2024 by Kimberly

Dive into the world of flavors with these pan-fried pork Dumplings! Perfectly golden, irresistibly tasty, and just the right crunch to satisfy your cravings.

This website uses affiliate links which may earn commission for purchases made at no additional cost to you.

TOTAL TIME

1 hr + 15 min

SERVES

40 dumplings

DIET

omnivore

EVERY RECIPE DESERVES

A Little Love Letter

Discover the joy of making juicy pan-fried pork Dumplings at home! A staple in Asian cuisine, these dumplings are a perfect blend of juicy filling and crispy skin. Easy to make and incredibly delicious, they’re sure to become a family favorite. Whether you’re a dumpling enthusiast or a first-timer, follow this simple guide to bring a taste of tradition into your kitchen.

Serve these golden delights with a side of dumpling dipping sauce. These juicy pan-fried pork Dumplings are best enjoyed hot, allowing the flavors to truly shine. They make a fantastic appetizer, a satisfying main, or a delightful side dish. Pair with a fresh cucumber salad or a steaming bowl of soup to complete a mouthwatering meal that’s sure to impress.

Store leftover dumplings in an airtight container in the refrigerator for up to three days. Reheat in a pan to retain their crispiness or microwave if in a hurry. You can also freeze them immediately after filling, so you always have fresh dumplings on hand.

Hi, I'm Kimberly!

Hi, I'm Kimberly.

A hopeless romantic when it comes to food. Every recipe I share is a love letter to food itself. I’m so glad you’re here. Make yourself at home and stay a while.

Love,
Kimberly

Kimberly the Zett Signature

If you want to get to know me better,
click here!


Juicy Pan-Fried Pork Dumplings

LET’S MAKE A PIECE OF HAPPINESS

Print
clock clock iconcutlery cutlery iconflag flag iconfolder folder iconinstagram instagram iconpinterest pinterest iconfacebook facebook iconprint print iconsquares squares iconheart heart iconheart solid heart solid icon
Juicy Pan-Fried Pork Dumplings

Juicy Pan-Fried Pork Dumplings


5 Stars 4 Stars 3 Stars 2 Stars 1 Star

No reviews

  • Author: Kimberly
  • Total Time: 75 min
  • Yield: 40

Description

GOOD TO HAVE ON HAND

  • sharp knife
  • cutting board
  • large bowl
  • small bowl
  • large pan with lid


Ingredients

Units Scale
  • 40 dumpling wrappers
  • 400 grams minced pork
  • 1 tbsp minced ginger
  • 4 garlic cloves
  • 3 spring onions
  • 1 egg
  • 1 tbsp soy sauce
  • 1 tbsp oyster sauce
  • 1 tsp sesame oil
  • 1/4 tsp salt
  • 1/4 tsp ground pepper
  • all-purpose flour
  • neutral cooking oil

Instructions

  1. Defrost the dumpling wrappers if necessary.
  2. Peel the ginger, finely chop or grate and add to a large bowl.
  3. Peel and finely chop or crush the garlic cloves and add to the ginger in the large bowl.
  4. Separate the spring onions into whites and greens. Cut the white part into fine rings and add to the bowl with the ginger and garlic. Cut the green part into fine strips. Set aside.
  5. Also add the ground meat into the large bowl. Additionally, add: 1/4 tsp salt, 1/4 tsp ground pepper, one egg, 1 tbsp oyster sauce, 1 tbsp soy sauce, and 1 tsp sesame oil. Mix the entire mixture with two chopsticks and set aside.
  6. As preparation for your dumplings, sprinkle a work surface or serving plate with a little flour, so you can place your filled dumplings there before frying them. Without flour, the dough would stick to the surface after a while.
  7. Now, it’s time to fill the dumplings. For this, you will need the bowl with your filling, a small bowl with fresh, cold water, a teaspoon, and the dumpling wrappers.
  8. For the filling and folding feel free to watch my video on this (located at the bottom of this page) as visuals always help 😉 Fill each dumpling wrapper with about 1 tsp of filling. Place the filling in the center of the wrapper. Dab a bit of the cold water on one half of the edges of the wrapper along the edge with a finger. Fold the wrapper in half so that the filling is enclosed by the edges. Press the edges tightly together. Once you have enclosed the filling in the dough, take the two rear corners, moisten one corner from one side and fold the corners onto each other from behind. Press tightly and place the dumpling on the floured work surface. Continue this process until for the remaining dumpling wrappers. For 40 dumplings, this can take about 15 to 30 minutes, depending on your speed.
  9. If you want to freeze the dumplings, I recommend doing it now and not after the dumplings have been fried.
  10. Once you have finished all the dumplings, heat a large pan over medium heat. Add 1 tbsp of oil to the pan and place as many dumplings as you can fit on the flat side in the pan. Let them fry for a few minutes until the bottom has become crispy. Then reduce the heat to low and pour a little water into the pan. Immediately cover the pan with the lid. Be careful that the oil in the pan is not too hot, otherwise there is a risk of burning. The dumplings will now be steamed with the water in the pan. Keep the lid closed until the dumpling skins have become translucent. This can take about 10-15 minutes. If they are not yet translucent and there is no more water in the pan, simply add some more. Now you can remove the lid and turn the heat back up to medium. Let them fry for about 5 more minutes without the lid, so that the bottom of the dumplings can become crispy again. Remove the dumplings from the pan and process the next batch in the same way.
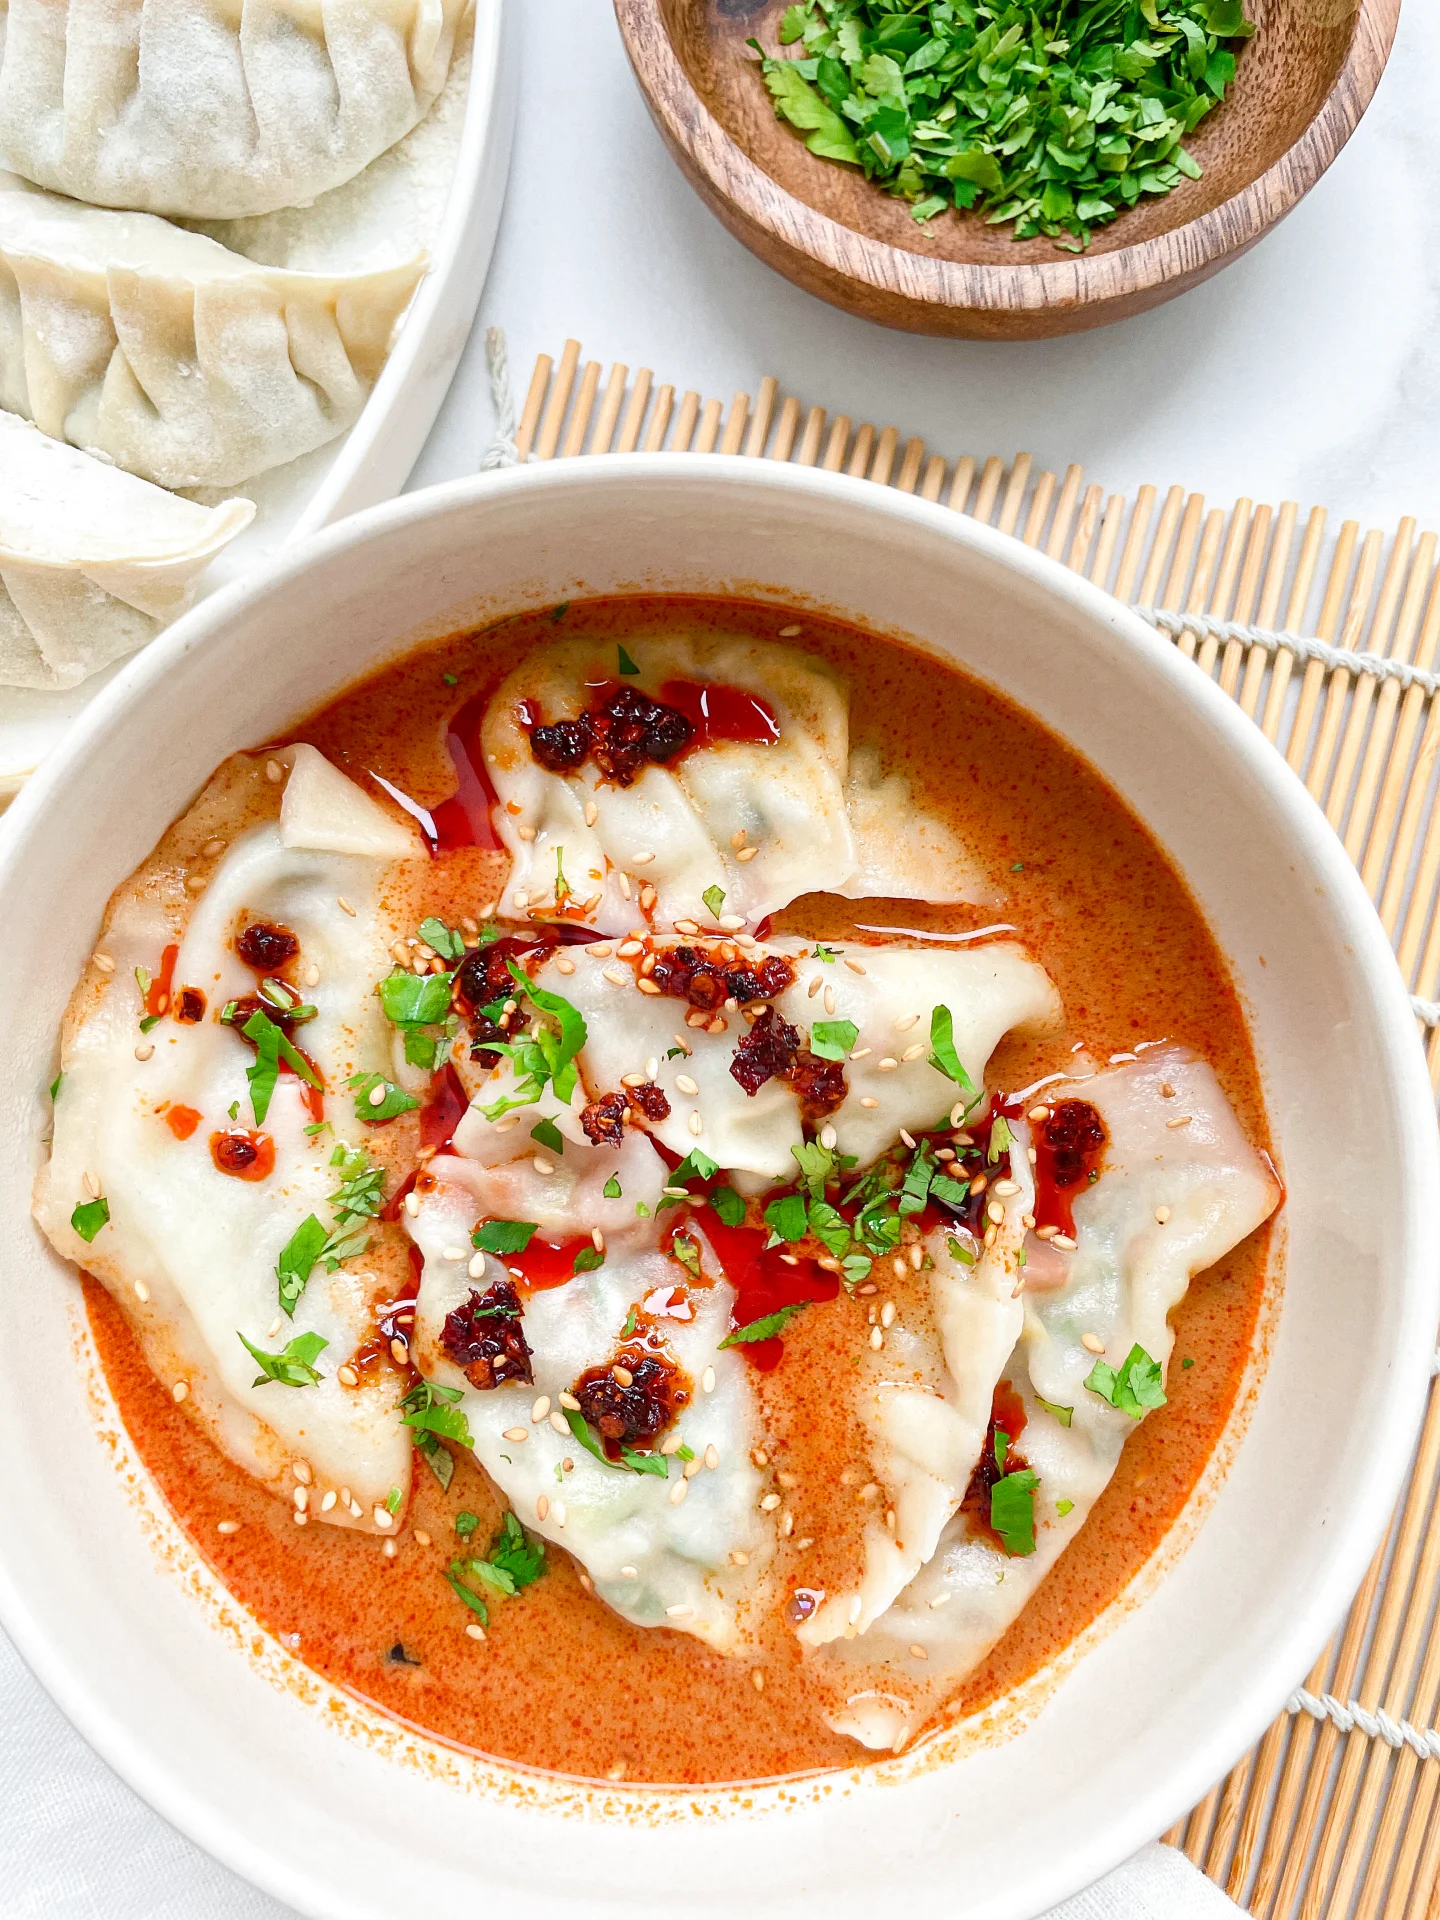
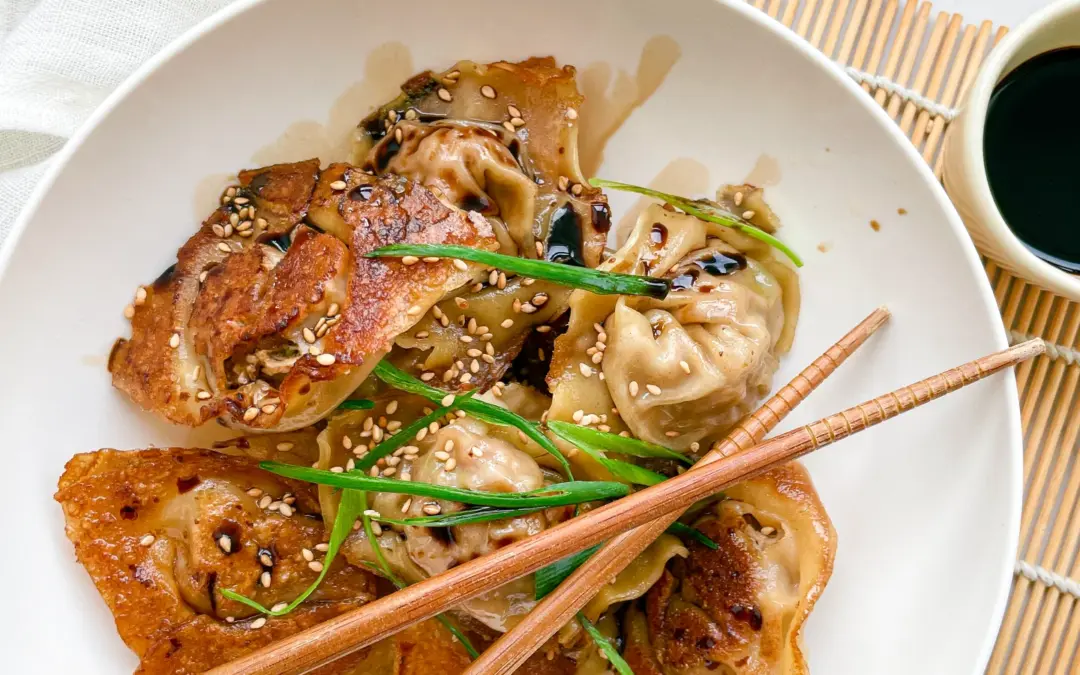
  11. When all the dumplings are done, serve them in a bowl with this dumpling dipping sauce and the green parts of the spring onion. You can also top them with roasted sesame seeds if you like.
  • Passive Time: 30 min
  • Cook Time: 45 min

CRAVING MORE?

Follow along here & don’t forget to subscribe to my substack!

Naan Bread

Naan Bread

Naan Bread

Naan Bread

February 24, 2024 by Kimberly

Discover the joy of homemade Naan Bread! Easy, fluffy, and delicious, it’s the perfect companion for any meal. Make it today and share the love!

This website uses affiliate links which may earn commission for purchases made at no additional cost to you.

TOTAL TIME

80 min

SERVES

4 naan

DIET

vegetarian

EVERY RECIPE DESERVES

A Little Love Letter

Dive into the delightful world of Indian cuisine with this easy Naan Bread recipe! Perfect for beginners and seasoned chefs alike, my homemade Naan is fluffy and irresistibly delicious. Whether you’re pairing it with your favorite indian butter chicken or enjoying it as a snack, this versatile bread is a must-try. Get ready to impress your family and friends with your baking skills and bring a piece of India right to your dinner table.

Serve your freshly baked Naan Bread alongside a variety of dishes to elevate your dining experience. It pairs wonderfully with curries, soups, and stews, absorbing all the flavors beautifully. For a modern twist, use it as a base for pizza or as a wrap for sandwiches. Don’t forget to brush it with garlic butter and sprinkle some cilantro on top for that extra burst of flavor.

To keep your Naan Bread fresh, wrap it in aluminum foil or store it in an airtight container at room temperature for up to 2 days. For longer storage, freeze the Naan, ensuring it’s well-wrapped, for up to a month.

Hi, I'm Kimberly!

Hi, I'm Kimberly.

A hopeless romantic when it comes to food. Every recipe I share is a love letter to food itself. I’m so glad you’re here. Make yourself at home and stay a while.

Love,
Kimberly

Kimberly the Zett Signature

If you want to get to know me better,
click here!


Naan Bread
Naan Bread

LET’S MAKE A PIECE OF HAPPINESS

Print
.tasty-recipe-responsive-iframe-container-b54b3a9f { position: relative; overflow: hidden; padding-top: 177.62%; } .tasty-recipe-responsive-iframe-container-b54b3a9f iframe { position: absolute; top: 0; left: 0; width: 100%; height: 100%; border: 0; } clock clock iconcutlery cutlery iconflag flag iconfolder folder iconinstagram instagram iconpinterest pinterest iconfacebook facebook iconprint print iconsquares squares iconheart heart iconheart solid heart solid icon
Naan Bread

Naan Bread


  • Author: Kimberly
  • Total Time: 80 min
  • Yield: 4

Description

GOOD TO HAVE ON HAND

  • medium-sized bowl
  • cling film
  • frying pan


Ingredients

Units Scale
  • 250 grams all-purpose flour
  • 1 tsp baking powder
  • 1/2 tsp salt
  • 30 grams full-fat yogurt
  • 125 milliliters lukewarm water

Instructions

  1. Mix the all-purpose flour, salt and baking powder in a medium-sized bowl. Add the yogurt and water and mix with a spatula or spoon to form a rough dough. Transfer the dough to a clean work surface and knead by hand to form a smooth dough. Wrap in cling film and leave to rest at room temperature for an hour.
  2. Unwrap the dough, divide it into four equal pieces on a floured surface and roll out each piece into a 20cm (8 inch) flatbread.
  3. Use a hot pan without fat to fry each side of the flatbread for about two to three minutes. Bubbles will form on the top side, which will fry until golden brown when turned over.
  • Passive Time: 60 min
  • Cook Time: 20 min

CRAVING MORE?

Follow along here & don’t forget to subscribe to my substack!

Croque Monsieur

Croque Monsieur

Croque Monsieur

Croque Monsieur

February 13, 2024 by Kimberly

Dive into the cheesy goodness of Croque Monsieur! This classic French sandwich brings a crispy, creamy delight to your table, perfect for any meal. A must-try!

This website uses affiliate links which may earn commission for purchases made at no additional cost to you.

TOTAL TIME

50 min

SERVES

4 sandwiches

DIET

omnivore

EVERY RECIPE DESERVES

A Little Love Letter

Step into the world of French cuisine with the Croque Monsieur, a luxurious twist on the grilled cheese sandwich. Featuring ham and melted cheese nestled between slices of buttery bread, topped with a creamy Béchamel sauce and then grilled to perfection. This dish is not just food – it’s a culinary experience that transports you straight to the streets of Paris with every bite. Perfect for brunch or a comforting dinner!

Serve the Croque Monsieur fresh off the grill, with its cheese deliciously oozing and bread crisply toasted. Pair it with a light, tangy salad to cut through the richness, or enjoy it with a cup of hot soup for a heartier meal. Don’t forget a sprinkle of fresh herbs or a dash of Dijon mustard on the side for that authentic French flair.

To keep the Croque Monsieur’s delightful texture, store any leftovers in an airtight container in the fridge. Reheat in the oven or on the stove to revive its crispy exterior and melty interior, ensuring it tastes just as fabulous.

Hi, I'm Kimberly!

Hi, I'm Kimberly.

A hopeless romantic when it comes to food. Every recipe I share is a love letter to food itself. I’m so glad you’re here. Make yourself at home and stay a while.

Love,
Kimberly

Kimberly the Zett Signature

If you want to get to know me better,
click here!


Croque Monsieur
Croque Monsieur

LET’S MAKE A PIECE OF HAPPINESS

Print
.tasty-recipe-responsive-iframe-container-5fd71612 { position: relative; overflow: hidden; padding-top: 177.62%; } .tasty-recipe-responsive-iframe-container-5fd71612 iframe { position: absolute; top: 0; left: 0; width: 100%; height: 100%; border: 0; } clock clock iconcutlery cutlery iconflag flag iconfolder folder iconinstagram instagram iconpinterest pinterest iconfacebook facebook iconprint print iconsquares squares iconheart heart iconheart solid heart solid icon
Croque Monsieur

Croque Monsieur


  • Author: Kimberly
  • Total Time: 45 min
  • Yield: 4

Description

GOOD TO HAVE ON HAND

  • knife
  • cheese grater
  • large pan


Ingredients

Units Scale
  • 8 slices sourdough bread
  • 200 grams deli ham
  • 100 grams Gruyere cheese
  • 100 grams Emmental cheese
  • 2 tsp Dijon mustard
  • 4 tsp butter
  • 600 grams Béchamel sauce

Instructions

  1. Prepare the Béchamel sauce.
  2. Preheat the oven to 250°C (480°F)
  3. Grate the Gruyere and Emmental and mix together in a bowl.
  4. Spread 1/2 teaspoon of butter on one side of each slice of bread and fry in the pan on the buttered side until crispy. Remove the bread from the pan.
  5. The crispy side should now be on the bottom. Spread 1/4 teaspoon of Dijon mustard on the non-fried side of each slice of bread.
  6. Place deli ham on each slice of bread on top of the mustard.
  7. 1 tbsp of Béchamel sauce and 50g (2 oz) of grated cheese are placed on top of the deli ham.
  8. Now stack the slices as a double-decker that a total of 4 sandwiches are made from those 8 slices.
  9. Place the 4 sandwiches on a baking tray lined with baking paper and bake for 10-12 minutes until the cheese and sauce have melted and browned. Cut each croque monsieur in half with a sharp knife and divide between 4 plates. Serve with a fresh salad.
  • Passive Time: 15 min
  • Cook Time: 30 min

CRAVING MORE?

Follow along here & don’t forget to subscribe to my substack!

Warm Oven Baked Salad with Yogurt Thyme Honey Dressing

Warm Oven Baked Salad with Yogurt Thyme Honey Dressing

Warm Oven Baked Salad with Yogurt Thyme Honey Dressing

Warm Oven Baked Salad with Yogurt Thyme Honey Dressing

February 8, 2024 by Kimberly

Indulge in a scrumptious, warm salad fresh from the oven, enhanced by a sweet and savory honey-thyme yogurt dressing. A delightful, healthy treat!

This website uses affiliate links which may earn commission for purchases made at no additional cost to you.

TOTAL TIME

35 min

SERVES

2 portions

DIET

vegetarian

EVERY RECIPE DESERVES

A Little Love Letter

Indulge in the culinary delight of a warm salad recipe, perfect for any season. This oven-baked salad is not just a dish – it’s a journey of flavors, combining the comfort of warm ingredients with the freshness of a salad. Enhanced with a Yogurt Dressing, this recipe brings a wholesome and gourmet touch to your table. The Thyme Honey Dressing adds a unique twist, making it a standout in your Healthy Salad collection.

It’s best enjoyed fresh from the oven, with the warmth complementing the cool, creamy Yogurt Dressing. It’s a versatile dish that pairs wonderfully with a variety of mains, making it an excellent addition to your Easy Salad Recipes. Whether as a standalone meal for a light lunch or dinner or as a side for an extensive dinner, this salad is sure to impress. Its rich flavors and gourmet appeal make it a perfect choice for dinner parties or a nutritious family meal.

When it comes to storage, this Oven Baked Salad with its Flavorful Salads dressing is best enjoyed fresh. However, if you need to store it, keep vegetables and dressing separate from another in an airtight container in the refrigerator. The salad stays fresh for up to one day, but remember, the fresher, the better to maintain its unique texture and taste.

Hi, I'm Kimberly!

Hi, I'm Kimberly.

A hopeless romantic when it comes to food. Every recipe I share is a love letter to food itself. I’m so glad you’re here. Make yourself at home and stay a while.

Love,
Kimberly

Kimberly the Zett Signature

If you want to get to know me better,
click here!


Warm Oven Baked Salad with Yogurt Thyme Honey Dressing

LET’S MAKE A PIECE OF HAPPINESS

Print
.tasty-recipe-responsive-iframe-container-77021a9b { position: relative; overflow: hidden; padding-top: 177.62%; } .tasty-recipe-responsive-iframe-container-77021a9b iframe { position: absolute; top: 0; left: 0; width: 100%; height: 100%; border: 0; } clock clock iconcutlery cutlery iconflag flag iconfolder folder iconinstagram instagram iconpinterest pinterest iconfacebook facebook iconprint print iconsquares squares iconheart heart iconheart solid heart solid icon
Warm Oven Baked Salad with Yogurt Thyme Honey Dressing

Warm Oven Baked Salad with Yogurt Thyme Honey Dressing


  • Author: Kimberly
  • Total Time: 30 min
  • Yield: 2

Description

GOOD TO HAVE ON HAND

  • sharp knife
  • cutting board
  • small bowl
  • medium bowl


Ingredients

Units Scale
VEGETABLES
  • 1 red bell pepper
  • 1 yellow bell pepper
  • 1 red onion
  • 2 big tomatoes
  • 1 cup sugar snaps
  • 1 bay leaf
  • 1 tsp dried thyme
  • salt & pepper to taste
BREAD
  • 250 grams bread or baguette
  • 3 tbsp olive oil
  • 2 tbsp butter
  • 1 garlic clove
  • 1 tbsp chives
  • 1/8 tsp salt
  • 1/8 tsp pepper
DRESSING
  • 75 grams yogurt
  • 1 tbsp white wine vinegar
  • 1 tsp honey
  • 1 tbsp parsley
  • salt & pepper to taste

Instructions

  1. Preheat the oven to 200°C (400°F)
  2. Wash the bell peppers, tomatoes and sugarsnaps and cut into bite-sized pieces.
  3. Finely chop the parsley and chives.
  4. Peel the onion and cut into semicircles.
  5. Cut the bread into slices approx. 1 cm (1/2 inch) thick.
  6. Line a baking tray with baking paper and spread the chopped peppers, sugarsnaps, onions and tomatoes on it. Spread 1 tbsp olive oil, 1 tsp dried thyme and 1 bay leaf over the vegetables and mix everything well. Roast in the oven for approx. 15-20 minutes.
  7. In the meantime, to prepare the bread, mix the softened butter with the olive oil in a small bowl and add 1 tbsp of chopped chives. Add 1/8 teaspoon each of pepper and salt and the crushed garlic, stir well and spread evenly over the slices of bread. Place the slices on a rack with baking paper in the oven with the vegetables for the last 5 minutes and bake until golden brown.
  8. For the dressing, mix the yogurt, honey, white wine vinegar, parsley and a pinch each of salt and pepper in a medium bowl and set aside.
  9. Now take the vegetables and bread out the oven and leave to cool briefly. Remove the bay leaf. Place the vegetables in the bowl with the yogurt dressing and toss to combine. Divide the vegetables between two plates and serve with the garlic bread.
  • Cook Time: 30 min

CRAVING MORE?

Follow along here & don’t forget to subscribe to my substack!

Light & Flavorful Blueberry Banana Cupcakes with Cream Cheese Frosting

Light & Flavorful Blueberry Banana Cupcakes with Cream Cheese Frosting

Light & Flavorful Blueberry Banana Cupcakes with Cream Cheese Frosting

Light & Flavorful Blueberry Banana Cupcakes with Cream Cheese Frosting

January 6, 2024 by Kimberly

Enjoy our Blueberry Banana Cupcakes, a refined sugar-free recipe, topped with creamy cheese frosting for a light, sweet delight blending natural fruitiness with rich smoothness.

This website uses affiliate links which may earn commission for purchases made at no additional cost to you.

TOTAL TIME

25 min

SERVES

12 cupcakes

DIET

vegetarian

EVERY RECIPE DESERVES

A Little Love Letter

These blueberry banana cupcakes are the kind of bake that instantly fills your kitchen with the scent of something cozy and inviting. They’re incredibly soft and light, made with ripe mashed bananas that add natural sweetness and moisture, and pockets of juicy blueberries that burst gently as they bake. Each bite feels fresh and bright, yet comforting in that nostalgic, homemade way.

What makes them truly special is how effortless they are: simple ingredients, a quick batter, and a result that tastes far more impressive than the time it takes to make them. They’re the kind of cupcakes you can whip up on a slow Sunday morning or bring to a last-minute gathering—and they’ll always feel like a thoughtful, homemade treat.

Once cooled, they’re topped with a silky, slightly tangy cream cheese frosting that pairs beautifully with the fruitiness of the cupcakes. It adds just the right amount of richness without overpowering the delicate flavors. Together, it’s a combination that feels both light and indulgent—perfect for brunch, spring and summer celebrations, or any moment that needs a little piece of happiness baked into it.

Hi, I'm Kimberly!

Hi, I'm Kimberly.

A hopeless romantic when it comes to food. Every recipe I share is a love letter to food itself. I’m so glad you’re here. Make yourself at home and stay a while.

Love,
Kimberly

Kimberly the Zett Signature

If you want to get to know me better,
click here!


Light & Flavorful Blueberry Banana Cupcakes with Cream Cheese Frosting

LET’S MAKE A PIECE OF HAPPINESS

Print
.tasty-recipe-responsive-iframe-container-8634009c { position: relative; overflow: hidden; padding-top: 177.62%; } .tasty-recipe-responsive-iframe-container-8634009c iframe { position: absolute; top: 0; left: 0; width: 100%; height: 100%; border: 0; } clock clock iconcutlery cutlery iconflag flag iconfolder folder iconinstagram instagram iconpinterest pinterest iconfacebook facebook iconprint print iconsquares squares iconheart heart iconheart solid heart solid icon
Light & Flavorful Blueberry Banana Cupcakes with Cream Cheese Frosting

Light & Flavorful Blueberry Banana Cupcakes with Cream Cheese Frosting


  • Author: Kimberly
  • Total Time: 25 min
  • Yield: 12 cupcakes

Description

GOOD TO HAVE ON HAND

  • cupcake tin
  • baking paper
  • large bowl
  • medium bowl
  • hand mixer


Ingredients

Units Scale
CUPCAKES
  • 3 ripe bananas
  • 50 milliliters coconut oil
  • 80 grams agave syrup
  • 1 egg
  • 1 tsp vanilla extract
  • 180 grams all-purpose flour
  • 1 tsp baking soda
  • 1 tsp baking powder
  • 1/2 tsp salt
  • 160 grams frozen blueberries
FROSTING
  • 230 grams cream cheese
  • 250 grams yogurt
  • 50 milliliters agave syrup
  • 1 tsp lemon juice
  • 1/2 tsp vanilla extract

Instructions

  1. Preheat the oven to 180°C (350°F) and line a 12-cup cupcake tin with baking paper and set aside.
  2. In a large bowl, mash the bananas with a fork to a mash. Mix in the coconut oil, agave syrup, egg and vanilla.
  3. Now add the flour, baking soda, baking powder and salt to the bowl and mix everything together until a creamy dough forms, do not overmix. Fold in the blueberries but set aside about 1 tablespoon of them for later.
  4. Fill the cupcake tins about 2/3 full. Now bake for 16 minutes. I bake them in two batches of 6 so that the cupcakes have more room to rise.
  5. Meanwhile, prepare the cream cheese frosting. Place the cream cheese, yoghurt, agave syrup, vanilla extract and lemon juice in a mixing bowl and beat with a hand mixer until stiff peaks form and a firm cream has formed,
  6. Take the cupcakes out of the oven and leave to cool on a wire rack. As soon as the cupcakes are at room temperature, the frosting can be spread on top. Warm the remaining blueberries in a small pot or in the microwave until they turn into a sauce. Let it cool and pour the sauce over the cupcakes just before serving.
  • Passive Time: 10 min
  • Cook Time: 15 min

CRAVING MORE?

Follow along here & don’t forget to subscribe to my substack!

Tarte Flambée

Tarte Flambée

Tarte Flambée

Tarte Flambée

December 30, 2023 by Kimberly

A thin crust, full-bodied crème fraîche, spicy bacon and savory onions – the classic Alsatian tarte flambée.

This website uses affiliate links which may earn commission for purchases made at no additional cost to you.

TOTAL TIME

60 min

SERVES

4 portions

DIET

omnivore

EVERY RECIPE DESERVES

A Little Love Letter

Indulge in the delectable charm of Tarte Flambée, a French classic celebrated for its crispy thin crust, creamy allure, and the delightful interplay of savory bacon and onions. Hailing from the picturesque Alsace region, this dish is a culinary masterpiece that elevates the dining experience with its unique blend of flavors.

This culinary delight pairs perfectly with a light salad or stands alone for a satisfying meal, bringing the essence of French cuisine to your table.

For later enjoyment, store any leftover Tarte Flambée in an airtight container in the refrigerator. Reheat slices in the oven. Avoid microwaving to maintain its crispy texture.

Hi, I'm Kimberly!

Hi, I'm Kimberly.

A hopeless romantic when it comes to food. Every recipe I share is a love letter to food itself. I’m so glad you’re here. Make yourself at home and stay a while.

Love,
Kimberly

Kimberly the Zett Signature

If you want to get to know me better,
click here!


Tarte Flambée
Tarte Flambée

LET’S MAKE A PIECE OF HAPPINESS

Print
.tasty-recipe-responsive-iframe-container-926d2bcd { position: relative; overflow: hidden; padding-top: 177.62%; } .tasty-recipe-responsive-iframe-container-926d2bcd iframe { position: absolute; top: 0; left: 0; width: 100%; height: 100%; border: 0; } clock clock iconcutlery cutlery iconflag flag iconfolder folder iconinstagram instagram iconpinterest pinterest iconfacebook facebook iconprint print iconsquares squares iconheart heart iconheart solid heart solid icon
Tarte Flambée

Tarte Flambée


  • Author: Kimberly
  • Total Time: 1 hr
  • Yield: 1 baking tray

Description

GOOD TO HAVE ON HAND

  • large mixing bowl
  • sieve
  • sharp knife
  • cutting board


Ingredients

Units Scale
DOUGH
  • 250 grams all-purpose flour
  • 125 milliliters water
  • 2 tbsp olive oil
  • 2 tsp salt
TOPPINGS
  • 100 grams crème fraîche
  • 125 grams bacon
  • 1 red onion
  • salt
  • pepper
  • chives

Instructions

  1. Put the water, salt, olive oil and sifted flour in a bowl. Stir with a spoon until it is no longer sticky. Then remove everything from the bowl and work into a smooth dough with your hands for approx. 3 minutes. Do not add any more flour. Then wrap the dough in cling film and leave to rest at room temperature for approx. 30 minutes.
  2. Remove the skin from the onions and cut into thin stripes.
  3. Sprinkle a little flour on a work surface. Place the dough piece on top and also sprinkle with a little flour. Then use a rolling pin to roll out the dough to the size of a baking tray, approx. 40×30 cm (16×12 inches).
  4. Place the dough on a baking tray lined with baking paper and brush with crème fraîche. Season with salt. Then spread the onions and bacon evenly on top.
  5. Bake the pastry at 250°C (480°F) using the grill function for approx. 15 minutes. Take out and top with freshly cracked pepper and chives.
  • Passive Time: 45 min
  • Cook Time: 15 min

CRAVING MORE?

Follow along here & don’t forget to subscribe to my substack!