Baked Falafel

Baked Falafel

Baked Falafel

Baked Falafel

February 2, 2025 by Kimberly

Crispy on the outside, soft and herby inside! These golden bites are the ultimate flavor bomb. Packed with chickpeas, garlic, and spices, they’re the kind of snack you’ll keep reaching for.

40 MINUTES

EASY

VEGAN

MIDDLE EAST

24 FALAFEL BALLS

CRISPY

PICNIC

SNACKS

ALL YEAR

INTRODUCTION

ABOUT THE RECIPE

Golden, crispy, and packed with bold flavors!! These herby chickpea bites are everything you want in a falafel, minus the frying. They’re light but satisfyingly crunchy, loaded with garlic, cumin, and fresh herbs for that perfect balance of flavor. Whether you stuff them in a warm pita, toss them over a fresh salad, or dip them in creamy tahini sauce, they’re the kind of meal that feels both nourishing and indulgent. And the best part? They’re baked, not fried, so you get all the crunch without the extra oil.

How to serve
These little crispy gems are beyond versatile! Tuck them into warm pita with fresh veggies and a drizzle of tahini for a classic falafel wrap. Throw them over a big salad with cucumbers, tomatoes, and a lemony dressing for a light but filling meal. Or just dunk them straight into hummus (no judgment here). Want to level it up? Pair them with roasted veggies, herby yogurt sauce, or even a spicy harissa dip.

How to store
Got leftovers? Pop them in an airtight container in the fridge for up to 4 days. Reheat them in the oven or air fryer at 180°C (350°F) for about 5 minutes to keep that crispy magic alive. For long-term storage, freeze them on a baking sheet before transferring them to a bag – just bake straight from frozen when you’re ready!

Hi, I'm Kimberly!

Hi, I'm Kimberly.

A passionate food lover who believes in the magic of homemade deliciousness that spreads love and warmth. Join me on this culinary adventure as I prepare wonderful dishes and let’s spread some happiness together!

Kimberly the Zett Signature

If you want to get to know me better, click here!


Baked Falafel
Baked Falafel
Baked Falafel
Baked Falafel
„Let’s make a piece of happiness“
Print
clock clock iconcutlery cutlery iconflag flag iconfolder folder iconinstagram instagram iconpinterest pinterest iconfacebook facebook iconprint print iconsquares squares iconheart heart iconheart solid heart solid icon
Baked Falafel

Baked Falafel


5 Stars 4 Stars 3 Stars 2 Stars 1 Star

No reviews

  • Author: Kimberly
  • Total Time: 12-24 hrs + 40 min
  • Yield: 24 falafel balls 1x

Description

Recommended Equipment

  • medium mixing bowl
  • food processor
  • small cookie scoop (or tablespoon)

Ingredients

Units Scale
  • 250 grams dry chickpeas
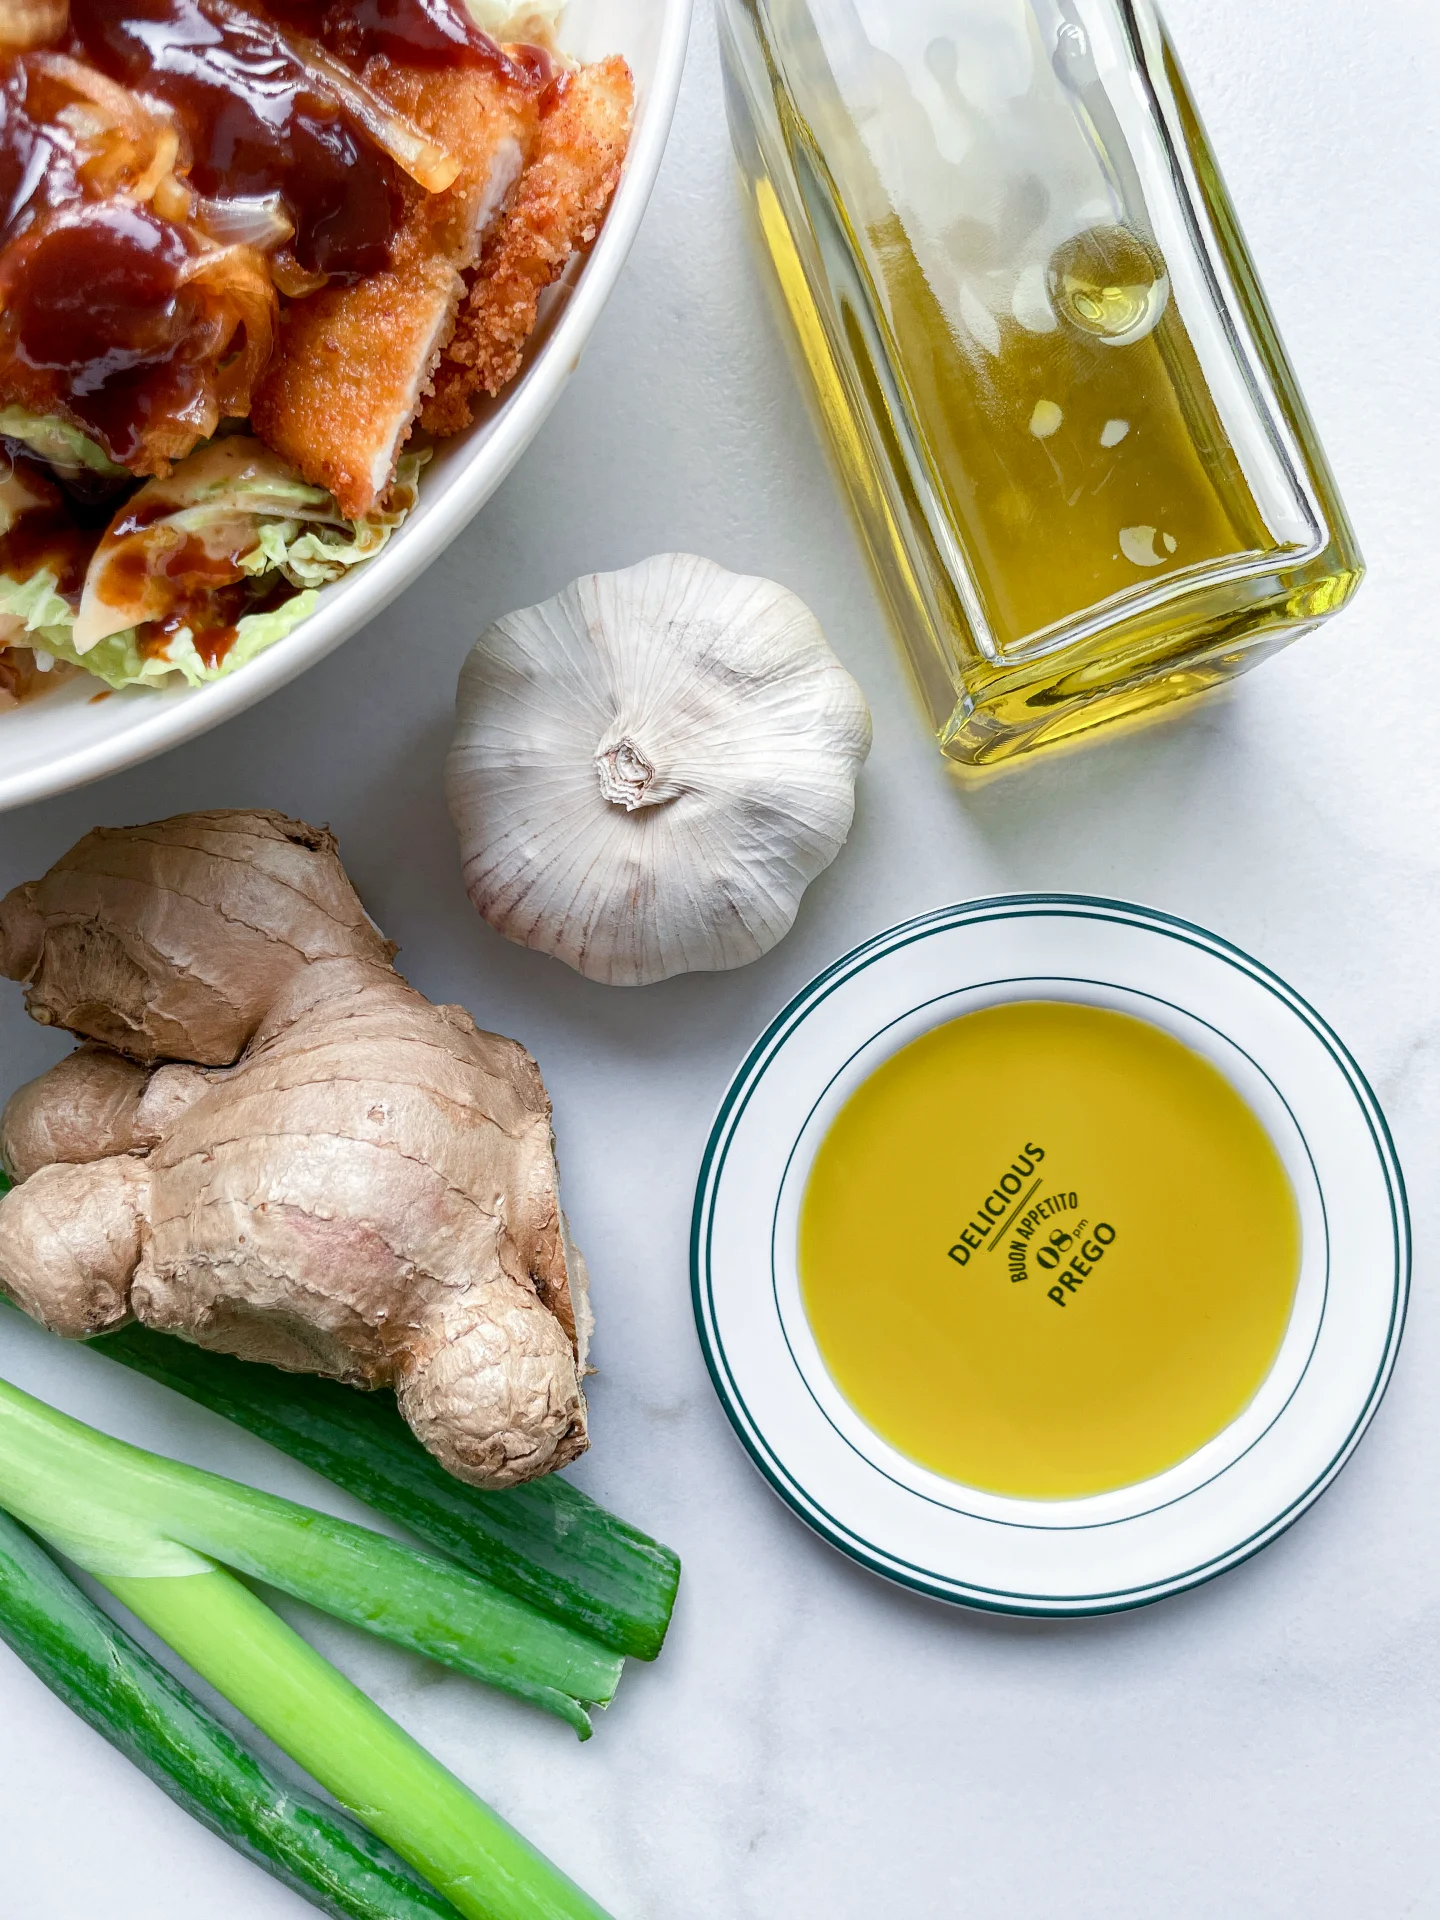
  • 2 tbsp olive oil
  • 2 tsp baking powder
  • 5 grams fresh parsley
  • 5 grams fresh cilantro
  • 5 leaves fresh mint
  • 1 yellow onion
  • 4 garlic cloves
  • 1 tsp salt
  • 1 tsp paprika
  • 1 tsp cumin
  • 1 tsp za’atar
  • 1/2 tsp white pepper

Instructions

  1. Soak the dried chickpeas in 750ml (3 cups) of cold water for about 12-24 hours and store them in the fridge. The next day, drain, rinse, and let them sit for a moment to remove excess water. Preheat the oven to 220°C / 428°F (fan-assisted).
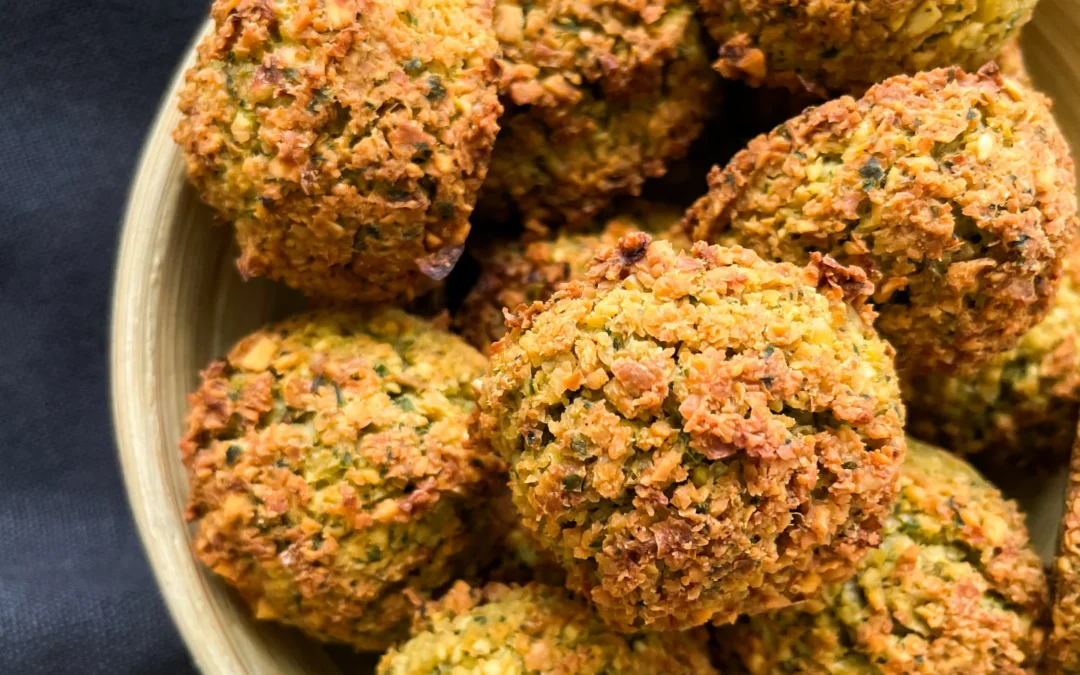
  2. Add the chickpeas along with the other ingredients to a food processor and blend until you get a crumbly yet moldable mixture. Use a small cookie scoop to shape the mixture into 30g/1oz falafel balls and place them on a baking sheet lined with parchment paper. Bake for about 25-30 minutes until golden brown.
  • Passive Time: 12-24 hrs
  • Cook Time: 40 min

Chocolate Mint Oil

Chocolate Mint Oil

Chocolate Mint Oil

Chocolate Mint Oil

December 20, 2024 by Kimberly

This infused oil is minty-fresh and oh-so-delicious, even if the chocolate vibes didn’t show up. Perfect for drizzling on salads or desserts – it’s a happy accident you’ll love.

40 MINUTES

ADVANCED

VEGAN

ENGLISH

40 PER TSP

REFRESHING

MICHELIN

OIL

ALL YEAR

INTRODUCTION

ABOUT THE RECIPE

Not every recipe turns out as expected, but sometimes the result is even better! This Chocolate Mint Oil was supposed to capture both chocolate and mint flavors, but only the fresh, vibrant mint transferred – and honestly? It’s absolutely delicious. The cocoa nibs didn’t quite make the impact I hoped for, but the minty finish is so versatile and refreshing. Perfect for sweet and savory dishes, this oil still deserves a spot in your kitchen.

How to serve
Drizzle this minty oil over fresh salads for a herby twist or use it to finish a dessert like brownies, ice cream, or fruit salads. It also works as a light drizzle over roasted vegetables, adding a subtle mint freshness to balance the flavors. For an unexpected yet delicious pairing, try it with lamb or feta cheese for a Mediterranean-inspired vibe. Versatile and fresh, it’s a little experiment gone right. For an extravagant dessert with a wow factor, you absolutely have to try this oil on my Vanilla Parfait with Chocolate Soil!

How to store
Store this infused oil in a clean, airtight bottle in the fridge for up to one week.

Hi, I'm Kimberly!

Hi, I'm Kimberly.

A passionate food lover who believes in the magic of homemade deliciousness that spreads love and warmth. Join me on this culinary adventure as I prepare wonderful dishes and let’s spread some happiness together!

Kimberly the Zett Signature

If you want to get to know me better, click here!


Chocolate Mint Oil
Chocolate Mint Oil
Chocolate Mint Oil
„Let’s make a piece of happiness“
Print
clock clock iconcutlery cutlery iconflag flag iconfolder folder iconinstagram instagram iconpinterest pinterest iconfacebook facebook iconprint print iconsquares squares iconheart heart iconheart solid heart solid icon
Chocolate Mint Oil

Chocolate Mint Oil


  • Author: Kimberly
  • Total Time: 40 min
  • Yield: 1 cup / 250 ml 1x

Description

RECOMMENDED EQUIPMENT

  • blender
  • medium-sized saucepan
  • whisk
  • a bowl which the medium saucepan fits into
  • 2 medium-sized bowls
  • 2 fine mesh strainers
  • oil bottle
  • ice cubes
  • coffee filter

Ingredients

Units Scale
  • 15 grams cocoa nibs
  • 15 grams fresh mint
  • 250 milliliter rapeseed oil

Instructions

  1. Put cocoa nibs and leaves of the mint into the blender. Pour in the oil. Blend on the highest setting until it no coarse pieces are longer visible.
  2. Pour the mixture from the blender into a medium-sized pot and heat it over medium heat, constantly stirring, to a temperature of about 102°-103°C (215°-217°F). Then, let the oil simmer with the lid partially on for the next 10 minutes. Stir only occasionally, making sure the temperature remains steady and nothing gets burned.
  3. At the end of the cooking process, prepare a bowl large enough to fit the medium-sized pot, filled with cold water and a handful of ice cubes. Also, hang a fine mesh sieve strainer over a medium-sized bowl.
  4. Now, place the pot in the ice water and stir to stop the cooking process. Once the oil is almost cold, remove the pot from the water and pour the oil into the first fine mesh sieve to catch the coarse particle.
  5. Then, pour the oil into the second fine mesh sieve, which you before equipped with a coffee filter, to catch the remaining finer particles.
  6. Allow the oil to drip through for about 30 minutes or maybe less depending on how many remaining particles are in the coffee filter. Once all the oil has passed through the coffee filter, transfer the collected amount of oil into an oil bottle. Store in the refrigerator for up to 1 week.
  • Passive Time: 30 min
  • Cook Time: 10 min

Pasta al Pomodoro

Pasta al Pomodoro

Pasta al Pomodoro

Pasta al Pomodoro

November 5, 2024 by Kimberly

Imagine al dente pasta coated in a fresh, rich garlic basil tomato sauce – each bite bursting with Mediterranean sunshine, cozy comfort, and pure bliss. This dish tastes like home, every single time.

20 MINUTES

EASY

VEGAN

ITALIAN

589 PER PORTION

COMFORT FOOD

WEEKNIGHT

DINNER

ALL YEAR

INTRODUCTION

ABOUT THE RECIPE

Get ready to taste sunshine on a plate! This recipe brings you straight to an Italian summer with every bite – simple, cozy, and irresistibly delicious. This dish is all about fresh tomatoes simmered into a rich, velvety sauce that clings to each pasta strand, making it the ultimate comfort food. Perfect for weeknight dinners or when you crave a warm, feel-good meal, it’s easy to make but feels like pure indulgence.

How to serve
To make it unforgettable, serve this pasta with fresh basil and a dusting of Parmesan. A side of crusty garlic bread or a light salad with arugula and lemon vinaigrette balances the richness, adding that final touch. For a real treat, drizzle a bit of high-quality olive oil over the top just before serving. It’s simple but adds incredible depth and brings the dish to life, making it feel like a restaurant meal in the comfort of your home.

How to store
Store any leftovers in an airtight container in the fridge for up to 3 days. Reheat gently on the stovetop, adding a splash of water or olive oil to keep the sauce creamy. This way, you can enjoy it as good as fresh!

Hi, I'm Kimberly!

Hi, I'm Kimberly.

A passionate food lover who believes in the magic of homemade deliciousness that spreads love and warmth. Join me on this culinary adventure as I prepare wonderful dishes and let’s spread some happiness together!

Kimberly the Zett Signature

If you want to get to know me better, click here!


Pasta al Pomodoro
Pasta al Pomodoro
Pasta al Pomodoro
Pasta al Pomodoro
Pasta al Pomodoro
„Let’s make a piece of happiness“
Print
clock clock iconcutlery cutlery iconflag flag iconfolder folder iconinstagram instagram iconpinterest pinterest iconfacebook facebook iconprint print iconsquares squares iconheart heart iconheart solid heart solid icon
Pasta al Pomodoro

Pasta al Pomodoro


  • Author: Kimberly
  • Total Time: 20 min
  • Yield: 4 1x

Description

Recommended Equipment

  • large frying pan
  • sharp knife
  • cutting board
  • large pot

Ingredients

Units Scale
  • 4 tbsp olive oil
  • 4 garlic cloves
  • 1 fresh chili
  • 500 grams strained tomatoes
  • 10 grams fresh basil
  • 500 grams pasta of your choice (I used Rigatoni)
  • Parmesan
  • Salt & pepper to taste

Instructions

  1. Warm up 4 tbsp of olive oil over medium heat in a large frying pan. Meanwhile, peel the garlic cloves but leave them whole. Once the oil is warm, add the garlic cloves and let them roast until golden brown. It helps to tilt the pan so the oil pools in one spot, letting the garlic cloves fully submerge.
  2. When the garlic is golden brown, remove it from the pan and set it aside on a cutting board to cool slightly. Meanwhile, get a large pot of water ready for cooking your pasta, place it on the stove, and bring it to a rolling boil.
  3. Now mash the garlic into a paste with a bit of salt using the flat side of your knife on the cutting board – the salt helps break it down. Add this garlic paste back into the olive oil in the pan. Finely chop a fresh chili and add it to the pan as well. Warm everything over medium heat. Meanwhile, wash, dry, and thinly slice the basil leaves. Add the strained tomatoes and basil to the pan, stirring everything well, and let it simmer on low heat.
  4. Add the pasta and a bit of salt to the boiling water, cooking it until al dente. Season the tomato sauce with salt and pepper to taste.
  5. Transfer the pasta to the tomato sauce, add a bit of the pasta water, and stir until the noodles are fully coated in the sauce. Serve the pasta on deep plates, topped with freshly grated Parmesan and a sprinkle of pepper.
  • Cook Time: 20 min

Tomato Soup & Caramalized Onion Grilled Cheese Sandwich

Tomato Soup & Caramalized Onion Grilled Cheese Sandwich

Tomato Soup & Caramalized Onion Grilled Cheese Sandwich

Tomato Soup & Caramalized Onion Grilled Cheese Sandwich

October 6, 2024 by Kimberly

This is not your typical tomato soup…Imagine cozying up with a velvety, rich soup layered with additional bold flavors like carrots and red wine. Pair this with a gooey, melty onion-studded sandwich and you’ve got pure comfort with a gourmet twist.

80 MINUTES

EASY

VEGETARIAN

INT.

855 PER PORTION

COMFORT FOOD

CLASSICS

DINNER

AUTUMN
WINTER

INTRODUCTION

ABOUT THE RECIPE

There’s nothing like a comforting bowl of tomato soup – except when it’s taken to the next level! This version is bursting with extra flavors from sweet carrots, rich tomato paste, and a splash of red wine, making each spoonful deeply satisfying and a little more gourmet than your everyday soup. Paired with a gooey grilled cheese sandwich layered with caramelized onions, it’s the perfect cozy meal that will make you feel like you’re indulging in something truly special.

How to serve
Serve this soup hot, with a side of crispy grilled cheese fresh from the pan. The soft caramelized onions in the sandwich bring a sweetness that balances perfectly with the rich, slightly tangy soup. For an added touch, top your soup with a drizzle of cream or olive oil, or even some fresh herbs for a pop of color and flavor. This combo is perfect for a chilly evening in, or a quick but luxurious lunch.

How to store
Leftovers? No problem! Keep the soup in an airtight container in the fridge for up to three days, and reheat gently on the stove to preserve its rich flavors. The grilled cheese is best fresh, but you can revive it in a hot pan for a quick crisp-up.

Hi, I'm Kimberly!

Hi, I'm Kimberly.

A passionate food lover who believes in the magic of homemade deliciousness that spreads love and warmth. Join me on this culinary adventure as I prepare wonderful dishes and let’s spread some happiness together!

Kimberly the Zett Signature

If you want to get to know me better, click here!


Tomato Soup & Caramalized Onion Grilled Cheese Sandwich
„Let’s make a piece of happiness“
Print
clock clock iconcutlery cutlery iconflag flag iconfolder folder iconinstagram instagram iconpinterest pinterest iconfacebook facebook iconprint print iconsquares squares iconheart heart iconheart solid heart solid icon
Tomato Soup & Caramalized Onion Grilled Cheese Sandwich

Tomato Soup & Caramalized Onion Grilled Cheese Sandwich


  • Author: Kimberly
  • Total Time: 1 hour 20 minutes
  • Yield: 4 1x

Description

Recommended Equipment

  • large baking dish
  • sharp knife
  • cutting board
  • large pan
  • peeler
  • large pot
  • immersion blender (or stand mixer)

Ingredients

Units Scale

OVEN VEGGIES

  • 1 kilogram tomatoes (I used San Marzano)
  • 1 red bell pepper
  • 2 carrots
  • 2 shallots
  • 12 garlic cloves
  • 3 tbsp olive oil
  • salt

CARAMALIZED ONIONS FOR GRILLES CHEESE

  • 8 small white onions
  • 2 tsp butter
  • 1 tbsp balsamic vinegar
  • salt

SOUP BASE

  • 1 tsp butter
  • 4 small white onions
  • 1/2 tsp chili flakes
  • 2 tbsp tomato paste
  • 80 milliliters red wine

SOUP

  • 400 milliliters vegetable broth
  • 200 milliliters heavy cream (save some for garnish)
  • 10 grams fresh basil (save some for garnish)
  • salt, pepper & cayenne pepper to taste

GRILLED CHEESE

  • 8 slices bread of your choice (I used regular white flat breads)
  • 200 grams cheese of your choice (I used an cheddar & medium-aged gouda)
  • butter

Instructions

  1. Preheat your oven to 150°C / 300°F. Wash the tomatoes and bell peppers, then dry them well. Get a large baking dish ready. Quarter the tomatoes, remove the seeds from the bell peppers, and roughly chop them. Peel the carrots and cut them into large chunks too. Peel the shallots and garlic. Now, put everything in the baking dish, drizzle with a little olive oil and sprinkle some salt over the veggies. Toss them to coat evenly, then place the baking dish in the oven for 40 minutes. After 40 minutes, increase the temperature to 210°C / 410°F and roast for another 15 minutes.
  2. While the veggies are roasting, you can prepare the caramelized onions for the grilled cheese sandwiches. Peel the onions and slice them thinly. Add 1 teaspoon of butter to a large pan and let it melt. Add the onion slices, sprinkle a bit of salt on top, and cook on low heat, stirring regularly for about 10-15 minutes.
  3. Now, peel the onions for the soup base and cut them roughly. Set them aside. Pick the basil leaves from their stems, wash them, and dry them well. Set them aside too.
  4. After 10-15 minutes, the onions in the pan will have left some fond (browned bits) at the bottom. This is the time to add another teaspoon of butter and cook the onions for another 10-15 minutes. Once the onions are soft and golden brown, add a splash of balsamic vinegar and cook for another 1-2 minutes. Transfer the caramalized onions to a bowl and set the pan back on the stove to make the soup base.
  5. Add another teaspoon of butter to the pan and sauté the roughly chopped onions over medium heat. After a few minutes, add the chili flakes and stir well. After a few more minutes, stir in the tomato paste so that all the onions are coated evenly. Let it cook for a few minutes. Then, deglaze with the red wine and let it simmer until it reduces to a thick, creamy paste. Set the pan aside.
  6. Grab a large pot and transfer the roasted vegetables (along with any juices) into it once they’re done. Add the soup base from the pan, the vegetable broth, and the basil leaves. Use an immersion blender to blend everything until you reach the desired consistency. Finally, stir in the cream. Season the soup with salt, pepper, and cayenne to taste. Keep the soup on low heat and bring it to a simmer.
  7. Meanwhile, make the grilled cheese sandwiches. Heat a pan over low-medium heat. While the pan heats up, spread a thin layer of butter on the outside of each slice of bread. Grate the cheese. Place half of the buttered bread (butter side down) in the pan, then evenly distribute the cheese and caramelized onions on top. Cover the pan with a lid and wait for the cheese to start melting. Once it does, place the remaining slices of bread (butter side up) on top. Use a spatula to flip the sandwiches so they can brown on the other side.
  8. While the sandwiches are finishing, ladle the soup into bowls and optionally garnish with a drizzle of walnut oil, some cream, and fresh basil. Once the other side of the grilled cheese is crispy, take them out of the pan and cut them however you like – halves, triangles, strips, or small squares – depending on how you prefer them with your soup.
  • Cook Time: 80 min

Mint Yogurt & Cucumber Dill Salad (Cacik inspired)

Mint Yogurt & Cucumber Dill Salad (Cacik inspired)

Mint Yogurt & Cucumber Dill Salad (Cacik inspired)

Mint Yogurt & Cucumber Dill Salad (Cacik inspired)

August 20, 2024 by Kimberly

Refresh your taste buds with this creamy & crunchy yogurt cucumber salad. The blend of mint and dill brings a burst of summer flavors that’s perfect for any occasion. Light, tangy, and irresistible!

15 MINUTES

EASY

VEGETARIAN

TURKISH

153 PER PORTION

CREAMY
CRUNCHY

EVERYDAY

DIPS & SPREADS

ALL YEAR

INTRODUCTION

ABOUT THE RECIPE

If you’re craving something light, refreshing, and bursting with flavor, you’re going to adore this Cacik-inspired dip-salad situation. It’s a delightful mix of creamy yogurt, fresh cucumbers, and aromatic herbs like mint and dill. Perfect for hot summer days or when you need a quick, healthy snack, this dip-salad is a breeze to whip up and incredibly satisfying. Trust me, once you try it, you’ll be hooked on its cool and tangy goodness!

How to serve
Enjoy it as a refreshing side dish with your grilled meats or fish, or as a cool appetizer to start your meal. It’s also perfect as a dip with some warm pita bread or crispy veggies. For a more substantial meal, pair it with a quinoa or grain bowl. This salad’s creamy, tangy flavor profile complements a wide range of dishes, making it a fantastic addition to any menu. I like to serve it with this Turkish Flatbread (Bazlama) and Spicy Turkish Vegetable Spread (Ezme) as a Meze variation.

How to store
Transfer it to an airtight container and keep it in the fridge. It stays fresh for up to three days, but it’s best enjoyed within the first day or two to maintain its crisp texture. Keep it chilled, and you’ll have a delicious, refreshing dip-salad ready whenever you need it.

Hi, I'm Kimberly!

Hi, I'm Kimberly.

A passionate food lover who believes in the magic of homemade deliciousness that spreads love and warmth. Join me on this culinary adventure as I prepare wonderful dishes and let’s spread some happiness together!

Kimberly the Zett Signature

If you want to get to know me better, click here!


Mint Yogurt & Cucumber Dill Salad (Cacik inspired)
„Let’s make a piece of happiness“
Print
clock clock iconcutlery cutlery iconflag flag iconfolder folder iconinstagram instagram iconpinterest pinterest iconfacebook facebook iconprint print iconsquares squares iconheart heart iconheart solid heart solid icon
Mint Yogurt & Cucumber Dill Salad (Cacik inspired)

Mint Yogurt & Cucumber Dill Salad (Cacik inspired)


  • Author: Kimberly
  • Total Time: 15 min
  • Yield: 4-6 1x

Description

RECOMMENDED EQUIPMENT

  • sharp knife
  • cutting board
  • small bowl
  • medium bowl

Ingredients

Units Scale

SALAD

  • 1 cucumber
  • 2 tbsp extra virgin olive oil
  • 1 tbsp lemon juice
  • 1 tbsp dill
  • salt & pepper to taste

YOGURT

  • 300 grams 10% fat yogurt
  • 2 garlic cloves
  • 1 tbsp fresh mint, chopped
  • pinch of salt

TOPPING

  • pistachios
  • dill
  • mint

Instructions

  1. Peel the garlic and grate it into a small bowl. Wash and dry the mint thoroughly. Pluck the leaves from the stems, finely chop them, and add them to the garlic. Then add the yogurt and salt. Mix everything well.
  2. Next, wash and dry the cucumber. Halve it lengthwise, then halve each piece again lengthwise and remove the seeds. Quarter the cucumber again lengthwise and cut into large chunks. Place the cucumber pieces in a medium bowl and season with salt, olive oil, lemon juice, and pepper. Wash, dry, and roughly chop the dill, then add it to the cucumbers. Mix everything well.
  3. Shell and finely chop the pistachios. Set aside.
  4. Spread the yogurt on a deep plate and top with the cucumber salad. Sprinkle with pistachios. Optionally, garnish with a few mint leaves and dill, and drizzle with a bit of olive oil.
  • Cook Time: 15 min

Rosemary Oil

Rosemary Oil

Rosemary Oil

Rosemary Oil

August 2, 2024 by Kimberly

Imagine a drizzle of fragrant, herb-infused oil that turns any dish into a gourmet experience. It’s like adding a touch of sunshine and nature’s best to your meals!

1 HOUR
15 MINUTES

ADVANCED

VEGAN

INT.

40 PER TSP

HERBACEOUS

MICHELIN

OIL

ALL YEAR

INTRODUCTION

ABOUT THE RECIPE

Let’s talk about a game-changer in the kitchen: rosemary-infused oil. This aromatic delight is perfect for adding a burst of flavor to just about anything. With its fragrant, herbal notes, this homemade infused oil can elevate your cooking to new heights. Plus, it’s super easy to make and adds a gourmet touch to your everyday meals.

How to serve
Drizzle it over roasted vegetables for an instant flavor boost or mix it into your salad dressings for a herby twist. It’s also fantastic as a dipping oil with fresh bread, bringing out the best in both simple and complex dishes. I love this oil in my Green Veggies on Whipped Ricotta with Fried Capers & Shallots.

How to store
Keep it in a clean, airtight bottle in a cool, dark place. It’s best to use it within 2 weeks to enjoy the freshest flavor.

Hi, I'm Kimberly!

Hi, I'm Kimberly.

A passionate food lover who believes in the magic of homemade deliciousness that spreads love and warmth. Join me on this culinary adventure as I prepare wonderful dishes and let’s spread some happiness together!

Kimberly the Zett Signature

If you want to get to know me better, click here!


Rosemary Oil
Rosemary Oil
Rosemary Oil
„Let’s make a piece of happiness“
Print
clock clock iconcutlery cutlery iconflag flag iconfolder folder iconinstagram instagram iconpinterest pinterest iconfacebook facebook iconprint print iconsquares squares iconheart heart iconheart solid heart solid icon
Rosemary Oil

Rosemary Oil


  • Author: Kimberly
  • Total Time: 1 hour + 15 min
  • Yield: 250 ml / 1 cup 1x

Description

RECOMMENDED EQUIPMENT

  • blender
  • medium-sized saucepan
  • whisk
  • a bowl which the medium saucepan fits into
  • 2 medium-sized bowls
  • 2 fine sieves
  • oil bottle
  • ice cubes
  • coffee filter

Ingredients

Units Scale
  • 20 grams fresh rosemary
  • 250 milliliters extra-virgin cold-pressed olive oil

Instructions

  1. Plug the rosemary leaves from the stems and put the leaves into the blender. Pour in the oil. Blend on the highest setting until only tiny pieces of the rosemary are visible.
  2. Pour the mixture from the blender into a medium-sized pot and heat it over medium heat to a temperature of about 101° (213°F/214°F), and maintain this temperature for the next 10 minutes. Stir occasionally, making sure the temperature remains steady and nothing gets burned.
  3. Prepare a bowl large enough to fit a medium-sized pot, and fill it with cold water and a handful of ice cubes. Also, hang a fine sieve strainer over one medium-sized bowl and another fine sieve strainer, with a coffee filter inside it, over another medium-sized bowl.
  4. Now, place the pot in the ice water and stir to cool the oil quickly. Once the oil is almost cold, remove the pot from the water and let it sit for about 20 minutes so that the oil gets more infused.
  5. After the 20 minutes, pour the oil into the prepared fine sieve to catch the coarse particles.
  6. Then, pour the oil into the second sieve, which is equipped with a coffee filter, to catch the remaining finer particles.
  7. Allow the oil to drip through for about 1 hour or maybe less depending on how many remaining particles are in the coffee filter. Once all the oil has passed through the coffee filter, transfer the collected amount of oil into an oil bottle. Store in the refrigerator for up to 1-2 weeks.
  • Prep Time: 5 min
  • Passive Time: 1 hour
  • Cook Time: 10 min