


Description
GOOD TO HAVE ON HAND
- sharp knife
- cutting board
- freezer
- high-power blender
- cereal bowl
Ingredients
Units Scale
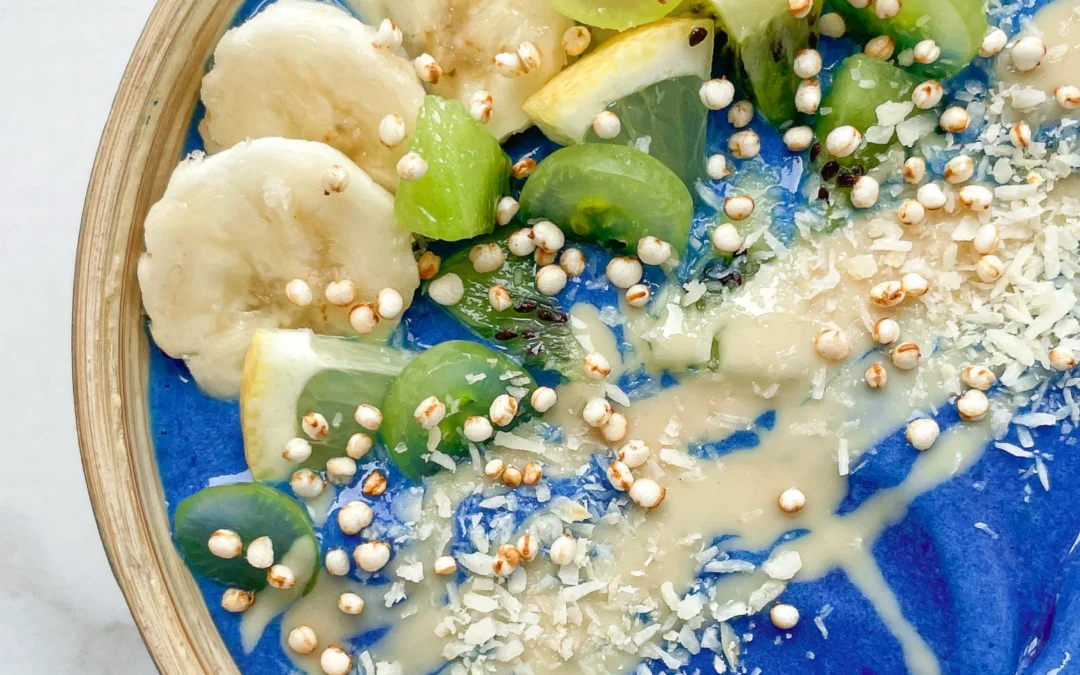
BASE
- 2 bananas, frozen
- 170 grams pineapple, frozen
- 125 milliliters to 250 milliliters almond milk (or your favorite type of milk)
- 1 tsp blue spirulina powder
- 1/4 banana
- 1/2 kiwi
- 3 green grapes
- 1 tsp coconut flakes
- 1 tsp puffed quinoa
Instructions
PREPARATIONS
- Chop the banana and pineapple into pieces and freeze them overnight.
INSTRUCTIONS
- Put the pineapple, banana, almond milk, and spirulina powder into the blender and blend until it becomes creamy.
- Meanwhile, slice 1/4 of a fresh banana and 3 grapes, and chop half a kiwi into small pieces.
- Pour the blue cream into a bowl and top it with the banana and grape slices, kiwi pieces, 1 teaspoon of almond butter, 1 teaspoon of puffed quinoa, and 1 teaspoon of coconut flakes. Enjoy it right away 🙂
- Prep Time: over night
- Cook Time: 10 min