Milk Chocolate Pudding with Chantilly Cream & Hazelnut Brittle

Milk Chocolate Pudding with Chantilly Cream & Hazelnut Brittle

Milk Chocolate Pudding with Chantilly Cream & Hazelnut Brittle

Milk Chocolate Pudding with Chantilly Cream & Hazelnut Brittle

August 29, 2024 by Kimberly

Indulge in a silky, luscious delight that melts in your mouth, combining rich chocolate bliss with fluffy cream and a satisfying crunchy surprise. Pure dessert heaven!

35 MINUTES

EASY

VEGETARIAN

INT.

424 PER PORTION

CREAMY

DATE NIGHT

DESSERT

ALL YEAR

INTRODUCTION

ABOUT THE RECIPE

Get ready to dive into a world of creamy chocolate bliss with this decadent sweet treat that’s sure to satisfy your sweet tooth. This velvety chocolate delight is the perfect combination of smooth indulgence and a delightful crunch, making it an elegant dessert that’s unbelievably easy to whip up at home. Whether you’re hosting a festive gathering or simply craving some classic comfort food, this homemade pudding will surely become your new favorite dessert inspiration.

How to serve
To elevate this gourmet treat, serve it chilled in elegant glassware topped with a dollop of fluffy whipped cream (chantilly) and a sprinkle of crunchy goodness for that extra touch of texture. You can also get creative by adding fresh berries or a drizzle of caramel sauce to enhance the rich chocolate flavor. This crowd-pleasing treat pairs wonderfully with a hot cup of coffee or a glass of dessert wine, making every bite a true sweet culinary adventure.

How to store
Keep any leftovers of this indulgent dessert refrigerated in an airtight container to maintain its creamy texture and fresh taste. It stays delicious for up to three days, ensuring you can enjoy this simple homemade sweet whenever the craving strikes. Just remember to add the crunchy topping right before serving to keep it perfectly crisp!

Hi, I'm Kimberly!

Hi, I'm Kimberly.

A passionate food lover who believes in the magic of homemade deliciousness that spreads love and warmth. Join me on this culinary adventure as I prepare wonderful dishes and let’s spread some happiness together!

Kimberly the Zett Signature

If you want to get to know me better, click here!


Milk Chocolate Pudding with Chantilly Cream & Hazelnut Brittle
„Let’s make a piece of happiness“
Print
clock clock iconcutlery cutlery iconflag flag iconfolder folder iconinstagram instagram iconpinterest pinterest iconfacebook facebook iconprint print iconsquares squares iconheart heart iconheart solid heart solid icon
Milk Chocolate Pudding with Chantilly Cream & Hazelnut Brittle

Milk Chocolate Pudding with Chantilly Cream & Hazelnut Brittle


5 Stars 4 Stars 3 Stars 2 Stars 1 Star

No reviews

  • Author: Kimberly
  • Total Time: 35 min
  • Yield: 6 1x

Description

Recommended Equipment

  • sharp knife
  • cutting board
  • small pan
  • parchment paper
  • rolling pin
  • tall container
  • electric mixer
  • small pot
  • small glass
  • medium-sized bowl

Ingredients

Units Scale

HAZELNUT BRITTLE

  • 75 grams hazelnuts
  • 50 grams white sugar
  • 1 tbsp butter
  • pinch of salt

CHANTILLY CREAM

  • 100 milliliters heavy cream, cold
  • 25 grams powdered sugar

CHOCOLADE PUDDING

  • 300 milliliters whole-fat milk
  • 200 grams milk chocolate
  • 100 milliliters heavy cream
  • 30 grams white sugar
  • 15 grams cornstarch
  • 1 tsp vanilla extract

Instructions

  1. Hazelnut Brittle: First, finely chop the hazelnuts and set them aside. Next, prepare two sheets of parchment paper. Then, add the sugar and a pinch of salt to a small pan and heat it over medium heat until the sugar starts to become transparent. Once most of the sugar has melted, slowly stir with a spoon until the sugar turns amber. Quickly add 1 tablespoon of butter and stir well. Then, mix in the chopped hazelnuts and pour the entire mixture onto one of the sheets of parchment paper. Place the other sheet of parchment paper on top and roll it flat with a rolling pin. Set it aside to cool. Once the brittle has cooled, you can chop it into small crumbs with a knife or break it down in a food processor. Store it in a bag until ready to use.
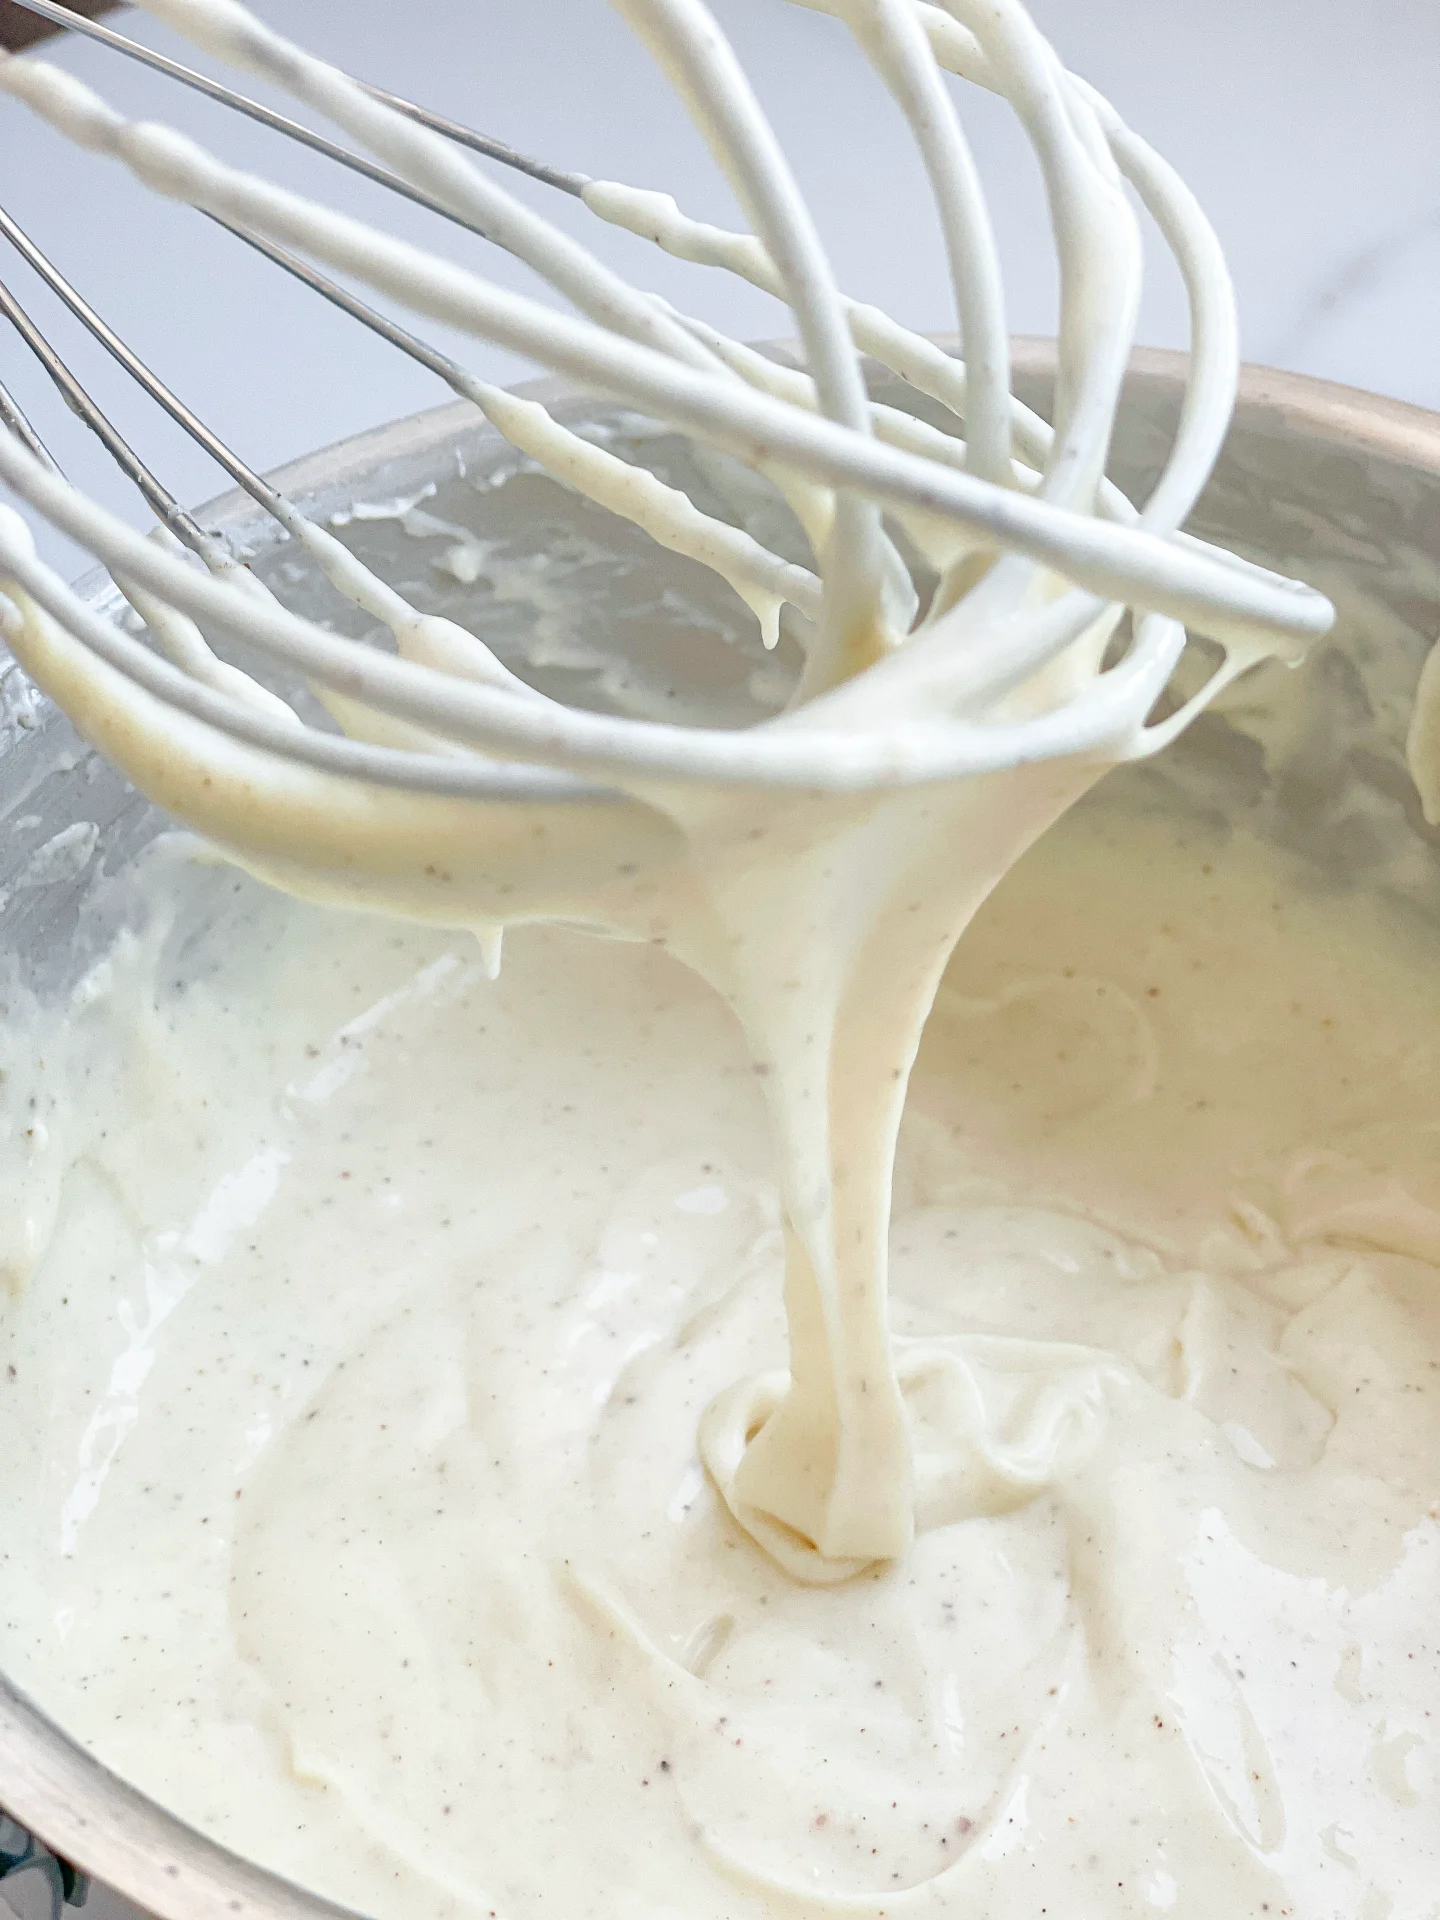
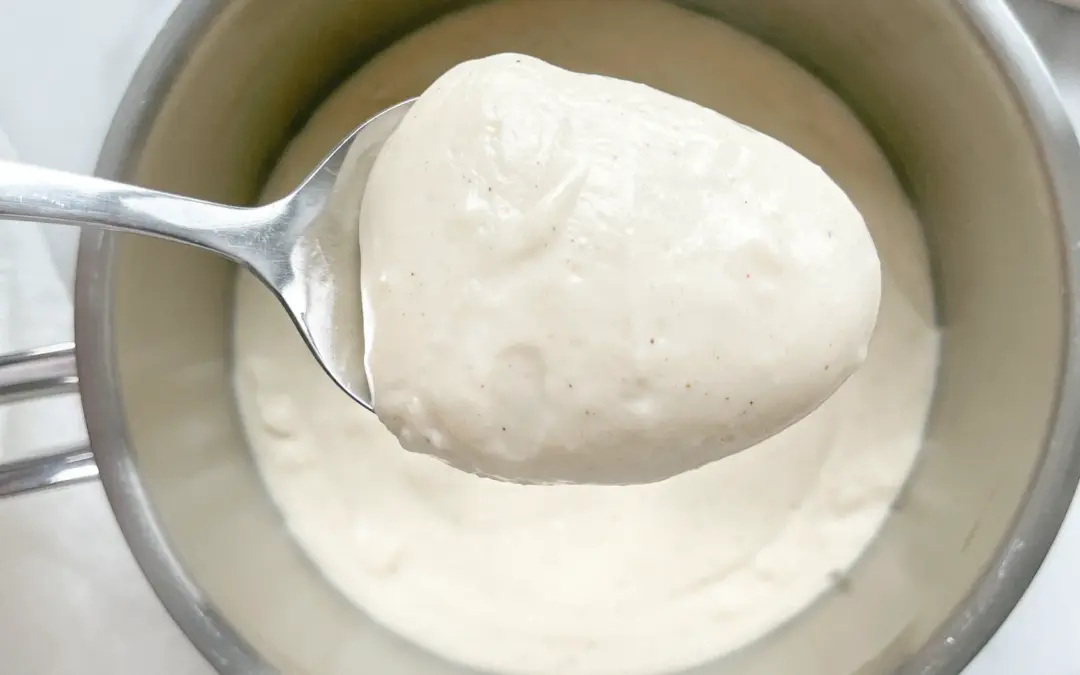
  2. Chantilly Cream: In a tall container, whip the cold cream at low speed while gradually adding the powdered sugar. Once the cream starts to thicken, increase the speed to medium and continue whipping until the cream is creamy and stiff. Keep it in the fridge until ready to use.
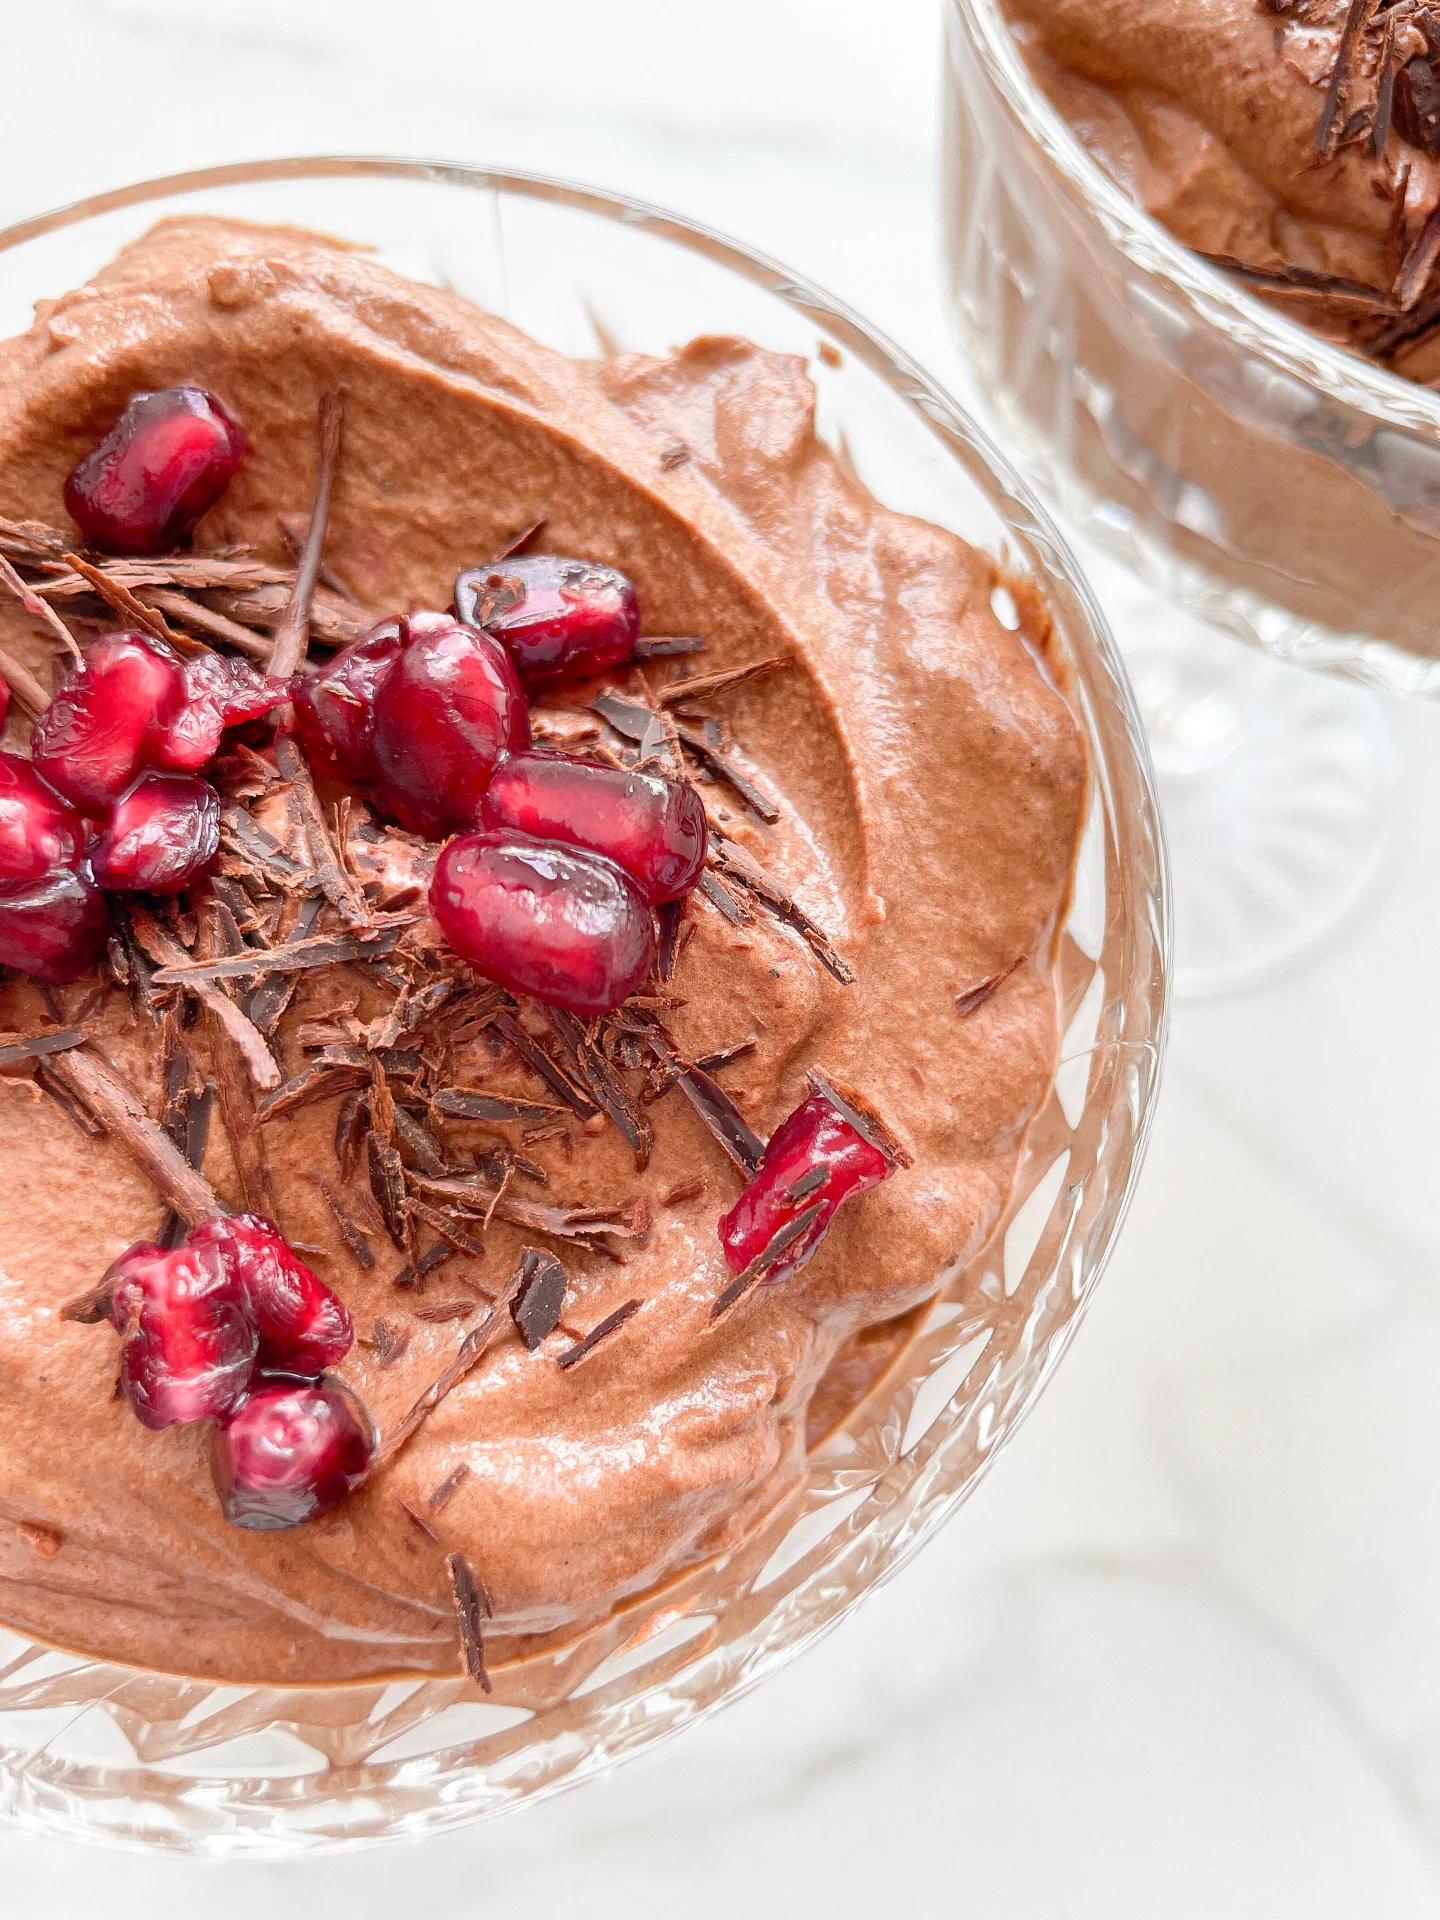
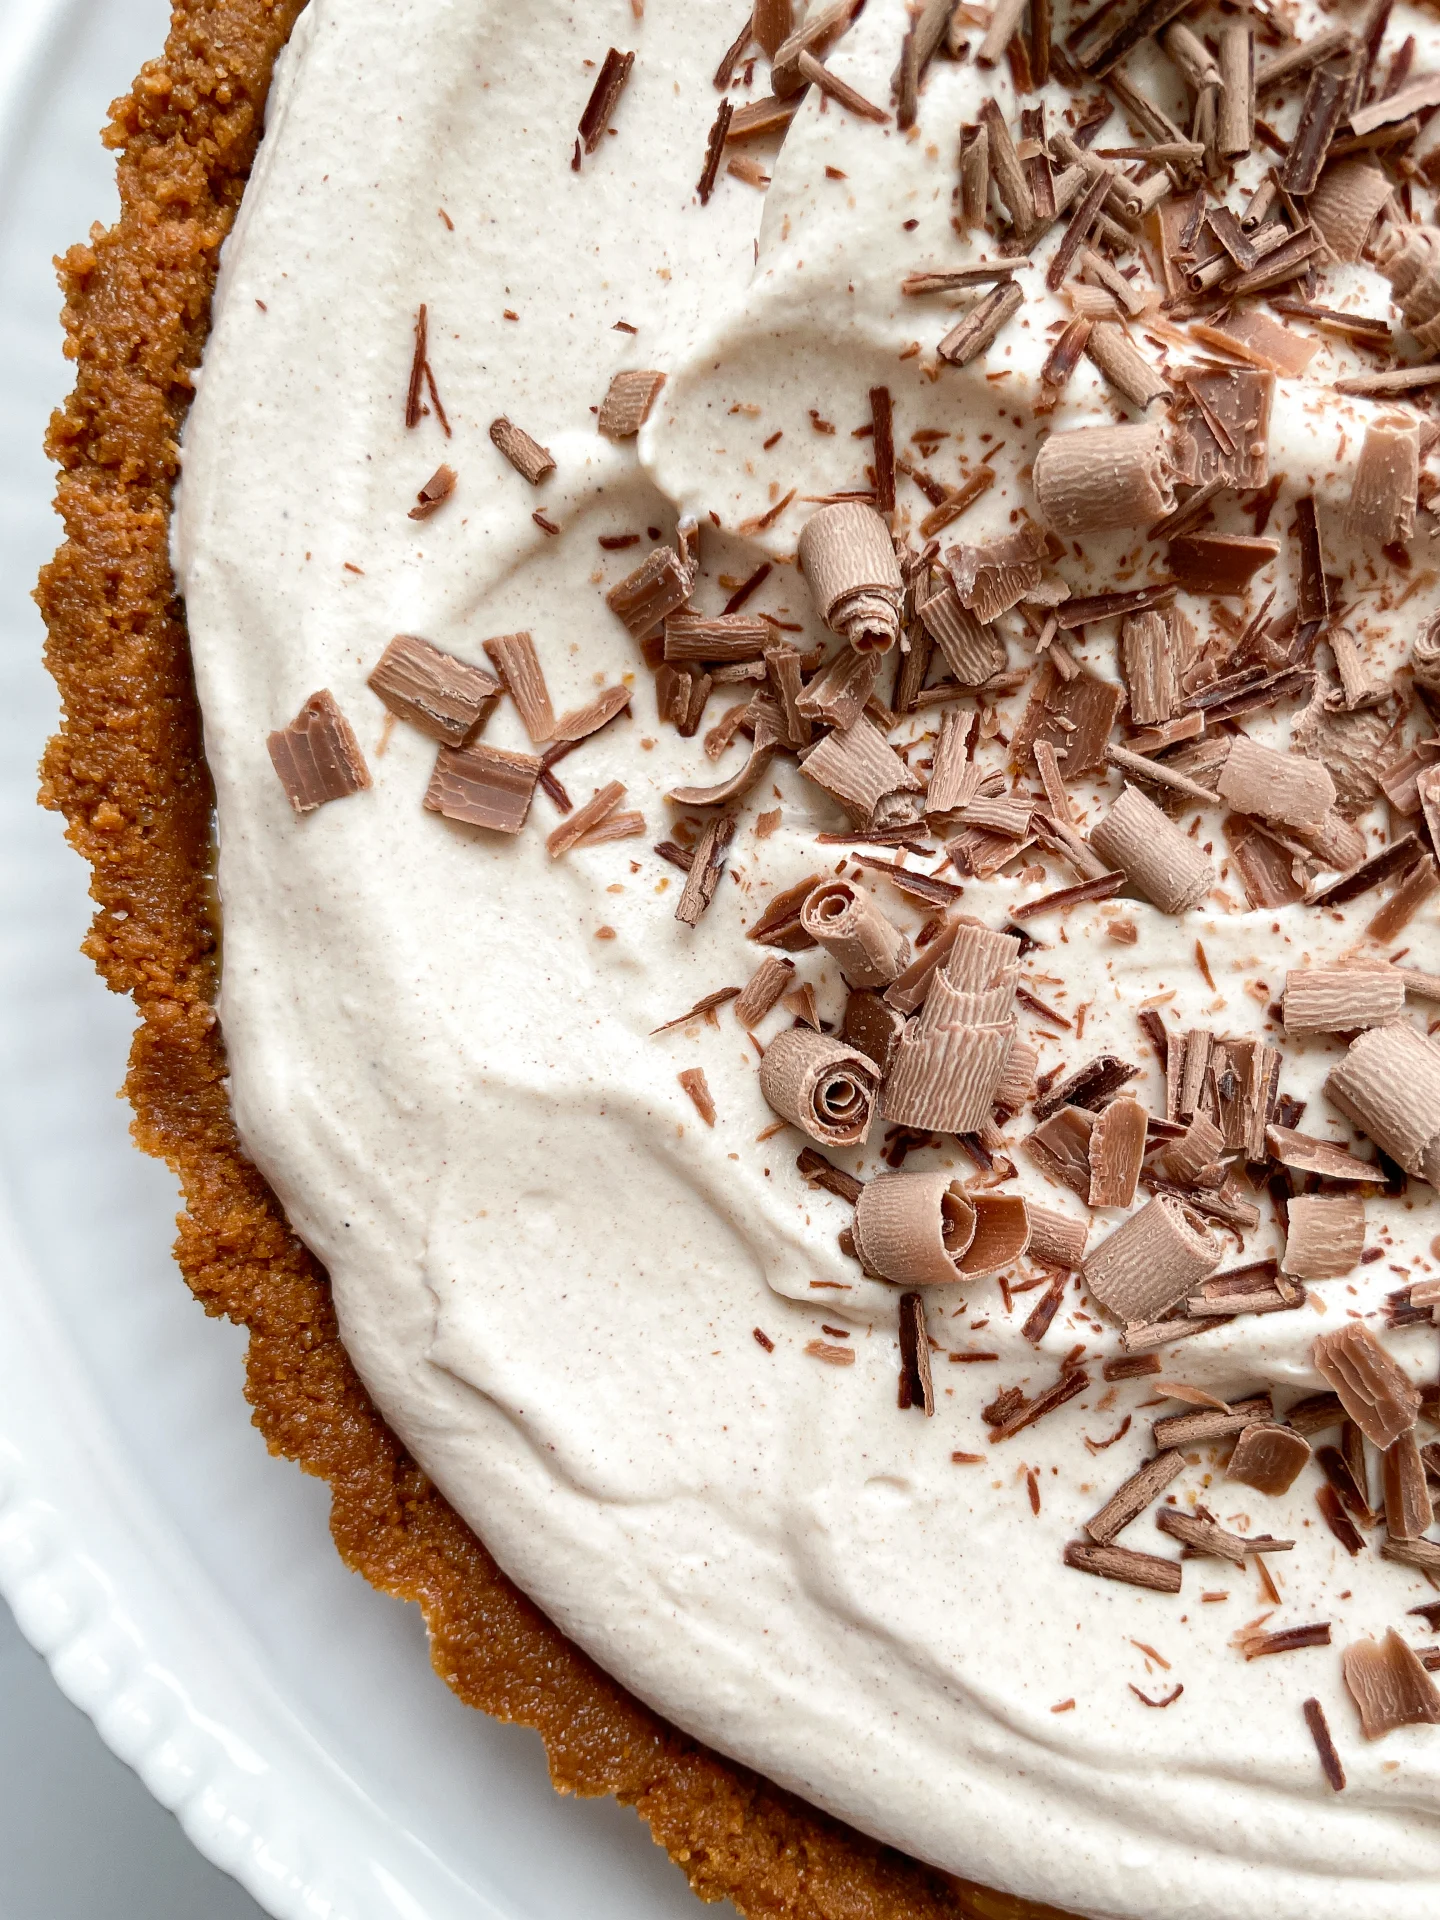
  3. Chocolate Pudding: In a small pot, combine 2/3 of the milk, cream, sugar (you can skip the sugar if you don’t like it too sweet), and vanilla extract, and heat over medium heat. Meanwhile, finely grate the chocolate. Remove the pot from the heat and stir in the chocolate until it melts. In a small glass, mix the remaining 1/3 of the milk with the cornstarch until smooth, then pour it into the chocolate pudding and bring it to a boil while stirring. The pudding will thicken as it cooks. You can either serve the pudding warm or pour it into a bowl and cover the surface with plastic wrap to prevent a skin from forming. Let the bowl cool to room temperature, then refrigerate until ready to serve.
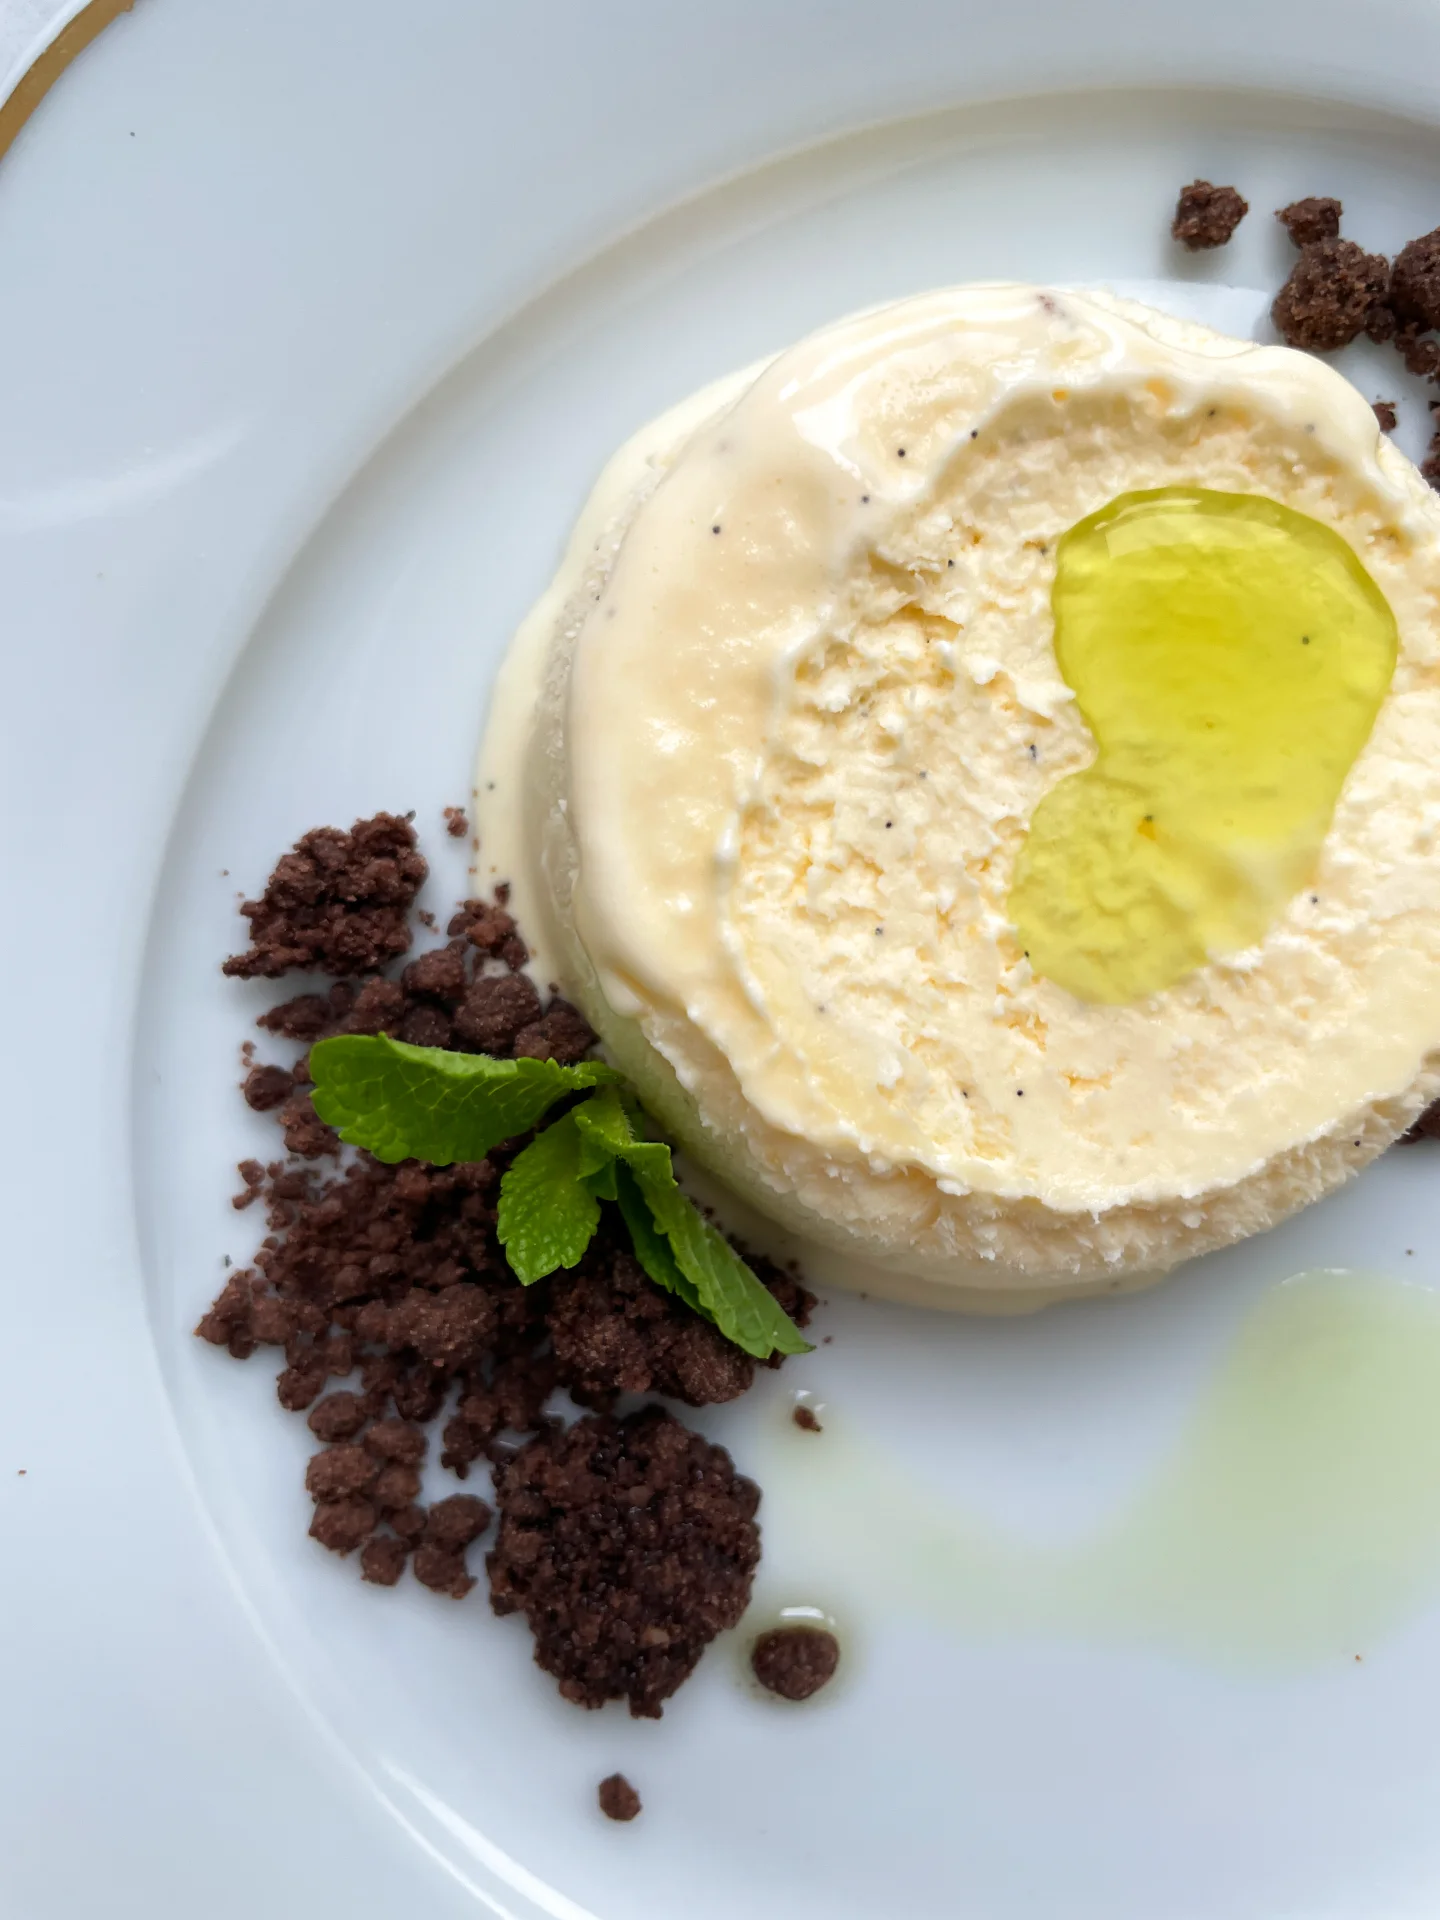
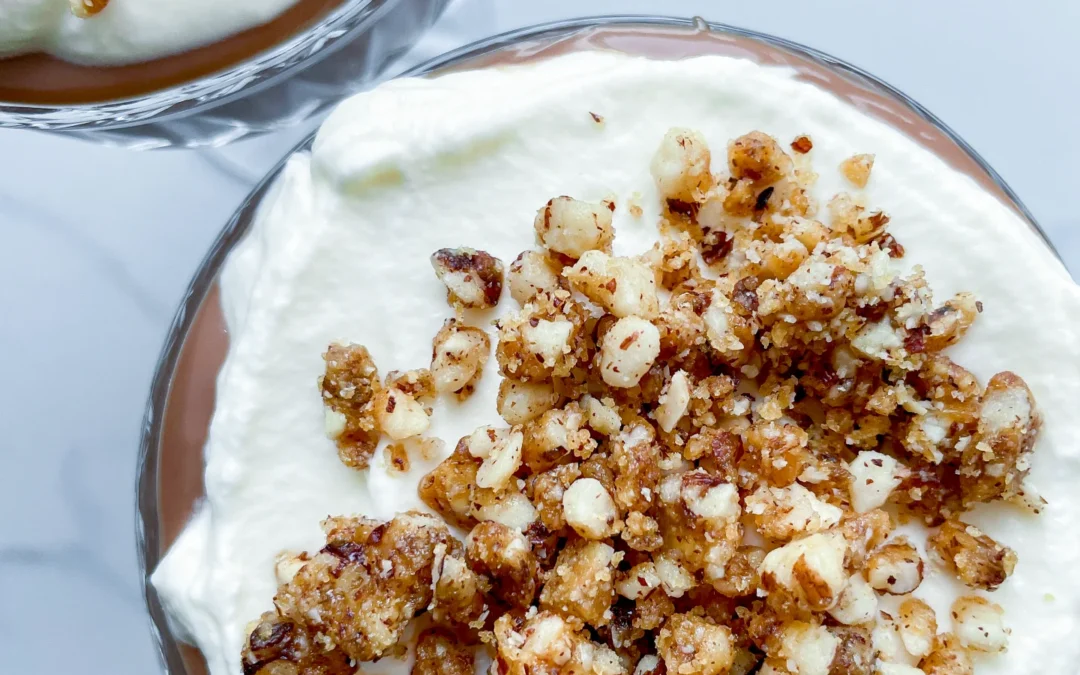
  4. To serve, spoon the pudding into glasses or bowls, top with 1-1.5 tablespoons of the Chantilly cream, and finish with a tablespoon of the hazelnut brittle.
  • Cook Time: 35 min

Cannelloni

Cannelloni

Cannelloni

Cannelloni

June 27, 2024 by Kimberly

Imagine biting into perfectly baked Cannelloni, stuffed with rich, savory beef filling, all wrapped in a golden, crispy bechamel parmesan top. It’s comfort food heaven in every bite!

2 HOURS
55 MINUTES

INTERMEDIATE

OMNIVORE

ITALIAN

872 PER PORTION

COMFORT FOOD

CLASSICS

DINNER

ALL YEAR

INTRODUCTION

ABOUT THE RECIPE

Cannelloni, the classic Italian comfort dish, is a true crowd-pleaser with its hearty fillings and rich, creamy sauce. Perfect for gatherings, it promises to be the star of your dining table.

How to serve
Serve your Cannelloni fresh out of the oven, topped with parmesan for that irresistible cheese pull. Accompany it with a simple green salad and a glass of delicious red wine for an authentic Italian dining experience. Whether it’s a cozy family dinner or a more festive occasion, cannelloni adapts to both, pleasing everyone who takes a bite.

How to store
Leftover Cannelloni can be refrigerated in an airtight container for up to three days, making it a fantastic make-ahead dish. Simply reheat in the oven until thoroughly warm and enjoy!

Hi, I'm Kimberly!

Hi, I'm Kimberly.

A passionate food lover who believes in the magic of homemade deliciousness that spreads love and warmth. Join me on this culinary adventure as I prepare wonderful dishes and let’s spread some happiness together!

Kimberly the Zett Signature

If you want to get to know me better, click here!


Cannelloni
Cannelloni
Cannelloni
„Let’s make a piece of happiness“
Print
clock clock iconcutlery cutlery iconflag flag iconfolder folder iconinstagram instagram iconpinterest pinterest iconfacebook facebook iconprint print iconsquares squares iconheart heart iconheart solid heart solid icon
Cannelloni

Cannelloni


  • Author: Kimberly
  • Total Time: 2 hrs 55 min
  • Yield: 6 1x

Description

Recommended Equipment

  • sharp knife
  • cutting board
  • vegetable peeler
  • large pot
  • baking dish
  • medium-sized pot
  • whisk
  • medium-sized bowl
  • piping bag

Ingredients

Units Scale
  • 24 cannelloni roles
  • 40 grams parmesan
  • 125 grams mozzarella
  • fresh basil

BEEF SAUCE

  • 500 grams minced beef
  • 500 grams minced pork
  • 700 milliliters beef stock
  • 1 tbsp butter
  • 1 tbsp clarified butter
  • 1 white onion
  • 1/2 celery stick
  • 1 carrot
  • 4 garlic cloves
  • 100 milliliters dry white wine
  • 800 grams canned tomatoes
  • 2 tbsp tomato paste
  • 1/2 tsp oregano
  • 1/4 tsp cinnamon
  • 1/4 tsp chili flakes
  • 1 tsp salt
  • 1/4 tsp black pepper

BECHAMEL SAUCE

  • 500 milliliters full-fat cow milk
  • 50 grams butter
  • 50 grams all-purpose flour
  • 1/8 tsp white pepper
  • 3/8 tsp salt
  • freshly grated nutmeg to taste

Instructions

  1. Peel the carrots, onion, and garlic, and chop them along with the celery into very small pieces. Set aside.
  2. Melt the clarified butter in a large pot and thoroughly brown the minced meat until a nice crust forms on the bottom. Then remove the meat from the pot and set it aside in a bowl.
  3. Now add the carrots, onion, garlic, and celery to the pot with 1 tbsp butter and sauté for about 5 minutes until soft. Deglaze with white wine and scrape up the crusty from the bottom. Return the ground meat to the pot along with tomato paste and a pinch of salt. Sauté for 1-2 minutes.
  4. Add beef broth and canned tomatoes and simmer over medium heat for about 1 hour without a lid. The consistency should be creamy-thick, neither too liquid nor too solid, just firm enough so that it doesn’t run out of the cannelloni when filling them. Now add oregano, salt, pepper, chili, and cinnamon, and season well. Set the filling aside to cool slightly.
  5. Meanwhile, prepare the béchamel sauce. The recipe can be found here: Béchamel Sauce. Once prepared, set it aside. Preheat the oven to 200°C / 392°F.
  6. Set up your cannelloni filling station. You’ll need the meat filling in the pot, a piping bag, a baking dish, and a spoon. Place about 4 tablespoons of the meat filling at the bottom of the baking dish. Fill your piping bag with a few tablespoons of the filling and pipe it into the cannelloni. I recommend not overfilling the piping bag to maintain control. Fill all the cannelloni one by one and arrange them in a single layer over the sauce in your baking dish. Spread the remaining sauce over the cannelloni.
  7. Next, pour the béchamel over the cannelloni, ensuring all gaps are filled with sauce. Top with grated mozzarella and Parmesan.
  8. Cover the baking dish with aluminum foil and bake for 30 minutes. After 30 minutes, remove the foil, increase the oven temperature to 220°C / 428°F, and bake for an additional 15 minutes until the cheese is crispy. Optionally, you can slice fresh basil into fine strips and sprinkle over the cannelloni.

Notes

The calorie information may vary depending on the product used, country and region.

  • Passive Time: 1 hour 45 min
  • Cook Time: 60 min

Pollo Tonnato

Pollo Tonnato

Pollo Tonnato

Pollo Tonnato

June 22, 2024 by Kimberly

Unleash the flavors with this delightful twist on the classic Vitello Tonnato! Tender chicken meets a creamy, tangy sauce for a dish that’s both satisfying and refreshingly different.

10 MINUTES

EASY

OMNIVORE

ITALIAN

439 PER PORTION

UMAMI
CREAMY

EVERDAY

LUNCH

ALL YEAR

INTRODUCTION

ABOUT THE RECIPE

Bring a slice of Italian flair to your table with Pollo Tonnato, a dish where simplicity and sophistication meet. This unique combination of tender chicken and a creamy tuna-based sauce offers a refreshing change from the usual veal recipe.

How to serve
Slice the chicken and drizzle with the rich tuna sauce, garnish with capers or lemon slices, and serve alongside a crisp green salad or fresh bread for a complete meal.

How to store
Store leftovers in an airtight container in the refrigerator. Enjoy within one day for the best freshness and taste.

Hi, I'm Kimberly!

Hi, I'm Kimberly.

A passionate food lover who believes in the magic of homemade deliciousness that spreads love and warmth. Join me on this culinary adventure as I prepare wonderful dishes and let’s spread some happiness together!

Kimberly the Zett Signature

If you want to get to know me better, click here!


Pollo Tonnato
Pollo Tonnato
Pollo Tonnato
„Let’s make a piece of happiness“
Print
clock clock iconcutlery cutlery iconflag flag iconfolder folder iconinstagram instagram iconpinterest pinterest iconfacebook facebook iconprint print iconsquares squares iconheart heart iconheart solid heart solid icon
Pollo Tonnato

Pollo Tonnato


  • Author: Kimberly
  • Total Time: 10 minutes
  • Yield: 2 as main 1x

Description

Recommended Equipment

  • glass jar
  • measuring spoons
  • immersion blender
  • large plate

Ingredients

Units Scale
  • 150 grams grilled chicken breast
  • 1 tsp capers
  • a hand full of arugula salad

SAUCE

  • 125 grams canned tuna in water, drained
  • 1 tbsp capers
  • 2 anchovies
  • 3 tbsp mayonnaise
  • juice of half a lemon
  • 4 tbsp extra-virgin olive oil
  • 1 tsp dijon mustard
  • salt to taste

Instructions

  • In a tall glass jar, add drained tuna and the following ingredients: 1 tbsp capers, 2 anchovies, 3 tbsp mayonnaise, the juice of half a lemon, 4 tbsp olive oil, and 1 tsp Dijon mustard. Then, use an immersion blender to puree everything into a creamy mixture. Season with salt to taste.
  • On a large plate, arrange the grilled chicken breast slices overlapping. Spread the tuna cream over the chicken slices, making sure some of the meat is still visible at the edges. Top with 1 tsp capers, grind fresh pepper over it, and place a handful of washed arugula in the center. Best served immediately or stored in the refrigerator until ready to eat.

Notes

The calorie information may vary depending on the product used, country and region.

  • Cook Time: 10 min

Vanilla Sauce

Vanilla Sauce

Vanilla Sauce

Vanilla Sauce

May 29, 2024 by Kimberly

Discover the ultimate vanilla sauce that’s creamy, rich, and perfect for all your desserts. It adds a deliciously sweet touch to every bite!

20 MINUTES

INTERMEDIATE

VEGETARIAN

FRENCH

236 PER PORTION

CREAMY
SWEET

CLASSICS

DESSERT

ALL YEAR

INTRODUCTION

ABOUT THE RECIPE

Vanilla sauce is a classic dessert topping that transforms any dish into a gourmet treat. This creamy and rich sauce is perfect for drizzling over cakes, pies, and fresh fruit. Easy to make and absolutely delicious, it’s a must-have recipe in your dessert repertoire.

How to serve
Serve this delightful vanilla sauce warm over a slice of apple pie, or drizzle it over a bowl of fresh berries for a simple yet elegant dessert. It’s also fantastic on bread pudding, pancakes, or even ice cream. The possibilities are endless, making it a versatile addition to your kitchen.

How to store
To store your vanilla sauce, let it cool completely before transferring it to an airtight container. Keep it refrigerated and it will stay fresh for up to 2 days. When ready to use, gently reheat it on the stove or in the microwave, stirring occasionally to maintain its smooth texture or serve it chilled straight from the fridge.

Hi, I'm Kimberly!

Hi, I'm Kimberly.

A passionate food lover who believes in the magic of homemade deliciousness that spreads love and warmth. Join me on this culinary adventure as I prepare wonderful dishes and let’s spread some happiness together!

Kimberly the Zett Signature

If you want to get to know me better, click here!


Vanilla Sauce
Vanilla Sauce
Vanilla Sauce
„Let’s make a piece of happiness“
Print
clock clock iconcutlery cutlery iconflag flag iconfolder folder iconinstagram instagram iconpinterest pinterest iconfacebook facebook iconprint print iconsquares squares iconheart heart iconheart solid heart solid icon
Vanilla Sauce

Vanilla Sauce


  • Author: Kimberly
  • Total Time: 20 minutes
  • Yield: 4 1x

Description

RECOMMENDED EQUIPMENT

  • 2 small pots
  • medium glass or aluminum bowl
  • whisk
  • spatula
  • sharp knife
  • cutting board

Ingredients

Units Scale
  • 150 milliliters heavy-cream
  • 150 milliliters whole-fat milk
  • 3 egg yolks
  • 50 grams brown sugar
  • 1 vanilla bean
  • pinch of salt

Instructions

  1. Pour the cream and milk into a pot. Slice the vanilla bean lengthwise, scrape out the seeds, and add both the seeds and the bean to the pot with the cream and milk. Bring to a simmer over medium heat, then set aside.
  2. Meanwhile, fill another pot halfway with water and bring it to a simmer.
  3. Separate the eggs and place the yolks in a medium glass or aluminum bowl. Add the brown sugar and salt, then whisk until smooth. The egg whites aren’t needed for this recipe, but you can use them to make delicious meringue.
  4. Remove the pot with the water from the heat and place the bowl with the egg-sugar mixture on top. The bottom of the bowl should not touch the water. Gradually add the hot cream to the egg-sugar mixture, whisking constantly. If you’re doing this alone, add a few tablespoons at a time and whisk quickly, repeating until about 3/4 of the cream is incorporated. This slow addition prevents the egg yolks from curdling by gently warming them. When most of the cream is added, pour in the rest and whisk.
  5. Place the pot with the bowl back on the stove over medium-high heat and switch from the whisk to a spatula. The spatula incorporates less air, preventing the sauce from becoming foamy. Stir the mixture with the spatula until it thickens, about 10 minutes, or until it reaches 75°-79°C (167°-174°F).
  6. To check if the sauce is ready, you can use a simple trick known as „coating the back of a spoon“ or as we say in Germany „pull off to the rose“. Dip a wooden spoon into the sauce and blow on the back of the spoon. If you see a pattern that resembles rose petals, the sauce is ready. A nice visual, right? So when you see this, remove the sauce from the heat. You can serve it now warm or let it cool. Enjoy this piece of happiness 🙂

Notes

NOTE: The calorie information may vary depending on the product used, country and region.

  • Cook Time: 20 min

Apple Crumble

Apple Crumble

Apple Crumble

Apple Crumble

December 3, 2023 by Kimberly

Apple crumble, a quick and delicious dessert for everyone. Sliced apples coated in cinnamon, topped with a quick crumble, and baked to perfection. A speedy treat satisfying every sweet tooth!

60 MINUTES

EASY

VEGETARIAN

ENGLISH

450 PER PORTION

COMFORT FOOD

CLASSIC

DESSERT

AUTUMN
WINTER

INTRODUCTION

ABOUT THE RECIPE

Once upon a kitchen, there was Apple Crumble…

Picture a cozy apple crumble, fresh and warm. Its golden-brown, cinnamon-kissed top teases your senses. The sweet smell of baked apples promises flavorful joy. Each bite reveals tender apples under a crumbly layer, with a buttery crunch. To make it even more special, imagine a silky vanilla sauce generously poured over, creating a rich, creamy magic. The sauce enhances the apple sweetness, creating a luxurious harmony. Each spoonful is like a warm hug of sweetness and nostalgia.

How to serve
To serve your delightful apple crumble, scoop generous portions onto plates while it’s still warm. Pair it with a scoop of vanilla ice cream for an extra treat. The contrasting temperatures create a heavenly experience. If you prefer a simpler approach, a dollop of whipped cream or a drizzle of caramel sauce also works wonders. For a cozy touch, consider serving it with a hot cup of coffee or tea.

How to store
When it comes to storing apple crumble, keep it in an airtight container in the refrigerator. This helps preserve its freshness and flavor. Before refrigerating, let it cool to room temperature. To reheat, use the oven for a few minutes to regain its warmth and crispiness. Alternatively, you can microwave individual servings for a quick fix. Just remember, while it can be stored, apple crumble is at its best when enjoyed freshly baked.

Hi, I'm Kimberly!

Hi, I'm Kimberly.

A passionate food lover who believes in the magic of homemade deliciousness that spreads love and warmth. Join me on this culinary adventure as I prepare wonderful dishes and let’s spread some happiness together!

Kimberly the Zett Signature

If you want to get to know me better, click here!


Apple Crumble
Apple Crumble
Apple Crumble

„Let’s make a piece of happiness“

Print
clock clock iconcutlery cutlery iconflag flag iconfolder folder iconinstagram instagram iconpinterest pinterest iconfacebook facebook iconprint print iconsquares squares iconheart heart iconheart solid heart solid icon
Apple Crumble

Apple Crumble


  • Author: Kimberly
  • Total Time: 60 min
  • Yield: 4 1x
  • Diet: Vegetarian

Description

RECOMMENDED EQUIPMENT
  • 1 sharp knife
  • 1 medium bowl
  • 1 spoon
  • 1 baking dish 20 x 20 cm (8×8 inch)

Ingredients

Units Scale

FILLING

  • 3 apples (best use Granny Smith or Honeycrisp, but any other type will do)
  • 25 grams sugar
  • 1 tsp lemon juice
  • 1 tbsp corn starch
  • 1/4 tsp salt
  • 1/2 tsp cinnamon
  • 1 tsp vanilla extract

CRUMBLE

  • 100 grams all-purpose flour
  • 80 grams sugar
  • 1/2 tsp baking powder
  • 1/4 tsp salt
  • 1/4 tsp cinnamon
  • 85 grams butter

Instructions

PREPARATIONS

  • Preheat the oven to 190C° (375F°)
  • Peel 3 apples, remove the core, cut into bite-sized pieces and put the pieces in a bowl.
  • Melt 85g (4 tbsp) butter in a saucepan or in the microwave.

INSTRUCTIONS

  1. For the filling pour 1 tsp lemon juice over the chopped apples and mix. Then add sugar, cornstarch, salt, cinnamon and vanilla extract. Mix everything together.
  2. Place the apples in the baking dish and spread evenly.
  3. In the same bowl, mix the crumble. Add all-purpose flour, sugar, baking powder, salt, cinnamon and the melted butter. Mix everything together well to form a dough-like consistency. Place the bowl in the fridge for about 10 minutes.
  4. Crumble the mixture over the apples and spread evenly.
  5. Place the baking dish in the oven and bake at 190C° (375F°) for 35 minutes.
  6. Now you can top it with your favorites: This tastes delicious with warm vanilla sauce or cold vanilla ice cream. You can also add almonds on top. Make the apple crumble the way you like it best.

Notes

The calorie information may vary depending on the product used, country and region.

  • Prep Time: 5 min
  • Passive Time: 45 min
  • Cook Time: 10 min
  • Category: DESSERT
  • Method: BAKING
  • Cuisine: ENGLISH

Infused Béchamel Sauce

Infused Béchamel Sauce

Infused Béchamel Sauce

Infused Béchamel Sauce

March 13, 2024 by Kimberly

Discover the magic of infused béchamel sauce! This recipe blends rich, creamy milk with fragrant herbs to elevate your favorite dishes. A symphony of flavor awaits!

95 MINUTES

INTERMEDIATE

VEGETARIAN

FRENCH

213 PER PORTION

COMFORT FOOD / CREAMY

CLASSIC

SAUCE

ALL YEAR

INTRODUCTION

ABOUT THE RECIPE

Dive into the heartwarming world of homemade sauces with my infused béchamel sauce! This isn’t just any sauce – it’s a creamy, dreamy blend that transforms ordinary meals into gourmet experiences. By infusing milk with a bouquet of herbs, the classic béchamel is taken to new heights. Perfect for those looking to add a touch of elegance to their culinary creations.

How to serve:
Serve this infused béchamel sauce over pasta or your favorite vegetables. It pairs beautifully with lasagna, turning a simple dish into a lavish feast. Drizzle it over roasted potatoes or steamed broccoli to add a creamy, herby twist. Whether it’s a family dinner or a special occasion, this sauce brings sophistication and depth to any meal.

How to store:
Keep your infused béchamel sauce fresh by storing it in an airtight container in the refrigerator. It will stay delicious for up to 3 days.

Hi, I'm Kimberly!

Hi, I'm Kimberly.

A passionate food lover who believes in the magic of homemade deliciousness that spreads love and warmth. Join me on this culinary adventure as I prepare wonderful dishes and let’s spread some happiness together!

Kimberly the Zett Signature

If you want to get to know me better, click here!


Infused Béchamel Sauce
„Let’s make a piece of happiness“

INGREDIENTS

FOR 6-8 PORTIONS

INFUSED MILK

  • 700ml full-fat cow milk (3 cups)
  • 1 white onion
  • 3-4 parsley stems
  • 1 bay leaf
  • 1 tsp black pepper corns

BÉCHAMEL SAUCE

  • 70g butter (2.5 oz)
  • 70g all-purpose flour (2.5 oz)
  • 1 garlic clove
  • 1/2 tsp salt
  • 3/8 tsp white pepper
  • 1/2 nutmeg
Infused Béchamel Sauce
}

ACTIVE: 2 min

PASSIVE: –

PREPARATIONS

Recommended Equipment
  • sharp knife
  • cutting board
  • small pot
  • medium-sized pot
  • wooden spoon
  • whisk
  • grater
  • strainer
  • pouring jug
  • Peel the onion and cut it in half.
  • Peel the garlic clove and cut it into quarters.
}

ACTIVE: 35 min

PASSIVE: 60 min

COOKING

1. In a small pot, bring the milk to a simmer with the onion halves, parsley, bay leaf, and peppercorns over medium heat. Lower the temperature and let it simmer gently for 10 minutes.

2. After 10 minutes, remove the pot from the heat and let it sit, covered, for about 60-90 minutes to infuse.

3. Place a strainer over a measuring cup and pour the milk through it. Discard the solids. Set the strained milk aside.

4. In a medium-sized pot, melt the butter over medium heat. Add the quartered garlic clove and let it sizzle in the butter briefly, then remove it.

5. Add all the flour to the melted butter and stir quickly with a wooden spoon until smooth. The mixture should resemble a paste. Take the pot off the heat and whisk in the first 100ml (1/2 cup) of milk until smoothly combined. Return the pot to the stove and bring to a brief boil while stirring constantly – this will happen quickly. Remove from the heat again and add the next 100ml (1/2 cup) of milk. Stir well, return to the heat, and let it come to a boil again. Continue this process with the remaining milk, adding 100ml (1/2 cup) at a time: remove from heat, add milk, stir, return to heat, bring to boil, and repeat.

6. After about 25 minutes, the sauce should be similar in consistency to melted cheese and you shouldn’t taste the flour anymore. Now, take the sauce off the heat and season it. Grate in some fresh nutmeg and add 3/8 tsp of salt and 1/4 tsp of pepper.

NOTE: The calorie information may vary depending on the product used, country and region.