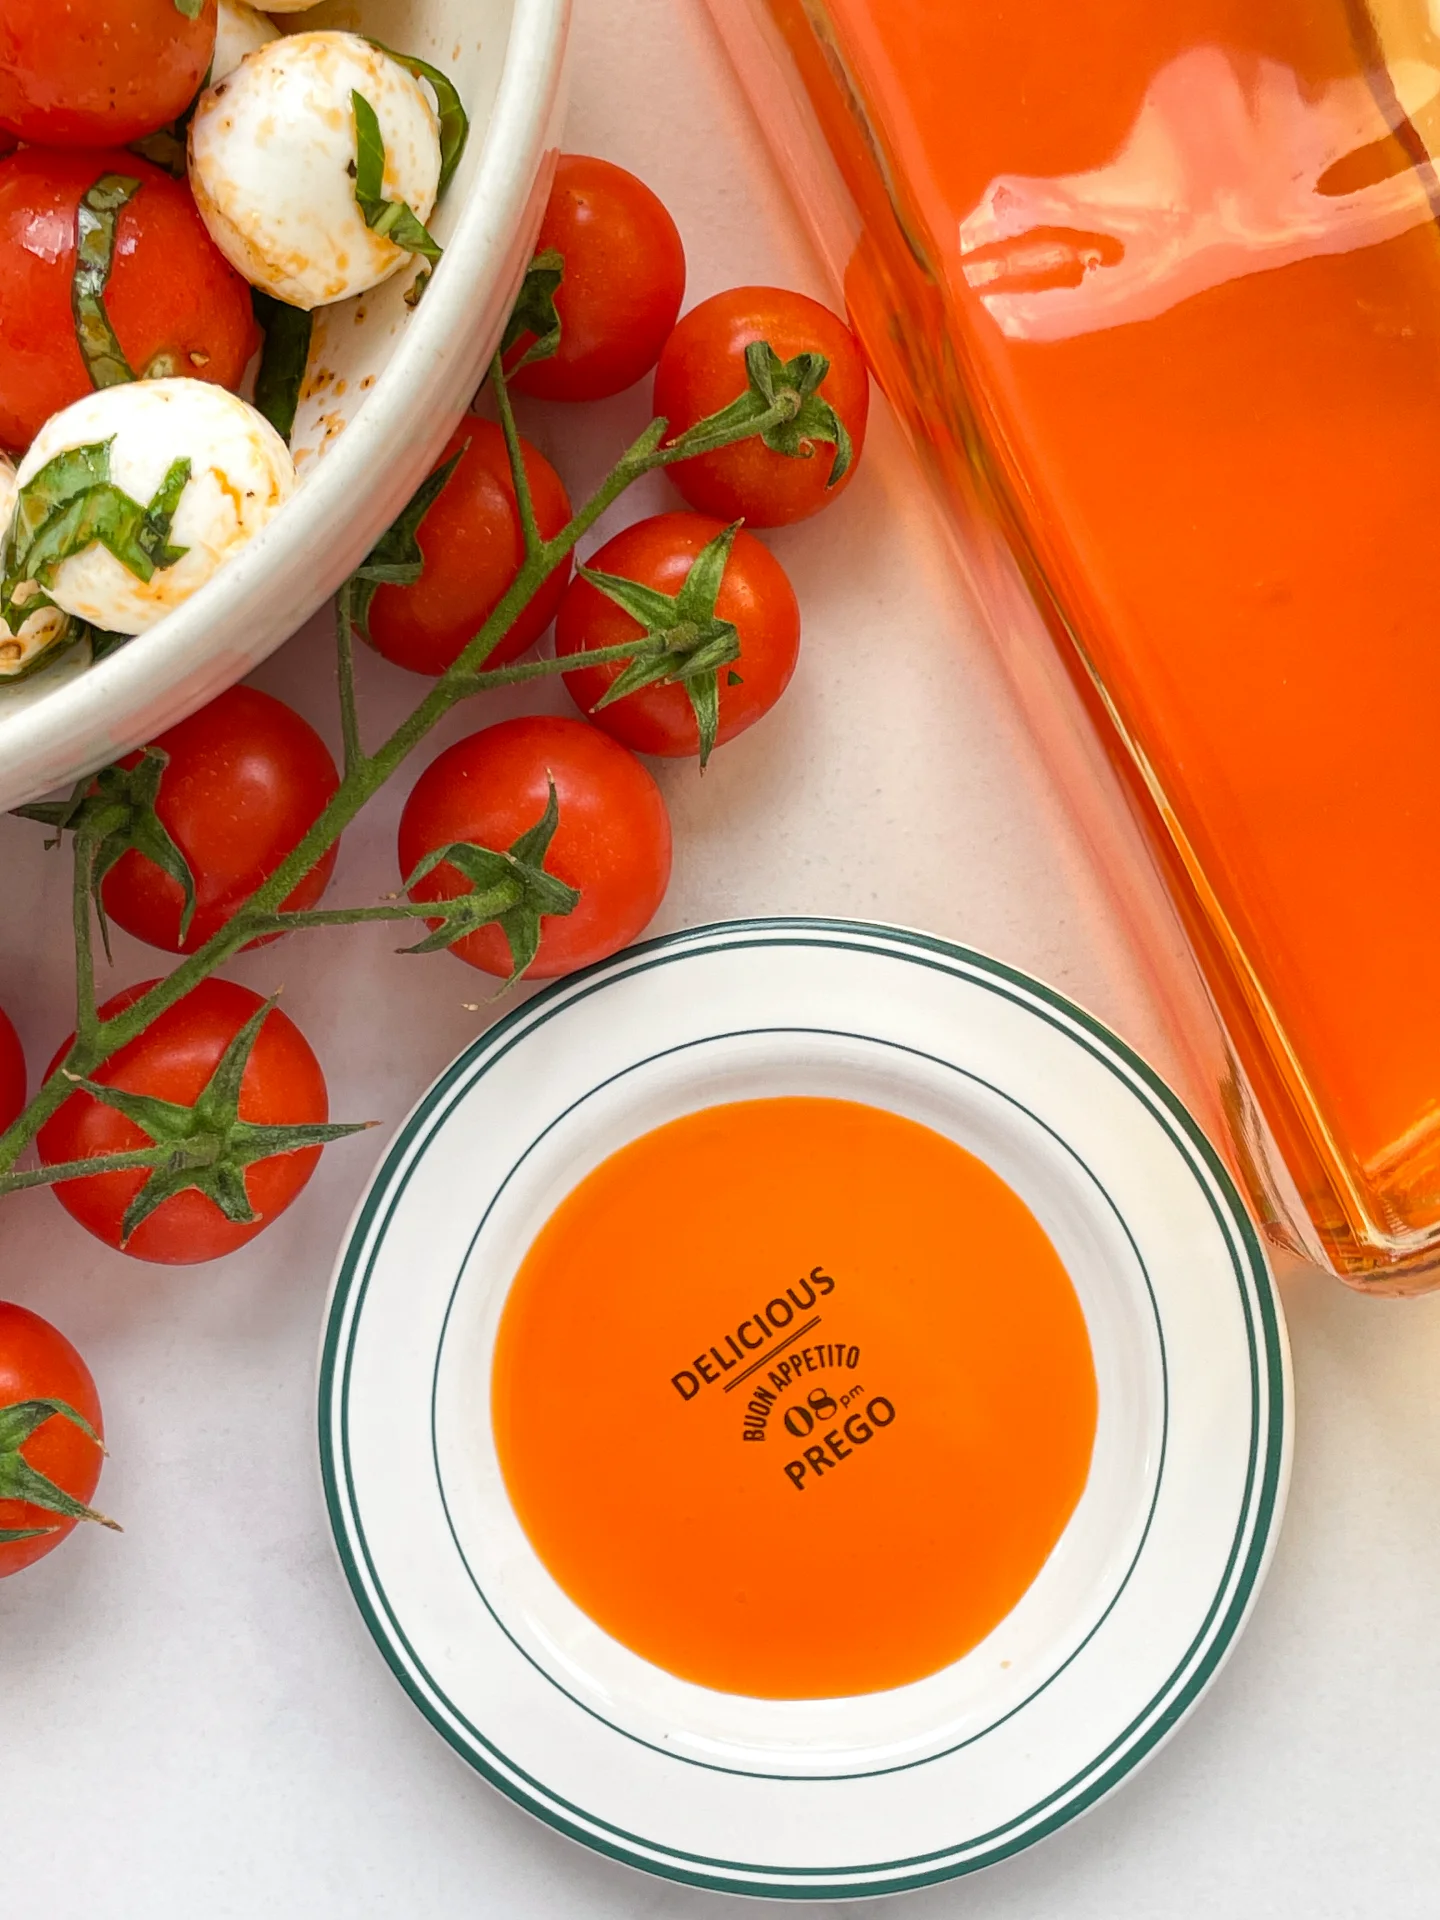
Bacon Onion Cheese Rolls & Poppy Seed Glaze

Bacon Onion Cheese Rolls & Poppy Seed Glaze

Bacon Onion Cheese Rolls & Poppy Seed Glaze

Bacon Onion Cheese Rolls & Poppy Seed Glaze

March 28, 2024 by Kimberly

Imagine soft, buttery rolls stuffed with crispy bacon, sweet caramelized onions, and gooey cheese, topped with a rich poppy seed glaze. It’s savory, satisfying, and pure comfort with every bite.

This website uses affiliate links which may earn commission for purchases made at no additional cost to you.

TOTAL TIME

2 hrs

SERVES

12 rolls

DIET

omnivore

EVERY RECIPE DESERVES

A Little Love Letter

Say hello to your new favorite snack! These savory rolls are the perfect combination of crispy bacon, caramelized onions, and melty cheese, all wrapped up in soft, buttery dough. Topped with a golden poppy seed glaze, they’re everything you didn’t know you needed for brunch, game day, or a cozy evening snack. Think warm, indulgent bites that feel like a little celebration in your kitchen. Simple to make and impossible to resist.

Serve these rolls fresh from the oven with a side of garlic herb butter or a tangy mustard dip for extra flavor. They’re perfect for brunch spreads, cozy dinner starters, or even as a party appetizer that everyone will rave about. Pair with a crisp salad or creamy soup for a balanced meal, or just enjoy them warm with your favorite drink for the ultimate comfort.

Keep any leftover rolls in an airtight container at room temperature for up to two days or refrigerate for up to four days. Reheat in the oven for 5-7 minutes at 180°C (350°F) to bring back their fresh, buttery goodness.

Hi, I'm Kimberly!

Hi, I'm Kimberly.

A hopeless romantic when it comes to food. Every recipe I share is a love letter to food itself. I’m so glad you’re here. Make yourself at home and stay a while.

Love,
Kimberly

Kimberly the Zett Signature

If you want to get to know me better,
click here!


Bacon Onion Cheese Rolls & Poppy Seed Glaze

LET’S MAKE A PIECE OF HAPPINESS

Print
clock clock iconcutlery cutlery iconflag flag iconfolder folder iconinstagram instagram iconpinterest pinterest iconfacebook facebook iconprint print iconsquares squares iconheart heart iconheart solid heart solid icon
Bacon Onion Cheese Rolls & Poppy Seed Glaze

Bacon Onion Cheese Rolls & Poppy Seed Glaze


5 Stars 4 Stars 3 Stars 2 Stars 1 Star

No reviews

  • Author: Kimberly
  • Total Time: 2 hrs
  • Yield: 12

Description

GOOD TO HAVE ON HAND

  • baking dish – my used measurements were 20x26cm (8×10 inch)
  • sharp knife
  • cutting board
  • medium-sized bowl
  • whisk
  • small bowl
  • pastry brush
  • spatula
  • large pan


Ingredients

Units Scale
DOUGH
  • 450 grams all-purpose flour
  • 180 milliliters full-fat cow milk
  • 2 tsp dry active yeast
  • 1 tbsp honey
  • 1 egg
  • 3 tbsp butter, room-temperature
  • 1/2 tsp salt
  • 1 tbsp olive oil for greasing the bowl
BACON
  • 250 grams bacon
  • 2 tsp dried thyme
  • 1 tbsp honey
  • 1/4 tsp cayenne pepper
  • 60 milliliter white wine (or any kind of stock)
CARAMALIZED ONIONS
  • 600 grams yellow onions
  • 1 tbsp butter
  • 1 tsp salt
  • 60 milliliter white wine (or any kind of stock)
POPPY SEED GLAZE
  • 2 tbsp butter, melted
  • 1 tsp Dijon mustard
  • 2 tsp brown sugar
  • 1 tsp poppy seeds
  • 1/2 tsp garlic powder
OTHER INGREDIENTS
  • 250 grams cheddar cheese
  • 1 tsp butter for greasing the baking dish

Instructions

  1. To make the dough, warm the milk slightly to 35–40°C (95–104°F) and mix it with the dry active yeast and honey in a small container. Let it sit for about 5 minutes until bubbles form, indicating the yeast is active. Meanwhile, in a medium-sized bowl, combine the egg, butter, and salt. Stir in the milk-yeast mixture until well incorporated. Gradually add the flour in four additions, mixing thoroughly after each one. Once the dough is firm enough, transfer it to a clean work surface and knead with the remaining flour until it becomes smooth, elastic, and soft. This should take about 10 minutes. Lightly oil a large bowl and place the dough ball inside. Coat the dough lightly with a bit more olive oil, then cover the bowl with cling film and a clean towel. Let it rest in a warm place for one hour.
  2. To make the caramelized onions, peel the onions, cut them into thin half-circles, and cook them in a large pan with a tablespoon of butter and a pinch of salt over low to medium heat. Stir occasionally, allowing them to caramelize slowly. This takes about 30 minutes, depending on the desired color. Finish by deglazing with a splash of white wine and letting it reduce briefly. Alternatively, you can use stock instead of wine. Remove the onions from the pan and set aside in a bowl.
  3. For the bacon, use the same pan you caramelized the onions in (no need for additional fat). Fry the bacon until crispy, then add fresh or dried thyme, a pinch of cayenne pepper, and a drizzle of honey. Let everything caramelize over medium heat before deglazing with a splash of white wine or stock. Allow the liquid to evaporate, then set the bacon aside.
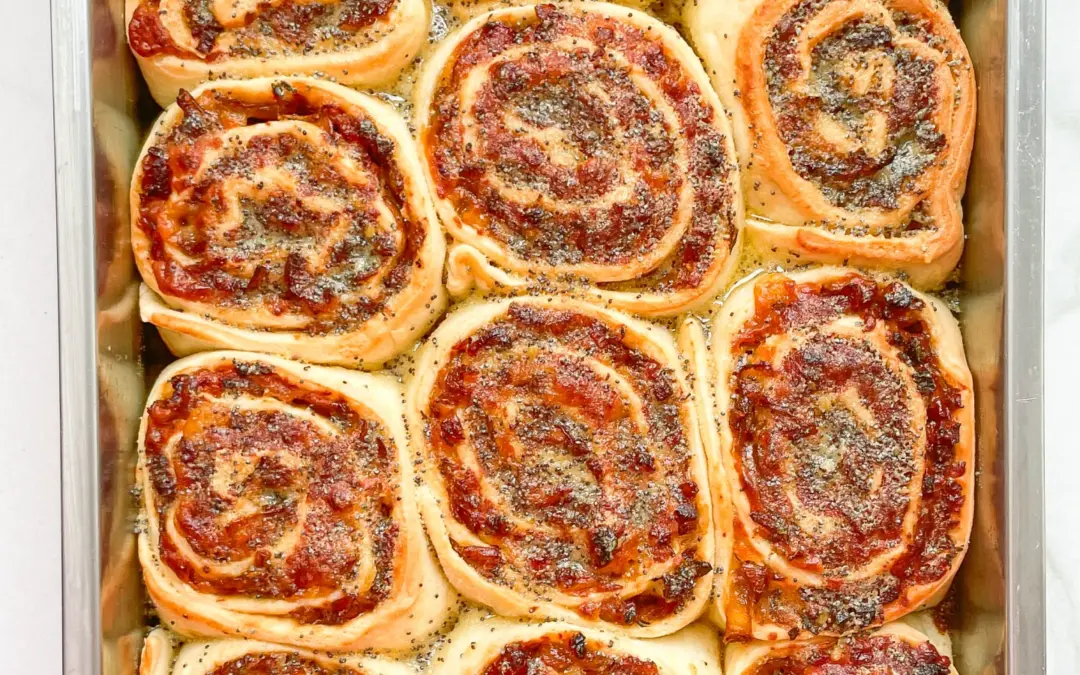
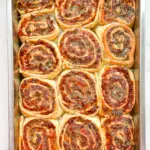
  4. Grease a baking dish with butter and set aside. Preheat the oven to 190°C / 375°F. Grate the cheddar cheese and set it aside. Dust a clean work surface with flour and place the dough ball on it. It should have doubled in size by now. Sprinkle the dough lightly with more flour and roll it out into a rectangle about 30×40 cm (12×16 inches). Spread half of the grated cheddar cheese evenly over the dough, followed by the caramelized onions and bacon. Top with the remaining cheese. Roll the dough tightly from the bottom upward, then cut it into 12 equal pieces. Place the rolls in the greased baking dish, cut side up. Cover the dish with cling film and a towel, and let it rest for another 30 minutes in a warm place.
  5. Bake the rolls in the preheated oven for about 30 minutes, or until golden brown. While the rolls bake, prepare the poppy seed glaze. In a small bowl, mix together melted butter, garlic powder, poppy seeds, brown sugar, and Dijon mustard.
  6. After 30 minutes of baking, remove the rolls from the oven and brush them evenly with the glaze. Return them to the oven and bake for another 5 minutes, being careful not to let them get too dark. Let the rolls cool for 15 minutes before serving. Enjoy!

  • Passive Time: 90 min
  • Cook Time: 30 min

CRAVING MORE?

Follow along here & don’t forget to subscribe to my substack!

Naan Bread

Naan Bread

Naan Bread

Naan Bread

February 24, 2024 by Kimberly

Discover the joy of homemade Naan Bread! Easy, fluffy, and delicious, it’s the perfect companion for any meal. Make it today and share the love!

This website uses affiliate links which may earn commission for purchases made at no additional cost to you.

TOTAL TIME

80 min

SERVES

4 naan

DIET

vegetarian

EVERY RECIPE DESERVES

A Little Love Letter

Dive into the delightful world of Indian cuisine with this easy Naan Bread recipe! Perfect for beginners and seasoned chefs alike, my homemade Naan is fluffy and irresistibly delicious. Whether you’re pairing it with your favorite indian butter chicken or enjoying it as a snack, this versatile bread is a must-try. Get ready to impress your family and friends with your baking skills and bring a piece of India right to your dinner table.

Serve your freshly baked Naan Bread alongside a variety of dishes to elevate your dining experience. It pairs wonderfully with curries, soups, and stews, absorbing all the flavors beautifully. For a modern twist, use it as a base for pizza or as a wrap for sandwiches. Don’t forget to brush it with garlic butter and sprinkle some cilantro on top for that extra burst of flavor.

To keep your Naan Bread fresh, wrap it in aluminum foil or store it in an airtight container at room temperature for up to 2 days. For longer storage, freeze the Naan, ensuring it’s well-wrapped, for up to a month.

Hi, I'm Kimberly!

Hi, I'm Kimberly.

A hopeless romantic when it comes to food. Every recipe I share is a love letter to food itself. I’m so glad you’re here. Make yourself at home and stay a while.

Love,
Kimberly

Kimberly the Zett Signature

If you want to get to know me better,
click here!


Naan Bread
Naan Bread

LET’S MAKE A PIECE OF HAPPINESS

Print
.tasty-recipe-responsive-iframe-container-b54b3a9f { position: relative; overflow: hidden; padding-top: 177.62%; } .tasty-recipe-responsive-iframe-container-b54b3a9f iframe { position: absolute; top: 0; left: 0; width: 100%; height: 100%; border: 0; } clock clock iconcutlery cutlery iconflag flag iconfolder folder iconinstagram instagram iconpinterest pinterest iconfacebook facebook iconprint print iconsquares squares iconheart heart iconheart solid heart solid icon
Naan Bread

Naan Bread


  • Author: Kimberly
  • Total Time: 80 min
  • Yield: 4

Description

GOOD TO HAVE ON HAND

  • medium-sized bowl
  • cling film
  • frying pan


Ingredients

Units Scale
  • 250 grams all-purpose flour
  • 1 tsp baking powder
  • 1/2 tsp salt
  • 30 grams full-fat yogurt
  • 125 milliliters lukewarm water

Instructions

  1. Mix the all-purpose flour, salt and baking powder in a medium-sized bowl. Add the yogurt and water and mix with a spatula or spoon to form a rough dough. Transfer the dough to a clean work surface and knead by hand to form a smooth dough. Wrap in cling film and leave to rest at room temperature for an hour.
  2. Unwrap the dough, divide it into four equal pieces on a floured surface and roll out each piece into a 20cm (8 inch) flatbread.
  3. Use a hot pan without fat to fry each side of the flatbread for about two to three minutes. Bubbles will form on the top side, which will fry until golden brown when turned over.
  • Passive Time: 60 min
  • Cook Time: 20 min

CRAVING MORE?

Follow along here & don’t forget to subscribe to my substack!

Light & Flavorful Blueberry Banana Cupcakes with Cream Cheese Frosting

Light & Flavorful Blueberry Banana Cupcakes with Cream Cheese Frosting

Light & Flavorful Blueberry Banana Cupcakes with Cream Cheese Frosting

Light & Flavorful Blueberry Banana Cupcakes with Cream Cheese Frosting

January 6, 2024 by Kimberly

Enjoy our Blueberry Banana Cupcakes, a refined sugar-free recipe, topped with creamy cheese frosting for a light, sweet delight blending natural fruitiness with rich smoothness.

This website uses affiliate links which may earn commission for purchases made at no additional cost to you.

TOTAL TIME

25 min

SERVES

12 cupcakes

DIET

vegetarian

EVERY RECIPE DESERVES

A Little Love Letter

These blueberry banana cupcakes are the kind of bake that instantly fills your kitchen with the scent of something cozy and inviting. They’re incredibly soft and light, made with ripe mashed bananas that add natural sweetness and moisture, and pockets of juicy blueberries that burst gently as they bake. Each bite feels fresh and bright, yet comforting in that nostalgic, homemade way.

What makes them truly special is how effortless they are: simple ingredients, a quick batter, and a result that tastes far more impressive than the time it takes to make them. They’re the kind of cupcakes you can whip up on a slow Sunday morning or bring to a last-minute gathering—and they’ll always feel like a thoughtful, homemade treat.

Once cooled, they’re topped with a silky, slightly tangy cream cheese frosting that pairs beautifully with the fruitiness of the cupcakes. It adds just the right amount of richness without overpowering the delicate flavors. Together, it’s a combination that feels both light and indulgent—perfect for brunch, spring and summer celebrations, or any moment that needs a little piece of happiness baked into it.

Hi, I'm Kimberly!

Hi, I'm Kimberly.

A hopeless romantic when it comes to food. Every recipe I share is a love letter to food itself. I’m so glad you’re here. Make yourself at home and stay a while.

Love,
Kimberly

Kimberly the Zett Signature

If you want to get to know me better,
click here!


Light & Flavorful Blueberry Banana Cupcakes with Cream Cheese Frosting

LET’S MAKE A PIECE OF HAPPINESS

Print
.tasty-recipe-responsive-iframe-container-8634009c { position: relative; overflow: hidden; padding-top: 177.62%; } .tasty-recipe-responsive-iframe-container-8634009c iframe { position: absolute; top: 0; left: 0; width: 100%; height: 100%; border: 0; } clock clock iconcutlery cutlery iconflag flag iconfolder folder iconinstagram instagram iconpinterest pinterest iconfacebook facebook iconprint print iconsquares squares iconheart heart iconheart solid heart solid icon
Light & Flavorful Blueberry Banana Cupcakes with Cream Cheese Frosting

Light & Flavorful Blueberry Banana Cupcakes with Cream Cheese Frosting


  • Author: Kimberly
  • Total Time: 25 min
  • Yield: 12 cupcakes

Description

GOOD TO HAVE ON HAND

  • cupcake tin
  • baking paper
  • large bowl
  • medium bowl
  • hand mixer


Ingredients

Units Scale
CUPCAKES
  • 3 ripe bananas
  • 50 milliliters coconut oil
  • 80 grams agave syrup
  • 1 egg
  • 1 tsp vanilla extract
  • 180 grams all-purpose flour
  • 1 tsp baking soda
  • 1 tsp baking powder
  • 1/2 tsp salt
  • 160 grams frozen blueberries
FROSTING
  • 230 grams cream cheese
  • 250 grams yogurt
  • 50 milliliters agave syrup
  • 1 tsp lemon juice
  • 1/2 tsp vanilla extract

Instructions

  1. Preheat the oven to 180°C (350°F) and line a 12-cup cupcake tin with baking paper and set aside.
  2. In a large bowl, mash the bananas with a fork to a mash. Mix in the coconut oil, agave syrup, egg and vanilla.
  3. Now add the flour, baking soda, baking powder and salt to the bowl and mix everything together until a creamy dough forms, do not overmix. Fold in the blueberries but set aside about 1 tablespoon of them for later.
  4. Fill the cupcake tins about 2/3 full. Now bake for 16 minutes. I bake them in two batches of 6 so that the cupcakes have more room to rise.
  5. Meanwhile, prepare the cream cheese frosting. Place the cream cheese, yoghurt, agave syrup, vanilla extract and lemon juice in a mixing bowl and beat with a hand mixer until stiff peaks form and a firm cream has formed,
  6. Take the cupcakes out of the oven and leave to cool on a wire rack. As soon as the cupcakes are at room temperature, the frosting can be spread on top. Warm the remaining blueberries in a small pot or in the microwave until they turn into a sauce. Let it cool and pour the sauce over the cupcakes just before serving.
  • Passive Time: 10 min
  • Cook Time: 15 min

CRAVING MORE?

Follow along here & don’t forget to subscribe to my substack!

Easy Ciabatta Buns

Easy Ciabatta Buns

Easy Ciabatta Buns

Easy Ciabatta Buns

December 27, 2023 by Kimberly

Soft and airy, easy ciabatta buns are perfect for sandwiches. Their golden crust and light texture make them a delightful choice for any meal or snack.

This website uses affiliate links which may earn commission for purchases made at no additional cost to you.

TOTAL TIME

4 hrs

SERVES

8 buns

DIET

vegan

EVERY RECIPE DESERVES

A Little Love Letter

Savor the simplicity of our easy ciabatta buns—a homemade delight with a golden crust and a soft, airy interior. Perfect for sandwiches or alongside a hearty meal, these buns require minimal effort for maximum flavor.

Serve these ciabatta buns fresh out of the oven for the ultimate experience. Ideal for crafting gourmet sandwiches or simply slathering with butter, their versatile nature complements any culinary creation. Embrace the warm, fluffy texture and revel in the homemade goodness.

To keep your ciabatta buns at their best, store them in a paper bag or bread box at room temperature. Avoid airtight containers to maintain the crisp crust. For longer freshness, freeze individually wrapped buns. Reheat in the oven for a few minutes to recapture that just-baked perfection.

Hi, I'm Kimberly!

Hi, I'm Kimberly.

A hopeless romantic when it comes to food. Every recipe I share is a love letter to food itself. I’m so glad you’re here. Make yourself at home and stay a while.

Love,
Kimberly

Kimberly the Zett Signature

If you want to get to know me better,
click here!


Easy Ciabatta Buns
Easy Ciabatta Buns
Easy Ciabatta Buns
Easy Ciabatta Buns

LET’S MAKE A PIECE OF HAPPINESS

Print
.tasty-recipe-responsive-iframe-container-19456ccb { position: relative; overflow: hidden; padding-top: 177.62%; } .tasty-recipe-responsive-iframe-container-19456ccb iframe { position: absolute; top: 0; left: 0; width: 100%; height: 100%; border: 0; } clock clock iconcutlery cutlery iconflag flag iconfolder folder iconinstagram instagram iconpinterest pinterest iconfacebook facebook iconprint print iconsquares squares iconheart heart iconheart solid heart solid icon
Easy Ciabatta Buns

Easy Ciabatta Buns


  • Author: Kimberly
  • Total Time: 4 hrs + 5 min
  • Yield: 8

Description

RECOMMENDED EQUIPMENT

  • large bowl
  • whisk
  • spatula
  • dough scraper (or blunt knife)
  • casserole dish (or ovenproof dish)

Ingredients

Units Scale
  • 350 milliliters lukewarm water
  • 1 tsp sugar
  • 1 tbsp oil
  • 7 grams instant yeast
  • 500 grams flour type 00 (pizza flour)
  • 1 tsp salt

Instructions

  1. Place the ingredients in a large bowl in the following order: warm water, 1 tsp sugar, 1 tbsp olive oil, dry yeast. Mix everything well with a whisk.
  2. Now add flour and 1 tsp salt. Mix everything well with a spatula so that the flour is incorporated and the edges can be scraped off. Now cover the bowl with a towel for 20 minutes and leave to rest.
  3. Wet your hands with a little water and grab the dough from four sides one after the other, pull it up and fold it in the middle so that the dough becomes rounder and has tension. Cover the bowl with a towel again and leave to rest for another 20 minutes.
  4. Repeat step 3 and cover the bowl with a towel again, but this time leave the dough to rest for approx. 2 hours.
  5. Sprinkle a little flour on a work surface and place the dough on top and also sprinkle with a little flour. Spread the dough out a little and divide into 8 equal portions. Pull the dough pieces in a semicircle on the worktop so that there is tension on the surface.
  6. Place baking paper on a baking tray and sprinkle with a little flour. Place the dough pieces on top, cover again with a towel and leave to rise for another hour.
  7. Now heat the oven to 230°C (446°F). Place a baking dish or ovenproof dish with water on the bottom of the oven. Instead of the bowl of water, you can also simply pour water into the oven with a spray bottle as soon as the tray is in the oven and then quickly close the door.
  8. Once the oven has heated up, place the baking tray with the rolls in the oven and bake for 10 minutes. Then remove the baking dish with water from the oven and bake for a further 10-15 minutes until the buns are golden brown.
  • Passive Time: 4 hrs
  • Cook Time: 5 min

CRAVING MORE?

Follow along here & don’t forget to subscribe to my substack!