Gorgonzola Spinach Gnocchi with Salsiccia Walnut Topping

Gorgonzola Spinach Gnocchi with Salsiccia Walnut Topping

Gorgonzola Spinach Gnocchi with Salsiccia Walnut Topping

Gorgonzola Spinach Gnocchi with Salsiccia Walnut Topping

November 25, 2024 by Kimberly

Creamy, cheesy, and just the right touch of indulgence! This cozy dish feels like a warm hug, with bold Italian vibes and a satisfying crunch that’s absolutely unforgettable.

50 MINUTES

EASY

OMNIVORE

ITALIAN

854 PER PORTION

COMFORT FOOD

EVERYDAY

DINNER

AUTUMN
WINTER

INTRODUCTION

ABOUT THE RECIPE

This dish is the ultimate comfort meal you didn’t know you needed! Think soft pillows of gnocchi wrapped in a velvety, cheesy sauce, with just enough spinach to feel balanced. The topping? A game-changing mix of savory sausage and crunchy walnuts that takes it to the next level. It’s one of those meals that feels fancy but is super easy to whip up. Perfect for impressing guests or treating yourself to a cozy night in!

How to serve
Serve this dish straight from the pan, steaming and ready to impress. Sprinkle a touch of freshly grated Parmesan or a drizzle of olive oil on top for that extra flair. Pair it with a crisp arugula salad or some roasted veggies to balance the richness. Want to make it truly unforgettable? A glass of chilled white wine or sparkling water with a citrus twist will make the flavors pop.

How to store
Got leftovers? Lucky you! Store them in an airtight container in the fridge for up to 3 days. Reheat gently in a pan over low heat, adding a splash of milk or cream to revive that creamy magic. Avoid freezing – it’s best enjoyed fresh!

Hi, I'm Kimberly!

Hi, I'm Kimberly.

A passionate food lover who believes in the magic of homemade deliciousness that spreads love and warmth. Join me on this culinary adventure as I prepare wonderful dishes and let’s spread some happiness together!

Kimberly the Zett Signature

If you want to get to know me better, click here!


Gorgonzola Spinach Gnocchi with Salsiccia Walnut Topping
„Let’s make a piece of happiness“
Print
clock clock iconcutlery cutlery iconflag flag iconfolder folder iconinstagram instagram iconpinterest pinterest iconfacebook facebook iconprint print iconsquares squares iconheart heart iconheart solid heart solid icon
Gorgonzola Spinach Gnocchi with Salsiccia Walnut Topping

Gorgonzola Spinach Gnocchi with Salsiccia Walnut Topping


5 Stars 4 Stars 3 Stars 2 Stars 1 Star

No reviews

  • Author: Kimberly
  • Total Time: 50 min
  • Yield: 4 1x

Description

RECOMMENDED EQUIPMENT

  • large frying pan
  • medium frying pan
  • large pot
  • strainer
  • sharp knife
  • cutting board


Ingredients

Units Scale

SPINACH GORGONZOLA SAUCE

  • 200 grams gorgonzola
  • 200 grams heavy cream
  • 1 tbsp butter
  • 250 milliliter chicken stock
  • 50 milliliter dry white wine
  • 4 garlic cloves
  • 1 shallot
  • 50 grams baby spinach
  • fresh oregano
  • fresh thyme
  • nutmeg, salt & pepper to taste

SALSICCIA WALNUT TOPPING

  • 200 grams salsiccia with fennel
  • 50 milliliter dry white wine
  • 40 grams walnuts
  • 2 tsp honey
  • fresh oregano
  • fresh thyme
  • cayenne pepper, salt & pepper to taste

OTHER INGREDIENTS

  • 800 grams gnocchi
  • parmesan for topping

Instructions

PREPARATIONS

  • Chop the shallot and garlic cloves into small, fine pieces. Take the salsiccia sausage out of its casing—either tear it into chunky bits with your hands or crumble it up, whichever feels less chaotic. Slice the gorgonzola into chunks—don’t overthink it; it’ll melt anyway. Wash the baby spinach thoroughly and spin it dry. Set everything aside.

INSTRUCTIONS

  1. Melt some butter in a large pan over medium heat. Toss in the shallots and cook until they’re glossy and translucent. Add the garlic and stir it until your kitchen smells incredible.
  2. Deglaze with a splash of white wine. Let it simmer for 1-2 minutes to let the alcohol cook off. Pour in the chicken broth and bring it to a boil. Once it boils, lower the heat to a simmer and stir in the cream. Let this dreamy mix simmer gently for 10-15 minutes while you prepare the salsiccia.
  3. Toss the sausage bits into a cold pan. Slowly heat it up so the fat renders out—no extra oil needed! Cook until the pieces are golden and crispy on the outside. Deglaze with another splash of white wine, simmering until most of the liquid evaporates and you’re left with a creamy coating. Toss in the walnuts, a pinch of cayenne pepper, salt, and a drizzle of honey. Stir everything and let it caramelize for 1-2 minutes. Add fresh oregano and thyme, mix, and let those flavors pop.
  4. Keep your cream and broth mixture on low heat. Stir in the Gorgonzola until it’s completely melted into the sauce—smooth, rich, and irresistible. Grate in some fresh nutmeg, then stir in more oregano and thyme. Add the spinach and stir until it wilts down. Keep everything warm and cozy over low heat.
  5. Fill a large pot with water, bring it to a boil, and add the gnocchi. Cook for 3-5 minutes, or until they float to the surface. Drain the gnocchi and toss them directly into the Gorgonzola-spinach sauce. Stir until every pillowy bite is coated in the sauce.
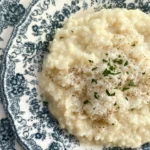
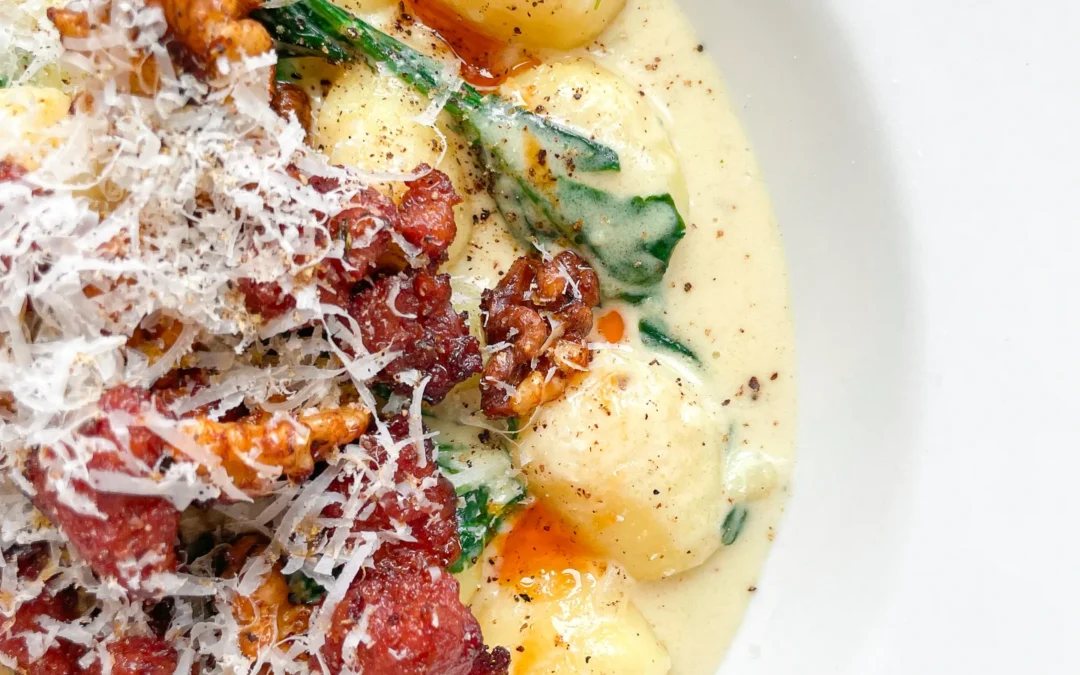
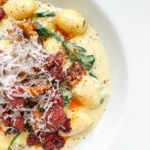
  6. Plate the gnocchi in deep bowls. Spoon the crispy salsiccia-walnut mixture on top and finish with a shower of freshly grated Parmesan.

  • Prep Time: 10 min
  • Passive Time: 15 min
  • Cook Time: 25 min

Almond Milk

Almond Milk

Almond Milk

Almond Milk

November 23, 2024 by Kimberly

Creamy, nutty goodness that’s fresh and pure – this homemade almond milk brings all the cozy vibes! Smooth, simple, and a total game-changer for your morning coffee or smoothie. Pure plant-powered bliss.

OVERNIGHT
15 MINUTES

EASY

VEGAN

INT.

20 PER PORTION

CREAMY
NUTTY

EVERYDAY

BEVERAGES

ALL YEAR

INTRODUCTION

ABOUT THE RECIPE

There’s something incredibly satisfying about making your own almond milk. Not only is it super creamy and fresh, but it’s also free from additives, so you’re just getting pure, nutty goodness. Whether you’re dairy-free, vegan, or just a fan of plant-based alternatives, this homemade version brings a taste and texture you just can’t get from store-bought. It’s smooth, lightly nutty, and perfect for adding a cozy, wholesome touch to your morning coffee or favorite smoothie!

How to serve
This fresh, creamy almond milk is incredibly versatile. Pour it over your morning cereal, blend it into smoothies, or enjoy it with your coffee for a nutty, silky texture. You can even use it in baking or cooking as a dairy-free substitute. Try adding a pinch of cinnamon, vanilla, or a tiny drizzle of maple syrup if you want a little extra flavor boost. It’s a great way to elevate everyday recipes with a homemade touch!

How to store
Homemade almond milk keeps best in the fridge for up to 4 days. Just pour it into a clean, airtight container or glass bottle, give it a shake before serving, and keep it nice and cold for freshness.

Hi, I'm Kimberly!

Hi, I'm Kimberly.

A passionate food lover who believes in the magic of homemade deliciousness that spreads love and warmth. Join me on this culinary adventure as I prepare wonderful dishes and let’s spread some happiness together!

Kimberly the Zett Signature

If you want to get to know me better, click here!


Almond Milk
Almond Milk
Almond Milk

„Let’s make a piece of happiness“

Print
clock clock iconcutlery cutlery iconflag flag iconfolder folder iconinstagram instagram iconpinterest pinterest iconfacebook facebook iconprint print iconsquares squares iconheart heart iconheart solid heart solid icon
Almond Milk

Almond Milk


  • Author: Kimberly
  • Total Time: 8 hrs + 17 min
  • Yield: 1 liter / 4 cups 1x

Description

Recommended Equipment

  • medium-sized bowl
  • blender
  • fine mesh strainer
  • bottle

Ingredients

Units Scale
  • 200 grams raw almonds
  • 1000 milliliters cold, filtered water
  • 3 dates, pitted
  • 1 tsp vanilla extract
  • pinch of salt

Instructions

PREPARATIONS THE NIGHT BEFORE

  • Soak the almonds and dates in cold water overnight.

INSTRUCTIONS

  1. Drain the almonds and dates using a strainer, and discard the soaking water.
  2. Add the almonds and dates to a blender, then pour in 1 liter of cold water. Blend on the highest setting for about 1 minute, until the liquid turns white and frothy.
  3. Add flavoring to taste. I used a pinch of salt and 1 teaspoon of vanilla extract, but 1 teaspoon of cinnamon would be a fantastic choice for the holiday season.
  4. Set up a fine mesh strainer over a bowl and pour the blended mixture through it. Press the pulp firmly to squeeze out as much liquid as possible. If you want, you can filter the milk again by pouring it through a cheesecloth. You can also put the pulp into the cheesecloth and squeeze it further by hand.
  5. Transfer the strained milk into a bottle and enjoy! It will keep in the fridge for about 4–5 days. Be sure to shake it before using, as the solids naturally separate from the water over time—this is completely normal.
  • Prep Time: 2 min
  • Passive Time: 8 hrs
  • Cook Time: 15 min

Biscoff Cinnamon Banoffee Pie

Biscoff Cinnamon Banoffee Pie

Biscoff Cinnamon Banoffee Pie

Biscoff Cinnamon Banoffee Pie

November 19, 2024 by Kimberly

Dreamy layers of creamy dulce de leche, fresh banana slices, and cinnamon whipped cream, all on a buttery Biscoff cookie crust. This no-bake treat is pure, cozy dessert bliss in every bite!

40 MINUTES

EASY

VEGETARIAN

ENGLISH

311 PER SLICE

CREAMY

THANKSGIVING

DESSERT & SWEETS

AUTUMN
WINTER

INTRODUCTION

ABOUT THE RECIPE

This no-bake delight layers all the cozy flavors: a buttery Biscoff cookie crust, homemade dulce de leche, fresh banana slices, and a whipped cinnamon topping. It’s creamy, sweet, and has that dreamy, melt-in-your-mouth quality that’ll make you reach for seconds. No baking needed – just a quick assembly for a dessert that’s equally impressive and easy. It’s the perfect treat when you want a little something special without turning on the oven.

How to serve
Serve this pie chilled and straight from the fridge to get the best creamy texture and hold. For a little extra flair, sprinkle the top with crushed Biscoff cookies or some shavings of your favorite chocolate. Pair it with a warm coffee or your favorite cozy drink – the caramel-like dulce de leche and cinnamon cream make this pie the ultimate comfort dessert. It’s also a crowd-pleaser, so bring it along to your next gathering!

How to store
Store any leftovers in the fridge, covered, for up to 3 days. The whipped cream topping stays nicely set, and the crust holds well. This pie is best served cold, straight from the fridge, for that perfect creamy bite.

Hi, I'm Kimberly!

Hi, I'm Kimberly.

A passionate food lover who believes in the magic of homemade deliciousness that spreads love and warmth. Join me on this culinary adventure as I prepare wonderful dishes and let’s spread some happiness together!

Kimberly the Zett Signature

If you want to get to know me better, click here!


Biscoff Cinnamon Banoffee Pie

„Let’s make a piece of happiness“

Print
clock clock iconcutlery cutlery iconflag flag iconfolder folder iconinstagram instagram iconpinterest pinterest iconfacebook facebook iconprint print iconsquares squares iconheart heart iconheart solid heart solid icon
Biscoff Cinnamon Banoffee Pie

Biscoff Cinnamon Banoffee Pie


5 from 1 review

  • Author: Kimberly
  • Total Time: 3 hrs + 15 min
  • Yield: 8-16 1x

Description

Recommended Equipment

  • small pot with lid
  • food processor
  • pie dish
  • sharp knife
  • cutting board
  • electric mixer
  • tall container
  • vegetable peeler
  • can opener

Ingredients

Units Scale
  • 300 grams biscoff cookies
  • 140 grams butter, room temperature
  • 400 grams sweetened condensed milk
  • 2 bananas
  • 1 tbsp lemon juice
  • 250 grams heavy cream
  • 30 grams powdered sugar
  • 1 tsp vanilla
  • 1 tsp cinnamon

Instructions

PREPARATIONS

  • You can buy ready-made dulce de leche or order it online, but it’s also easy to make at home ahead of time. Just grab a 400g can of sweetened condensed milk, remove the label, and place the can in a pot. Fill with enough water to completely cover the can, then bring the water to a boil. Reduce the heat to low, cover the pot, and let it simmer for about 2 hours and 30 minutes. Be sure to keep the can covered with water the entire time – if the water evaporates, just add more. After the 2.5 hours, pour off the water and let the can cool completely before using the dulce de leche inside.

INSTRUCTIONS

  1. Use a food processor to blend the Biscoff cookies and softened butter until they’re crumbly. Press the mixture evenly into a pie dish, covering the bottom and sides completely. Chill the crust in the fridge for 20 minutes.
  2. Meanwhile, slice the bananas evenly and sprinkle with a little lemon juice to keep them from browning. Place the banana slices in the fridge until you’re ready to use them. Next, pour the cold cream into a tall container, add powdered sugar, vanilla extract, and cinnamon, and whip until stiff peaks form. Chill the whipped cream in the fridge until needed. Prepare the chocolate shavings by running a vegetable peeler along the narrow edge of a chocolate bar. Set the shavings aside.
  3. Open the can of dulce de leche and take the crust out of the fridge. Spread the entire can of dulce de leche evenly over the crust.
  4. Take the banana slices out of the fridge and arrange them over the dulce de leche so that the entire surface is covered.
  5. Now, take the whipped cream and spread it evenly over the bananas. Finally, sprinkle the chocolate shavings on top for decoration.
  6. Serve the pie immediately or keep it in the fridge until you’re ready to serve.
  • Passive Time: 2 hrs + 35 min
  • Cook Time: 40 min

Egg Salad

Egg Salad

Egg Salad

Egg Salad

November 17, 2023 by Kimberly

Creamy, tangy, and absolutely crave-worthy! This rich egg salad hits all the comfort notes with just the right balance of freshness and zing. Perfect on toast or as a party favorite.

15 MINUTES

EASY

VEGETARIAN

INT.

354 PER PORTION

CREAMY

CLASSICS

SALAD

ALL YEAR

INTRODUCTION

ABOUT THE RECIPE

This creamy egg salad is a cozy twist on a classic, with layers of rich flavor from a touch of Dijon and a sprinkle of fresh chives. It’s a go-to recipe for those moments when you need a quick, delicious meal with a bit of a zing. With its velvety texture and perfectly balanced tang, this salad makes you wonder why you’d ever buy pre-made again. One bite, and you’ll see why it’s so easy to fall in love with! If you’re not so confident with boiling eggs yet, read on for a full guide and get the best tips for achieving The Perfect Boiled Egg.

How to serve
This egg salad is endlessly versatile, perfect as a sandwich filling or spooned over crunchy toast for an easy lunch. It also makes a great dip for crackers or veggies when served at a gathering. Feeling fancy? Add it to a croissant or as a topping for a crisp salad. This dish is all about the comfort factor, so serve it however makes you feel the coziest – it’s that kind of meal.

How to store
To keep this egg salad fresh and tasty, store it in an airtight container in the fridge for up to 2 days. Just give it a stir before serving to freshen up the texture, and enjoy chilled. Perfect for make-ahead lunches or snack prep!

Hi, I'm Kimberly!

Hi, I'm Kimberly.

A passionate food lover who believes in the magic of homemade deliciousness that spreads love and warmth. Join me on this culinary adventure as I prepare wonderful dishes and let’s spread some happiness together!

Kimberly the Zett Signature

If you want to get to know me better, click here!


Egg Salad
Egg Salad
Egg Salad

„Let’s make a piece of happiness“

Print
clock clock iconcutlery cutlery iconflag flag iconfolder folder iconinstagram instagram iconpinterest pinterest iconfacebook facebook iconprint print iconsquares squares iconheart heart iconheart solid heart solid icon
Egg Salad

Egg Salad


  • Author: Kimberly
  • Total Time: 15 min
  • Yield: 2 1x

Description

Recommended Equipment

  • small saucepan
  • medium-sized bowl
  • sharp knife
  • cutting board

Ingredients

Units Scale
  • 4 eggs
  • 50 grams mayonnaise
  • 12 tsp white wine vinegar
  • 1/21 tsp Dijon mustard
  • chives
  • salt & pepper to taste

Instructions

  1. Boil the eggs for about 7-8 minutes until hard-boiled. If you’re not so confident with cooking eggs yet, read on for a full guide and get the best tips for achieving the perfect boiled egg.
  2. Meanwhile, finely chop the chives and place them in a bowl. Add the mayonnaise, white wine vinegar, Dijon mustard, salt, and pepper, and set aside for now.
  3. Once the eggs are cooked, place them in a bowl with cold water to cool for about 5 minutes. Peel the eggs, carefully score the egg whites, and gently separate them so the yolks remain whole. Separate all the eggs into whites and yolks, adding the yolks to the other ingredients in the bowl.
  4. Mash the yolks with the other ingredients until you get a smooth, light orange mixture.
  5. Cut the egg whites into small pieces and add them to the bowl with the other ingredients. Mix everything well and serve.
  • Passive Time: 5 min
  • Cook Time: 10 min

Swedish Meatball Stew

Swedish Meatball Stew

Swedish Meatball Stew

Swedish Meatball Stew

November 11, 2024 by Kimberly

A hearty stew with tender meatballs, soft potatoes, and a hint of fresh herbs. It’s the perfect blend of warmth and flavor, topped with a dollop of lingonberries – pure comfort in a bowl.

80 MINUTES

EASY

OMNIVORE

SWEDISH

891 PER PORTION

COMFORT FOOD

EVERYDAY

DINNER

AUTUMN
WINTER

INTRODUCTION

ABOUT THE RECIPE

Imagine coming home to a cozy bowl of Swedish-inspired stew, where golden-brown meatballs meet tender potatoes in a creamy, herb-filled sauce. This dish combines everything we love about comfort food with a fresh, Nordic twist! With a touch of dill, parsley, and a spoonful of tangy lingonberries, it’s like a warm hug in every bite. Perfect for chilly evenings or family dinners, this stew is all about bold, cozy flavors that make you feel at home.

How to serve
To serve, ladle this creamy stew into bowls and top with a sprinkle of fresh parsley and dill for color and flavor. Adding a spoonful of lingonberries and creme fraiche gives a sweet, tangy pop that balances the savory richness of the stew. It’s amazing with crusty bread on the side for dipping or alongside a simple salad. Whether you’re serving it to family or friends, this stew is a guaranteed crowd-pleaser that’ll have everyone coming back for seconds!

How to store
Store the stew in an airtight container in the fridge for up to 3 days. When reheating, do it gently on the stove, adding a splash of broth or cream if it needs a little extra moisture. The flavors actually get even better after a day or two!

Hi, I'm Kimberly!

Hi, I'm Kimberly.

A passionate food lover who believes in the magic of homemade deliciousness that spreads love and warmth. Join me on this culinary adventure as I prepare wonderful dishes and let’s spread some happiness together!

Kimberly the Zett Signature

If you want to get to know me better, click here!


Swedish Meatball Stew
„Let’s make a piece of happiness“
Print
clock clock iconcutlery cutlery iconflag flag iconfolder folder iconinstagram instagram iconpinterest pinterest iconfacebook facebook iconprint print iconsquares squares iconheart heart iconheart solid heart solid icon
Swedish Meatball Stew

Swedish Meatball Stew


  • Author: Kimberly
  • Total Time: 80 min
  • Yield: 3-4 1x

Description

Recommended Equipment

  • sharp knife
  • cutting board
  • grater
  • medium bowl
  • large pan with lid
  • whisk
  • measuring cup

Ingredients

Units Scale

MEATBALLS

  • 250 grams minced beef
  • 250 grams minced pork
  • 1 big white onion
  • 2 garlic cloves
  • 20 grams bread crumbs
  • 1 egg
  • 5 grams fresh parsley
  • 5 grams fresh dill
  • 1/2 tsp Dijon mustard
  • nutmeg, salt & pepper to taste
  • 2 tsp clarified butter for frying

SAUCE

  • 20 grams butter
  • 20 grams flour
  • 500 milliliters beef stock
  • 100 milliliters heavy cream
  • 1 tsp Worcestershire sauce
  • 1/2 tsp Dijon mustard
  • nutmeg, salt & pepper to taste

OTHER INGREDIENTS

  • 150 grams frozen peas
  • 500 grams baby potatoes

TOPPINGS

  • 3 tbsp lingonberry jam
  • 3 tbsp creme fraiche

Instructions

  1. First, peel the onion and garlic cloves and set them aside. Finely chop the parsley and dill, placing them in a medium bowl. Add the ground meat, breadcrumbs, egg, Dijon mustard, nutmeg, salt, and pepper. Grate the onion and garlic finely and add them to the mixture as well. Mix everything thoroughly and form the mixture into small balls, about 40g each, roughly the size of a ping-pong ball.
  2. Heat a large pan over medium-high heat with a bit of clarified butter, and sear the meatballs on all sides until they are nicely browned. They don’t need to be fully cooked through yet, as they’ll finish cooking in the sauce. Be careful not to let them get too dark, as this can cause bitterness in the final dish.
  3. While the meatballs are cooking, wash the potatoes, dry them well, and cut them in halves or quarters, depending on their size. Set them aside.
  4. Once the meatballs are seared, remove them from the pan and set them aside on a plate. Return the pan to the stove and deglaze with white wine, scraping up any browned bits with a wooden spoon. Let it reduce for about 5 minutes. Strain the liquid through a sieve to remove any larger bits, then set this liquid aside.
  5. Now, place the pan over low heat, melt the butter, and whisk in the flour to create a roux, stirring constantly until you have a smooth, creamy paste. Let it cook for a few minutes, stirring continuously to remove any raw flour taste. Gradually add the beef broth in several stages, whisking each time until the sauce is smooth and comes to a light boil before adding the next portion. Finally, pour in the reserved liquid and the cream, stirring well. Season the sauce with Dijon mustard, Worcestershire sauce, salt, and pepper.
  6. Add the prepared potatoes to the sauce, cover, and let them simmer over medium heat for about 20 minutes, or until they are tender.
  7. While the potatoes are cooking, place the frozen peas in a small bowl, cover with hot water, and let them sit for about 5 minutes. Drain the peas and set them aside. Finely chop a bit more parsley and dill for garnish, and prepare the lingonberries and crème fraîche.
  8. Once the potatoes are soft, return the meatballs to the sauce, stir everything together, and let it simmer for an additional 10 minutes, or until the meatballs are fully cooked through and heated.
  9. To serve, divide the potatoes, meatballs, and sauce among deep plates. Top with peas, a dollop of crème fraîche, a spoonful of lingonberry jam, and fresh herbs. Enjoy!
  • Passive Time: 30 min
  • Cook Time: 50 min

Classic Risotto

Classic Risotto

Classic Risotto

Classic Risotto

November 9, 2023 by Kimberly

Creamy, dreamy, and cozy, this Parmesan and white wine risotto is pure comfort in a bowl. It’s that no-fuss, indulgent dish perfect for when you crave a warm, savory hug.

45 MINUTES

EASY

VEGETARIAN

ITALIAN

722 PER PORTION

CREAMY

CLASSICS

DINNER

ALL YEAR

INTRODUCTION

ABOUT THE RECIPE

Imagine a creamy, warm risotto made with Parmesan and white wine, bringing pure comfort to your plate. This easy recipe is approachable, yet delivers an indulgent result that feels like a special treat. With simple steps and bold flavors, it’s perfect for any night you want to relax with something delicious. Ideal as a base for endless variations, this risotto keeps things cozy and straightforward while packing in all the richness and creaminess you crave. If you’re not so confident with preparing a risotto yet, read on for a full guide and get the best tips for achieving THE Perfect Risotto.

How to serve
Serve your risotto steaming hot in a wide bowl to showcase that lovely creamy texture. Garnish with fresh herbs like parsley or basil and a generous shave of extra Parmesan for an extra touch of umami. You could also add a drizzle of truffle oil or crispy pancetta for a sophisticated twist. Pair with a light side salad or a crisp white wine to complement the dish’s creamy, savory flavors.

How to store
If there are leftovers, place the risotto in an airtight container and refrigerate for up to three days. To reheat, add a splash of broth or water, and warm on the stove, stirring to bring back the creamy consistency.

Hi, I'm Kimberly!

Hi, I'm Kimberly.

A passionate food lover who believes in the magic of homemade deliciousness that spreads love and warmth. Join me on this culinary adventure as I prepare wonderful dishes and let’s spread some happiness together!

Kimberly the Zett Signature

If you want to get to know me better, click here!


Classic Risotto
Classic Risotto

„Let’s make a piece of happiness“

Print
clock clock iconcutlery cutlery iconflag flag iconfolder folder iconinstagram instagram iconpinterest pinterest iconfacebook facebook iconprint print iconsquares squares iconheart heart iconheart solid heart solid icon
Classic Risotto

Classic Risotto


5 from 1 review

  • Author: Kimberly
  • Total Time: 45 min
  • Yield: 2 1x

Description

RECOMMENDED EQUIPMENT
  • sharp knife
  • cutting board
  • medium-sized pot
  • measuring cup
  • grater

Ingredients

Units Scale
  • 200 grams risotto rice
  • 400 milliliter vegetable broth
  • 200 milliliter dry white wine
  • 300 milliliter water
  • 100 grams parmesan
  • 1 shallot
  • 1 tbsp olive oil
  • 1 tsp butter
  • salt & pepper to taste
  • parsley for garnish

Instructions

PREPARATIONS

  • Finely grate the Parmesan.
  • Cut the shallot into small pieces.

INSTRUCTIONS

  1. Heat 1 tbsp of olive oil in a pot over medium heat. Sauté the shallot until translucent. Add the butter and risotto rice, stirring everything well, and sauté for 1-2 minutes.
  2. Deglaze with the first 100ml (1/2 cup) of white wine, letting it reduce over medium heat until no liquid remains in the pot.
  3. Next, add 100ml (1/2 cup) of stock and let it simmer, stirring occasionally, until the liquid has mostly evaporated. Continue adding stock 100ml (1/2 cup) at a time, letting it simmer and be absorbed by the rice before each addition, until the remaining 200ml (1 cup) of stock has been used.
  4. Afterward, add 150ml (1/2 cup) of water, allowing the rice to absorb it as it cooks. Follow with another 100ml (1/2 cup) of white wine, then add the final 150ml (1/2 cup) of water, stirring as it cooks. The whole process should take around 40 minutes.
  5. Remove the pot from the heat and stir in the Parmesan until it melts. Season with salt and white pepper to taste.
  6. Divide the risotto between plates and top with additional grated Parmesan, freshly ground pepper, and parsley.
  • Prep Time: 5 min
  • Cook Time: 40 min