Naan Bread

Naan Bread

Naan Bread

Naan Bread

February 24, 2024 by Kimberly

Discover the joy of homemade Naan Bread! Easy, fluffy, and delicious, it’s the perfect companion for any meal. Make it today and share the love!

This website uses affiliate links which may earn commission for purchases made at no additional cost to you.

TOTAL TIME

80 min

SERVES

4 naan

DIET

vegetarian

EVERY RECIPE DESERVES

A Little Love Letter

Dive into the delightful world of Indian cuisine with this easy Naan Bread recipe! Perfect for beginners and seasoned chefs alike, my homemade Naan is fluffy and irresistibly delicious. Whether you’re pairing it with your favorite indian butter chicken or enjoying it as a snack, this versatile bread is a must-try. Get ready to impress your family and friends with your baking skills and bring a piece of India right to your dinner table.

Serve your freshly baked Naan Bread alongside a variety of dishes to elevate your dining experience. It pairs wonderfully with curries, soups, and stews, absorbing all the flavors beautifully. For a modern twist, use it as a base for pizza or as a wrap for sandwiches. Don’t forget to brush it with garlic butter and sprinkle some cilantro on top for that extra burst of flavor.

To keep your Naan Bread fresh, wrap it in aluminum foil or store it in an airtight container at room temperature for up to 2 days. For longer storage, freeze the Naan, ensuring it’s well-wrapped, for up to a month.

Hi, I'm Kimberly!

Hi, I'm Kimberly.

A hopeless romantic when it comes to food. Every recipe I share is a love letter to food itself. I’m so glad you’re here. Make yourself at home and stay a while.

Love,
Kimberly

Kimberly the Zett Signature

If you want to get to know me better,
click here!


Naan Bread
Naan Bread

LET’S MAKE A PIECE OF HAPPINESS

Print
clock clock iconcutlery cutlery iconflag flag iconfolder folder iconinstagram instagram iconpinterest pinterest iconfacebook facebook iconprint print iconsquares squares iconheart heart iconheart solid heart solid icon
Naan Bread

Naan Bread


5 Stars 4 Stars 3 Stars 2 Stars 1 Star

No reviews

  • Author: Kimberly
  • Total Time: 80 min
  • Yield: 4

Description

GOOD TO HAVE ON HAND

  • medium-sized bowl
  • cling film
  • frying pan


Ingredients

Units Scale
  • 250 grams all-purpose flour
  • 1 tsp baking powder
  • 1/2 tsp salt
  • 30 grams full-fat yogurt
  • 125 milliliters lukewarm water

Instructions

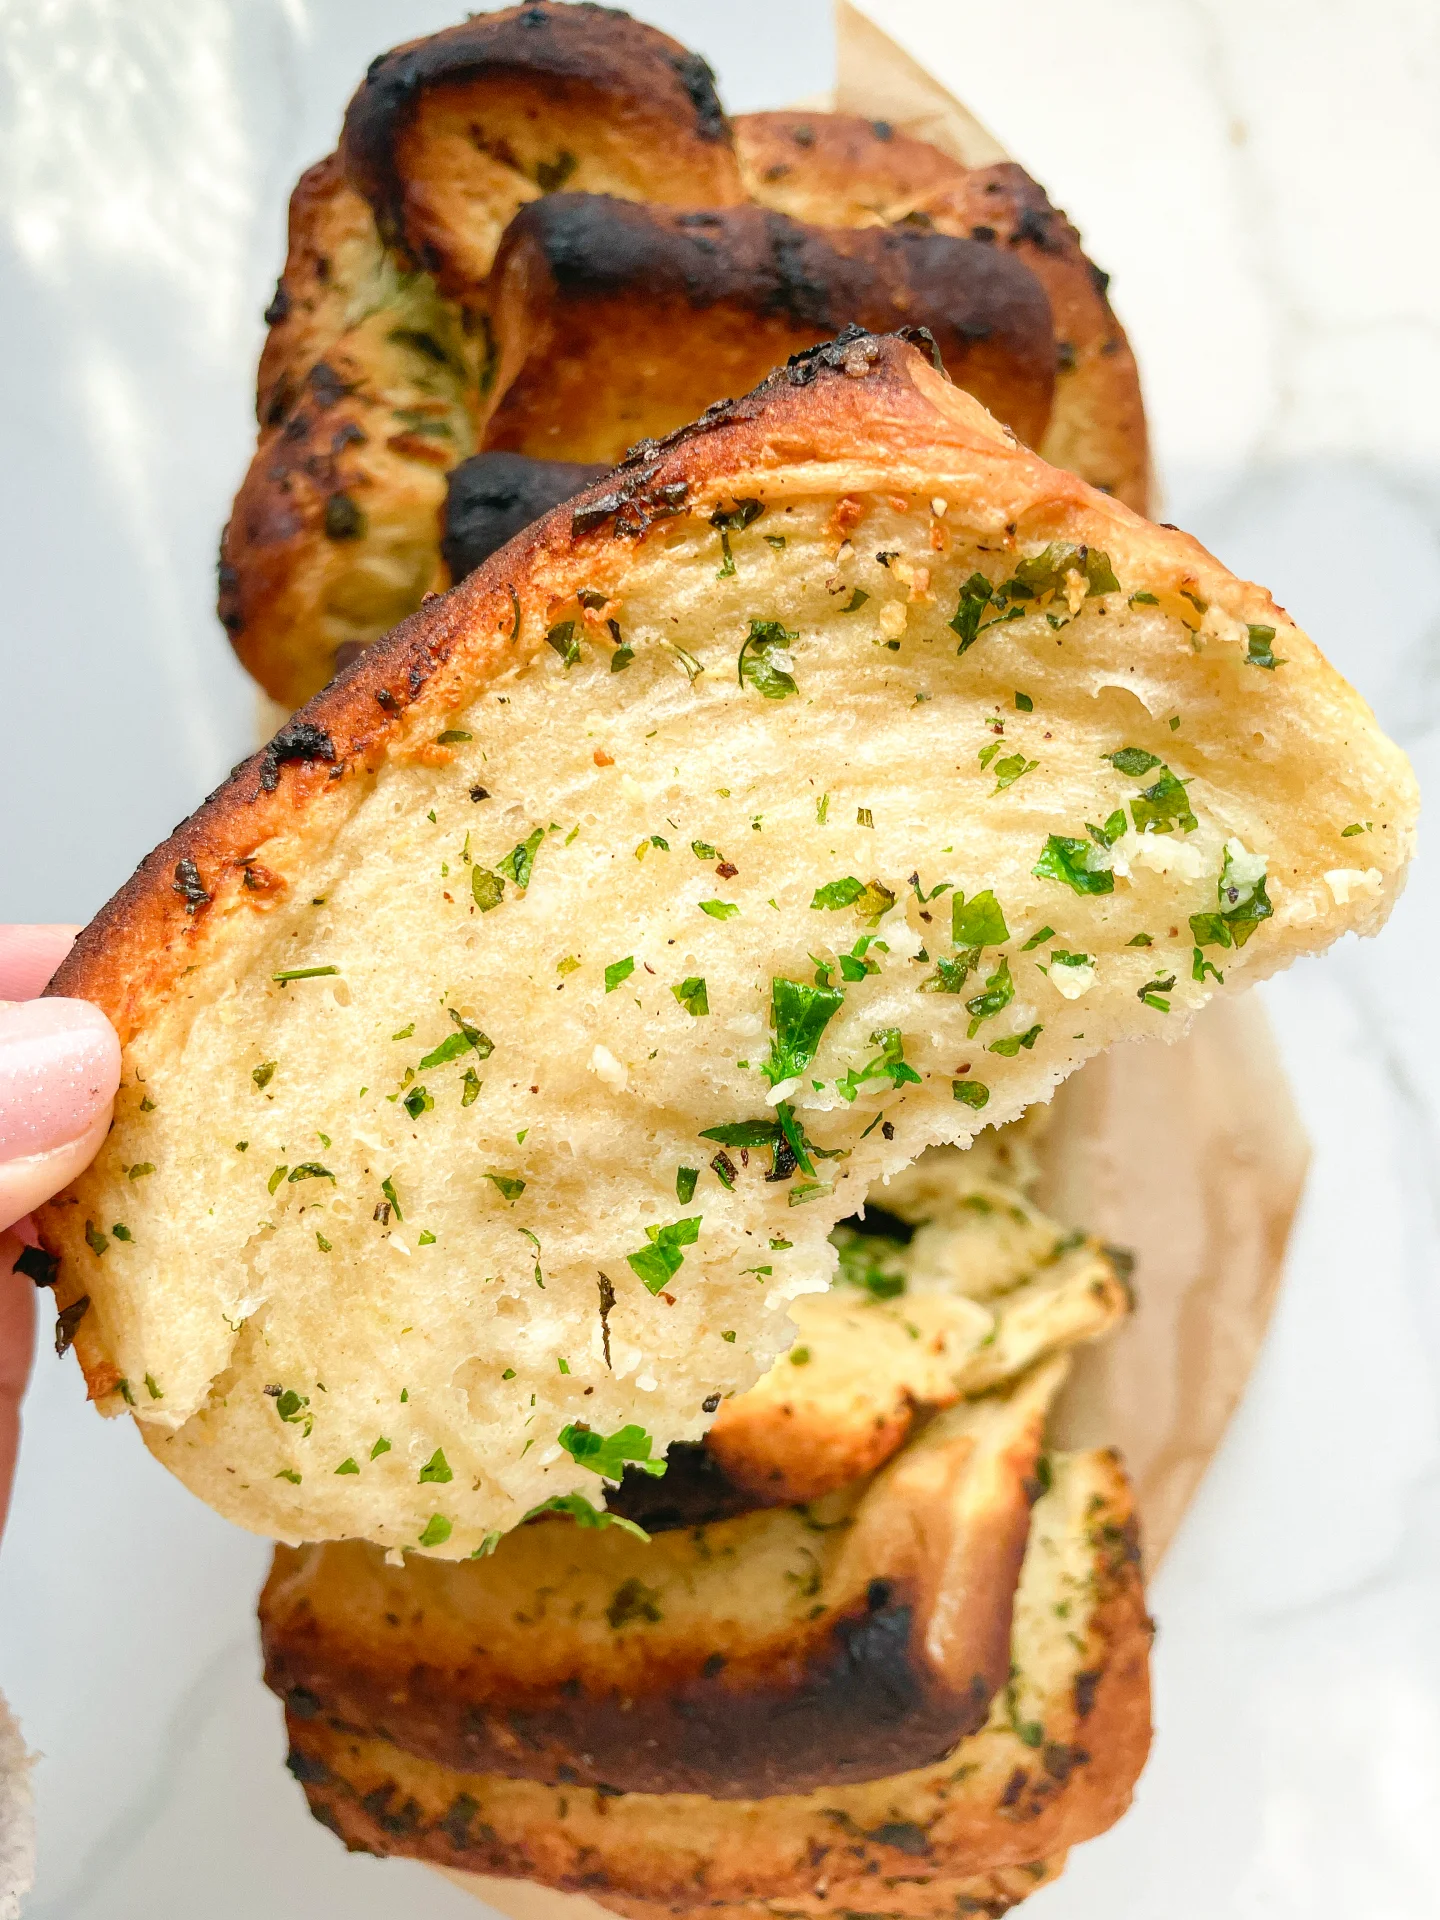
  1. Mix the all-purpose flour, salt and baking powder in a medium-sized bowl. Add the yogurt and water and mix with a spatula or spoon to form a rough dough. Transfer the dough to a clean work surface and knead by hand to form a smooth dough. Wrap in cling film and leave to rest at room temperature for an hour.
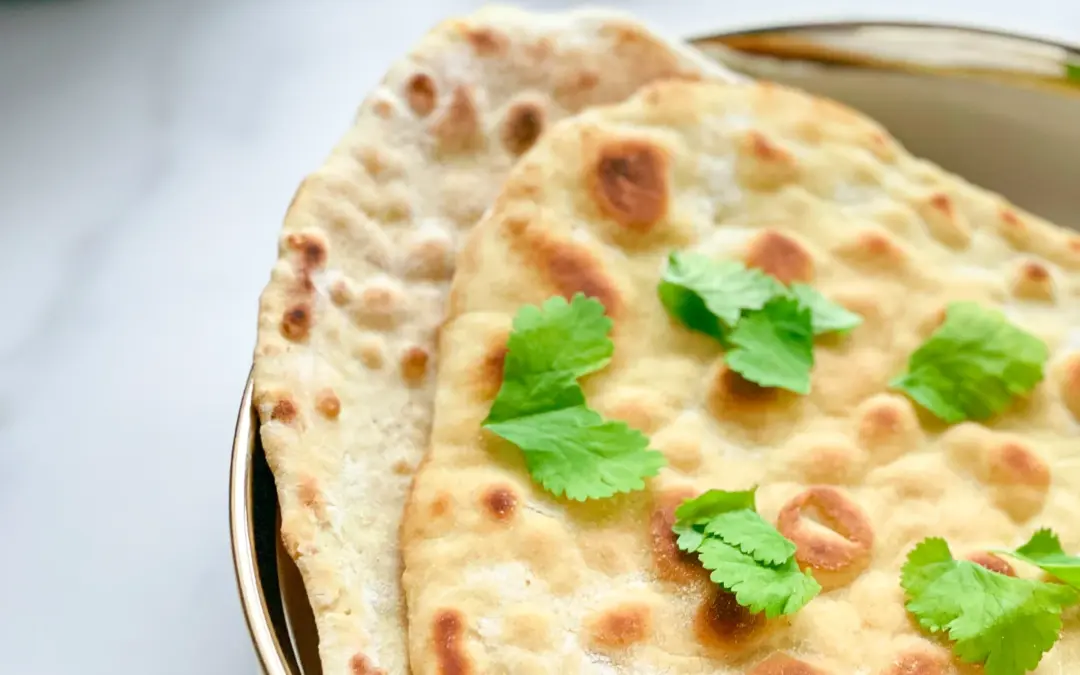
  2. Unwrap the dough, divide it into four equal pieces on a floured surface and roll out each piece into a 20cm (8 inch) flatbread.
  3. Use a hot pan without fat to fry each side of the flatbread for about two to three minutes. Bubbles will form on the top side, which will fry until golden brown when turned over.
  • Passive Time: 60 min
  • Cook Time: 20 min

CRAVING MORE?

Follow along here & don’t forget to subscribe to my substack!

Croque Monsieur

Croque Monsieur

Croque Monsieur

Croque Monsieur

February 13, 2024 by Kimberly

Dive into the cheesy goodness of Croque Monsieur! This classic French sandwich brings a crispy, creamy delight to your table, perfect for any meal. A must-try!

This website uses affiliate links which may earn commission for purchases made at no additional cost to you.

TOTAL TIME

50 min

SERVES

4 sandwiches

DIET

omnivore

EVERY RECIPE DESERVES

A Little Love Letter

Step into the world of French cuisine with the Croque Monsieur, a luxurious twist on the grilled cheese sandwich. Featuring ham and melted cheese nestled between slices of buttery bread, topped with a creamy Béchamel sauce and then grilled to perfection. This dish is not just food – it’s a culinary experience that transports you straight to the streets of Paris with every bite. Perfect for brunch or a comforting dinner!

Serve the Croque Monsieur fresh off the grill, with its cheese deliciously oozing and bread crisply toasted. Pair it with a light, tangy salad to cut through the richness, or enjoy it with a cup of hot soup for a heartier meal. Don’t forget a sprinkle of fresh herbs or a dash of Dijon mustard on the side for that authentic French flair.

To keep the Croque Monsieur’s delightful texture, store any leftovers in an airtight container in the fridge. Reheat in the oven or on the stove to revive its crispy exterior and melty interior, ensuring it tastes just as fabulous.

Hi, I'm Kimberly!

Hi, I'm Kimberly.

A hopeless romantic when it comes to food. Every recipe I share is a love letter to food itself. I’m so glad you’re here. Make yourself at home and stay a while.

Love,
Kimberly

Kimberly the Zett Signature

If you want to get to know me better,
click here!


Croque Monsieur
Croque Monsieur

LET’S MAKE A PIECE OF HAPPINESS

Print
.tasty-recipe-responsive-iframe-container-5fd71612 { position: relative; overflow: hidden; padding-top: 177.62%; } .tasty-recipe-responsive-iframe-container-5fd71612 iframe { position: absolute; top: 0; left: 0; width: 100%; height: 100%; border: 0; } clock clock iconcutlery cutlery iconflag flag iconfolder folder iconinstagram instagram iconpinterest pinterest iconfacebook facebook iconprint print iconsquares squares iconheart heart iconheart solid heart solid icon
Croque Monsieur

Croque Monsieur


  • Author: Kimberly
  • Total Time: 45 min
  • Yield: 4

Description

GOOD TO HAVE ON HAND

  • knife
  • cheese grater
  • large pan


Ingredients

Units Scale
  • 8 slices sourdough bread
  • 200 grams deli ham
  • 100 grams Gruyere cheese
  • 100 grams Emmental cheese
  • 2 tsp Dijon mustard
  • 4 tsp butter
  • 600 grams Béchamel sauce

Instructions

  1. Prepare the Béchamel sauce.
  2. Preheat the oven to 250°C (480°F)
  3. Grate the Gruyere and Emmental and mix together in a bowl.
  4. Spread 1/2 teaspoon of butter on one side of each slice of bread and fry in the pan on the buttered side until crispy. Remove the bread from the pan.
  5. The crispy side should now be on the bottom. Spread 1/4 teaspoon of Dijon mustard on the non-fried side of each slice of bread.
  6. Place deli ham on each slice of bread on top of the mustard.
  7. 1 tbsp of Béchamel sauce and 50g (2 oz) of grated cheese are placed on top of the deli ham.
  8. Now stack the slices as a double-decker that a total of 4 sandwiches are made from those 8 slices.
  9. Place the 4 sandwiches on a baking tray lined with baking paper and bake for 10-12 minutes until the cheese and sauce have melted and browned. Cut each croque monsieur in half with a sharp knife and divide between 4 plates. Serve with a fresh salad.
  • Passive Time: 15 min
  • Cook Time: 30 min

CRAVING MORE?

Follow along here & don’t forget to subscribe to my substack!

Warm Oven Baked Salad with Yogurt Thyme Honey Dressing

Warm Oven Baked Salad with Yogurt Thyme Honey Dressing

Warm Oven Baked Salad with Yogurt Thyme Honey Dressing

Warm Oven Baked Salad with Yogurt Thyme Honey Dressing

February 8, 2024 by Kimberly

Indulge in a scrumptious, warm salad fresh from the oven, enhanced by a sweet and savory honey-thyme yogurt dressing. A delightful, healthy treat!

This website uses affiliate links which may earn commission for purchases made at no additional cost to you.

TOTAL TIME

35 min

SERVES

2 portions

DIET

vegetarian

EVERY RECIPE DESERVES

A Little Love Letter

Indulge in the culinary delight of a warm salad recipe, perfect for any season. This oven-baked salad is not just a dish – it’s a journey of flavors, combining the comfort of warm ingredients with the freshness of a salad. Enhanced with a Yogurt Dressing, this recipe brings a wholesome and gourmet touch to your table. The Thyme Honey Dressing adds a unique twist, making it a standout in your Healthy Salad collection.

It’s best enjoyed fresh from the oven, with the warmth complementing the cool, creamy Yogurt Dressing. It’s a versatile dish that pairs wonderfully with a variety of mains, making it an excellent addition to your Easy Salad Recipes. Whether as a standalone meal for a light lunch or dinner or as a side for an extensive dinner, this salad is sure to impress. Its rich flavors and gourmet appeal make it a perfect choice for dinner parties or a nutritious family meal.

When it comes to storage, this Oven Baked Salad with its Flavorful Salads dressing is best enjoyed fresh. However, if you need to store it, keep vegetables and dressing separate from another in an airtight container in the refrigerator. The salad stays fresh for up to one day, but remember, the fresher, the better to maintain its unique texture and taste.

Hi, I'm Kimberly!

Hi, I'm Kimberly.

A hopeless romantic when it comes to food. Every recipe I share is a love letter to food itself. I’m so glad you’re here. Make yourself at home and stay a while.

Love,
Kimberly

Kimberly the Zett Signature

If you want to get to know me better,
click here!


Warm Oven Baked Salad with Yogurt Thyme Honey Dressing

LET’S MAKE A PIECE OF HAPPINESS

Print
.tasty-recipe-responsive-iframe-container-77021a9b { position: relative; overflow: hidden; padding-top: 177.62%; } .tasty-recipe-responsive-iframe-container-77021a9b iframe { position: absolute; top: 0; left: 0; width: 100%; height: 100%; border: 0; } clock clock iconcutlery cutlery iconflag flag iconfolder folder iconinstagram instagram iconpinterest pinterest iconfacebook facebook iconprint print iconsquares squares iconheart heart iconheart solid heart solid icon
Warm Oven Baked Salad with Yogurt Thyme Honey Dressing

Warm Oven Baked Salad with Yogurt Thyme Honey Dressing


  • Author: Kimberly
  • Total Time: 30 min
  • Yield: 2

Description

GOOD TO HAVE ON HAND

  • sharp knife
  • cutting board
  • small bowl
  • medium bowl


Ingredients

Units Scale
VEGETABLES
  • 1 red bell pepper
  • 1 yellow bell pepper
  • 1 red onion
  • 2 big tomatoes
  • 1 cup sugar snaps
  • 1 bay leaf
  • 1 tsp dried thyme
  • salt & pepper to taste
BREAD
  • 250 grams bread or baguette
  • 3 tbsp olive oil
  • 2 tbsp butter
  • 1 garlic clove
  • 1 tbsp chives
  • 1/8 tsp salt
  • 1/8 tsp pepper
DRESSING
  • 75 grams yogurt
  • 1 tbsp white wine vinegar
  • 1 tsp honey
  • 1 tbsp parsley
  • salt & pepper to taste

Instructions

  1. Preheat the oven to 200°C (400°F)
  2. Wash the bell peppers, tomatoes and sugarsnaps and cut into bite-sized pieces.
  3. Finely chop the parsley and chives.
  4. Peel the onion and cut into semicircles.
  5. Cut the bread into slices approx. 1 cm (1/2 inch) thick.
  6. Line a baking tray with baking paper and spread the chopped peppers, sugarsnaps, onions and tomatoes on it. Spread 1 tbsp olive oil, 1 tsp dried thyme and 1 bay leaf over the vegetables and mix everything well. Roast in the oven for approx. 15-20 minutes.
  7. In the meantime, to prepare the bread, mix the softened butter with the olive oil in a small bowl and add 1 tbsp of chopped chives. Add 1/8 teaspoon each of pepper and salt and the crushed garlic, stir well and spread evenly over the slices of bread. Place the slices on a rack with baking paper in the oven with the vegetables for the last 5 minutes and bake until golden brown.
  8. For the dressing, mix the yogurt, honey, white wine vinegar, parsley and a pinch each of salt and pepper in a medium bowl and set aside.
  9. Now take the vegetables and bread out the oven and leave to cool briefly. Remove the bay leaf. Place the vegetables in the bowl with the yogurt dressing and toss to combine. Divide the vegetables between two plates and serve with the garlic bread.
  • Cook Time: 30 min

CRAVING MORE?

Follow along here & don’t forget to subscribe to my substack!

Light & Flavorful Blueberry Banana Cupcakes with Cream Cheese Frosting

Light & Flavorful Blueberry Banana Cupcakes with Cream Cheese Frosting

Light & Flavorful Blueberry Banana Cupcakes with Cream Cheese Frosting

Light & Flavorful Blueberry Banana Cupcakes with Cream Cheese Frosting

January 6, 2024 by Kimberly

Enjoy our Blueberry Banana Cupcakes, a refined sugar-free recipe, topped with creamy cheese frosting for a light, sweet delight blending natural fruitiness with rich smoothness.

This website uses affiliate links which may earn commission for purchases made at no additional cost to you.

TOTAL TIME

25 min

SERVES

12 cupcakes

DIET

vegetarian

EVERY RECIPE DESERVES

A Little Love Letter

These blueberry banana cupcakes are the kind of bake that instantly fills your kitchen with the scent of something cozy and inviting. They’re incredibly soft and light, made with ripe mashed bananas that add natural sweetness and moisture, and pockets of juicy blueberries that burst gently as they bake. Each bite feels fresh and bright, yet comforting in that nostalgic, homemade way.

What makes them truly special is how effortless they are: simple ingredients, a quick batter, and a result that tastes far more impressive than the time it takes to make them. They’re the kind of cupcakes you can whip up on a slow Sunday morning or bring to a last-minute gathering—and they’ll always feel like a thoughtful, homemade treat.

Once cooled, they’re topped with a silky, slightly tangy cream cheese frosting that pairs beautifully with the fruitiness of the cupcakes. It adds just the right amount of richness without overpowering the delicate flavors. Together, it’s a combination that feels both light and indulgent—perfect for brunch, spring and summer celebrations, or any moment that needs a little piece of happiness baked into it.

Hi, I'm Kimberly!

Hi, I'm Kimberly.

A hopeless romantic when it comes to food. Every recipe I share is a love letter to food itself. I’m so glad you’re here. Make yourself at home and stay a while.

Love,
Kimberly

Kimberly the Zett Signature

If you want to get to know me better,
click here!


Light & Flavorful Blueberry Banana Cupcakes with Cream Cheese Frosting

LET’S MAKE A PIECE OF HAPPINESS

Print
.tasty-recipe-responsive-iframe-container-8634009c { position: relative; overflow: hidden; padding-top: 177.62%; } .tasty-recipe-responsive-iframe-container-8634009c iframe { position: absolute; top: 0; left: 0; width: 100%; height: 100%; border: 0; } clock clock iconcutlery cutlery iconflag flag iconfolder folder iconinstagram instagram iconpinterest pinterest iconfacebook facebook iconprint print iconsquares squares iconheart heart iconheart solid heart solid icon
Light & Flavorful Blueberry Banana Cupcakes with Cream Cheese Frosting

Light & Flavorful Blueberry Banana Cupcakes with Cream Cheese Frosting


  • Author: Kimberly
  • Total Time: 25 min
  • Yield: 12 cupcakes

Description

GOOD TO HAVE ON HAND

  • cupcake tin
  • baking paper
  • large bowl
  • medium bowl
  • hand mixer


Ingredients

Units Scale
CUPCAKES
  • 3 ripe bananas
  • 50 milliliters coconut oil
  • 80 grams agave syrup
  • 1 egg
  • 1 tsp vanilla extract
  • 180 grams all-purpose flour
  • 1 tsp baking soda
  • 1 tsp baking powder
  • 1/2 tsp salt
  • 160 grams frozen blueberries
FROSTING
  • 230 grams cream cheese
  • 250 grams yogurt
  • 50 milliliters agave syrup
  • 1 tsp lemon juice
  • 1/2 tsp vanilla extract

Instructions

  1. Preheat the oven to 180°C (350°F) and line a 12-cup cupcake tin with baking paper and set aside.
  2. In a large bowl, mash the bananas with a fork to a mash. Mix in the coconut oil, agave syrup, egg and vanilla.
  3. Now add the flour, baking soda, baking powder and salt to the bowl and mix everything together until a creamy dough forms, do not overmix. Fold in the blueberries but set aside about 1 tablespoon of them for later.
  4. Fill the cupcake tins about 2/3 full. Now bake for 16 minutes. I bake them in two batches of 6 so that the cupcakes have more room to rise.
  5. Meanwhile, prepare the cream cheese frosting. Place the cream cheese, yoghurt, agave syrup, vanilla extract and lemon juice in a mixing bowl and beat with a hand mixer until stiff peaks form and a firm cream has formed,
  6. Take the cupcakes out of the oven and leave to cool on a wire rack. As soon as the cupcakes are at room temperature, the frosting can be spread on top. Warm the remaining blueberries in a small pot or in the microwave until they turn into a sauce. Let it cool and pour the sauce over the cupcakes just before serving.
  • Passive Time: 10 min
  • Cook Time: 15 min

CRAVING MORE?

Follow along here & don’t forget to subscribe to my substack!

Tarte Flambée

Tarte Flambée

Tarte Flambée

Tarte Flambée

December 30, 2023 by Kimberly

A thin crust, full-bodied crème fraîche, spicy bacon and savory onions – the classic Alsatian tarte flambée.

This website uses affiliate links which may earn commission for purchases made at no additional cost to you.

TOTAL TIME

60 min

SERVES

4 portions

DIET

omnivore

EVERY RECIPE DESERVES

A Little Love Letter

Indulge in the delectable charm of Tarte Flambée, a French classic celebrated for its crispy thin crust, creamy allure, and the delightful interplay of savory bacon and onions. Hailing from the picturesque Alsace region, this dish is a culinary masterpiece that elevates the dining experience with its unique blend of flavors.

This culinary delight pairs perfectly with a light salad or stands alone for a satisfying meal, bringing the essence of French cuisine to your table.

For later enjoyment, store any leftover Tarte Flambée in an airtight container in the refrigerator. Reheat slices in the oven. Avoid microwaving to maintain its crispy texture.

Hi, I'm Kimberly!

Hi, I'm Kimberly.

A hopeless romantic when it comes to food. Every recipe I share is a love letter to food itself. I’m so glad you’re here. Make yourself at home and stay a while.

Love,
Kimberly

Kimberly the Zett Signature

If you want to get to know me better,
click here!


Tarte Flambée
Tarte Flambée

LET’S MAKE A PIECE OF HAPPINESS

Print
.tasty-recipe-responsive-iframe-container-926d2bcd { position: relative; overflow: hidden; padding-top: 177.62%; } .tasty-recipe-responsive-iframe-container-926d2bcd iframe { position: absolute; top: 0; left: 0; width: 100%; height: 100%; border: 0; } clock clock iconcutlery cutlery iconflag flag iconfolder folder iconinstagram instagram iconpinterest pinterest iconfacebook facebook iconprint print iconsquares squares iconheart heart iconheart solid heart solid icon
Tarte Flambée

Tarte Flambée


  • Author: Kimberly
  • Total Time: 1 hr
  • Yield: 1 baking tray

Description

GOOD TO HAVE ON HAND

  • large mixing bowl
  • sieve
  • sharp knife
  • cutting board


Ingredients

Units Scale
DOUGH
  • 250 grams all-purpose flour
  • 125 milliliters water
  • 2 tbsp olive oil
  • 2 tsp salt
TOPPINGS
  • 100 grams crème fraîche
  • 125 grams bacon
  • 1 red onion
  • salt
  • pepper
  • chives

Instructions

  1. Put the water, salt, olive oil and sifted flour in a bowl. Stir with a spoon until it is no longer sticky. Then remove everything from the bowl and work into a smooth dough with your hands for approx. 3 minutes. Do not add any more flour. Then wrap the dough in cling film and leave to rest at room temperature for approx. 30 minutes.
  2. Remove the skin from the onions and cut into thin stripes.
  3. Sprinkle a little flour on a work surface. Place the dough piece on top and also sprinkle with a little flour. Then use a rolling pin to roll out the dough to the size of a baking tray, approx. 40×30 cm (16×12 inches).
  4. Place the dough on a baking tray lined with baking paper and brush with crème fraîche. Season with salt. Then spread the onions and bacon evenly on top.
  5. Bake the pastry at 250°C (480°F) using the grill function for approx. 15 minutes. Take out and top with freshly cracked pepper and chives.
  • Passive Time: 45 min
  • Cook Time: 15 min

CRAVING MORE?

Follow along here & don’t forget to subscribe to my substack!

Easy Ciabatta Buns

Easy Ciabatta Buns

Easy Ciabatta Buns

Easy Ciabatta Buns

December 27, 2023 by Kimberly

Soft and airy, easy ciabatta buns are perfect for sandwiches. Their golden crust and light texture make them a delightful choice for any meal or snack.

This website uses affiliate links which may earn commission for purchases made at no additional cost to you.

TOTAL TIME

4 hrs

SERVES

8 buns

DIET

vegan

EVERY RECIPE DESERVES

A Little Love Letter

Savor the simplicity of our easy ciabatta buns—a homemade delight with a golden crust and a soft, airy interior. Perfect for sandwiches or alongside a hearty meal, these buns require minimal effort for maximum flavor.

Serve these ciabatta buns fresh out of the oven for the ultimate experience. Ideal for crafting gourmet sandwiches or simply slathering with butter, their versatile nature complements any culinary creation. Embrace the warm, fluffy texture and revel in the homemade goodness.

To keep your ciabatta buns at their best, store them in a paper bag or bread box at room temperature. Avoid airtight containers to maintain the crisp crust. For longer freshness, freeze individually wrapped buns. Reheat in the oven for a few minutes to recapture that just-baked perfection.

Hi, I'm Kimberly!

Hi, I'm Kimberly.

A hopeless romantic when it comes to food. Every recipe I share is a love letter to food itself. I’m so glad you’re here. Make yourself at home and stay a while.

Love,
Kimberly

Kimberly the Zett Signature

If you want to get to know me better,
click here!


Easy Ciabatta Buns
Easy Ciabatta Buns
Easy Ciabatta Buns
Easy Ciabatta Buns

LET’S MAKE A PIECE OF HAPPINESS

Print
.tasty-recipe-responsive-iframe-container-19456ccb { position: relative; overflow: hidden; padding-top: 177.62%; } .tasty-recipe-responsive-iframe-container-19456ccb iframe { position: absolute; top: 0; left: 0; width: 100%; height: 100%; border: 0; } clock clock iconcutlery cutlery iconflag flag iconfolder folder iconinstagram instagram iconpinterest pinterest iconfacebook facebook iconprint print iconsquares squares iconheart heart iconheart solid heart solid icon
Easy Ciabatta Buns

Easy Ciabatta Buns


  • Author: Kimberly
  • Total Time: 4 hrs + 5 min
  • Yield: 8

Description

RECOMMENDED EQUIPMENT

  • large bowl
  • whisk
  • spatula
  • dough scraper (or blunt knife)
  • casserole dish (or ovenproof dish)

Ingredients

Units Scale
  • 350 milliliters lukewarm water
  • 1 tsp sugar
  • 1 tbsp oil
  • 7 grams instant yeast
  • 500 grams flour type 00 (pizza flour)
  • 1 tsp salt

Instructions

  1. Place the ingredients in a large bowl in the following order: warm water, 1 tsp sugar, 1 tbsp olive oil, dry yeast. Mix everything well with a whisk.
  2. Now add flour and 1 tsp salt. Mix everything well with a spatula so that the flour is incorporated and the edges can be scraped off. Now cover the bowl with a towel for 20 minutes and leave to rest.
  3. Wet your hands with a little water and grab the dough from four sides one after the other, pull it up and fold it in the middle so that the dough becomes rounder and has tension. Cover the bowl with a towel again and leave to rest for another 20 minutes.
  4. Repeat step 3 and cover the bowl with a towel again, but this time leave the dough to rest for approx. 2 hours.
  5. Sprinkle a little flour on a work surface and place the dough on top and also sprinkle with a little flour. Spread the dough out a little and divide into 8 equal portions. Pull the dough pieces in a semicircle on the worktop so that there is tension on the surface.
  6. Place baking paper on a baking tray and sprinkle with a little flour. Place the dough pieces on top, cover again with a towel and leave to rise for another hour.
  7. Now heat the oven to 230°C (446°F). Place a baking dish or ovenproof dish with water on the bottom of the oven. Instead of the bowl of water, you can also simply pour water into the oven with a spray bottle as soon as the tray is in the oven and then quickly close the door.
  8. Once the oven has heated up, place the baking tray with the rolls in the oven and bake for 10 minutes. Then remove the baking dish with water from the oven and bake for a further 10-15 minutes until the buns are golden brown.
  • Passive Time: 4 hrs
  • Cook Time: 5 min

CRAVING MORE?

Follow along here & don’t forget to subscribe to my substack!