Cajun Bang Bang Salmon Rice Bowl

Cajun Bang Bang Salmon Rice Bowl

Cajun Bang Bang Salmon Rice Bowl

Cajun Bang Bang Salmon Rice Bowl

February 7, 2024 by Kimberly

Discover the taste of Cajun-spiced Salmon Bites, paired with fluffy rice for a quick, savory meal. Perfect for an easy, delightful seafood experience!

This website uses affiliate links which may earn commission for purchases made at no additional cost to you.

TOTAL TIME

25 min

SERVES

2 portions

DIET

omnivore

EVERY RECIPE DESERVES

A Little Love Letter

Dive into the vibrant world of Cajun cuisine with my Cajun Salmon Recipe, a perfect blend of bold flavors and nutritious ingredients. These Spicy Salmon Bites offer a tantalizing experience, bringing the essence of Southern cooking right to your plate. Ideal for those who love Easy Seafood Meals, this dish combines the simplicity of cooking with an explosion of taste, making it a must-try for seafood enthusiasts.

The salmon bites, with their perfect Cajun seasoning, are best paired with fluffy, light rice, enhancing the rich flavors of the fish. This pairing makes for an irresistible combination and lands this dish among the top quick salmon dishes. Whether you’re hosting a dinner party or looking for a simple yet flavorful seafood recipe for your family, these Cajun Salmon Bites will not disappoint. Their versatility also makes them a great option for a healthy salmon idea, fitting into various meal plans.

Keep any leftovers in an airtight container in the refrigerator, ensuring they stay fresh. Make sure to store each ingredient in a separate container. They can be easily reheated for a quick meal, maintaining their delicious taste and texture.

Hi, I'm Kimberly!

Hi, I'm Kimberly.

A hopeless romantic when it comes to food. Every recipe I share is a love letter to food itself. I’m so glad you’re here. Make yourself at home and stay a while.

Love,
Kimberly

Kimberly the Zett Signature

If you want to get to know me better,
click here!


Cajun Bang Bang Salmon Rice Bowl

LET’S MAKE A PIECE OF HAPPINESS

Print
clock clock iconcutlery cutlery iconflag flag iconfolder folder iconinstagram instagram iconpinterest pinterest iconfacebook facebook iconprint print iconsquares squares iconheart heart iconheart solid heart solid icon
Cajun Bang Bang Salmon Rice Bowl

Cajun Bang Bang Salmon Rice Bowl


5 Stars 4 Stars 3 Stars 2 Stars 1 Star

No reviews

  • Author: Kimberly
  • Total Time: 25 min
  • Yield: 2 1x

Description

GOOD TO HAVE ON HAND

  • sharp knife
  • cutting board
  • medium bowl
  • small bowl
  • rice cooker (or pot with lid)


Ingredients

Units Scale
SALMON
  • 300 grams salmon fillet
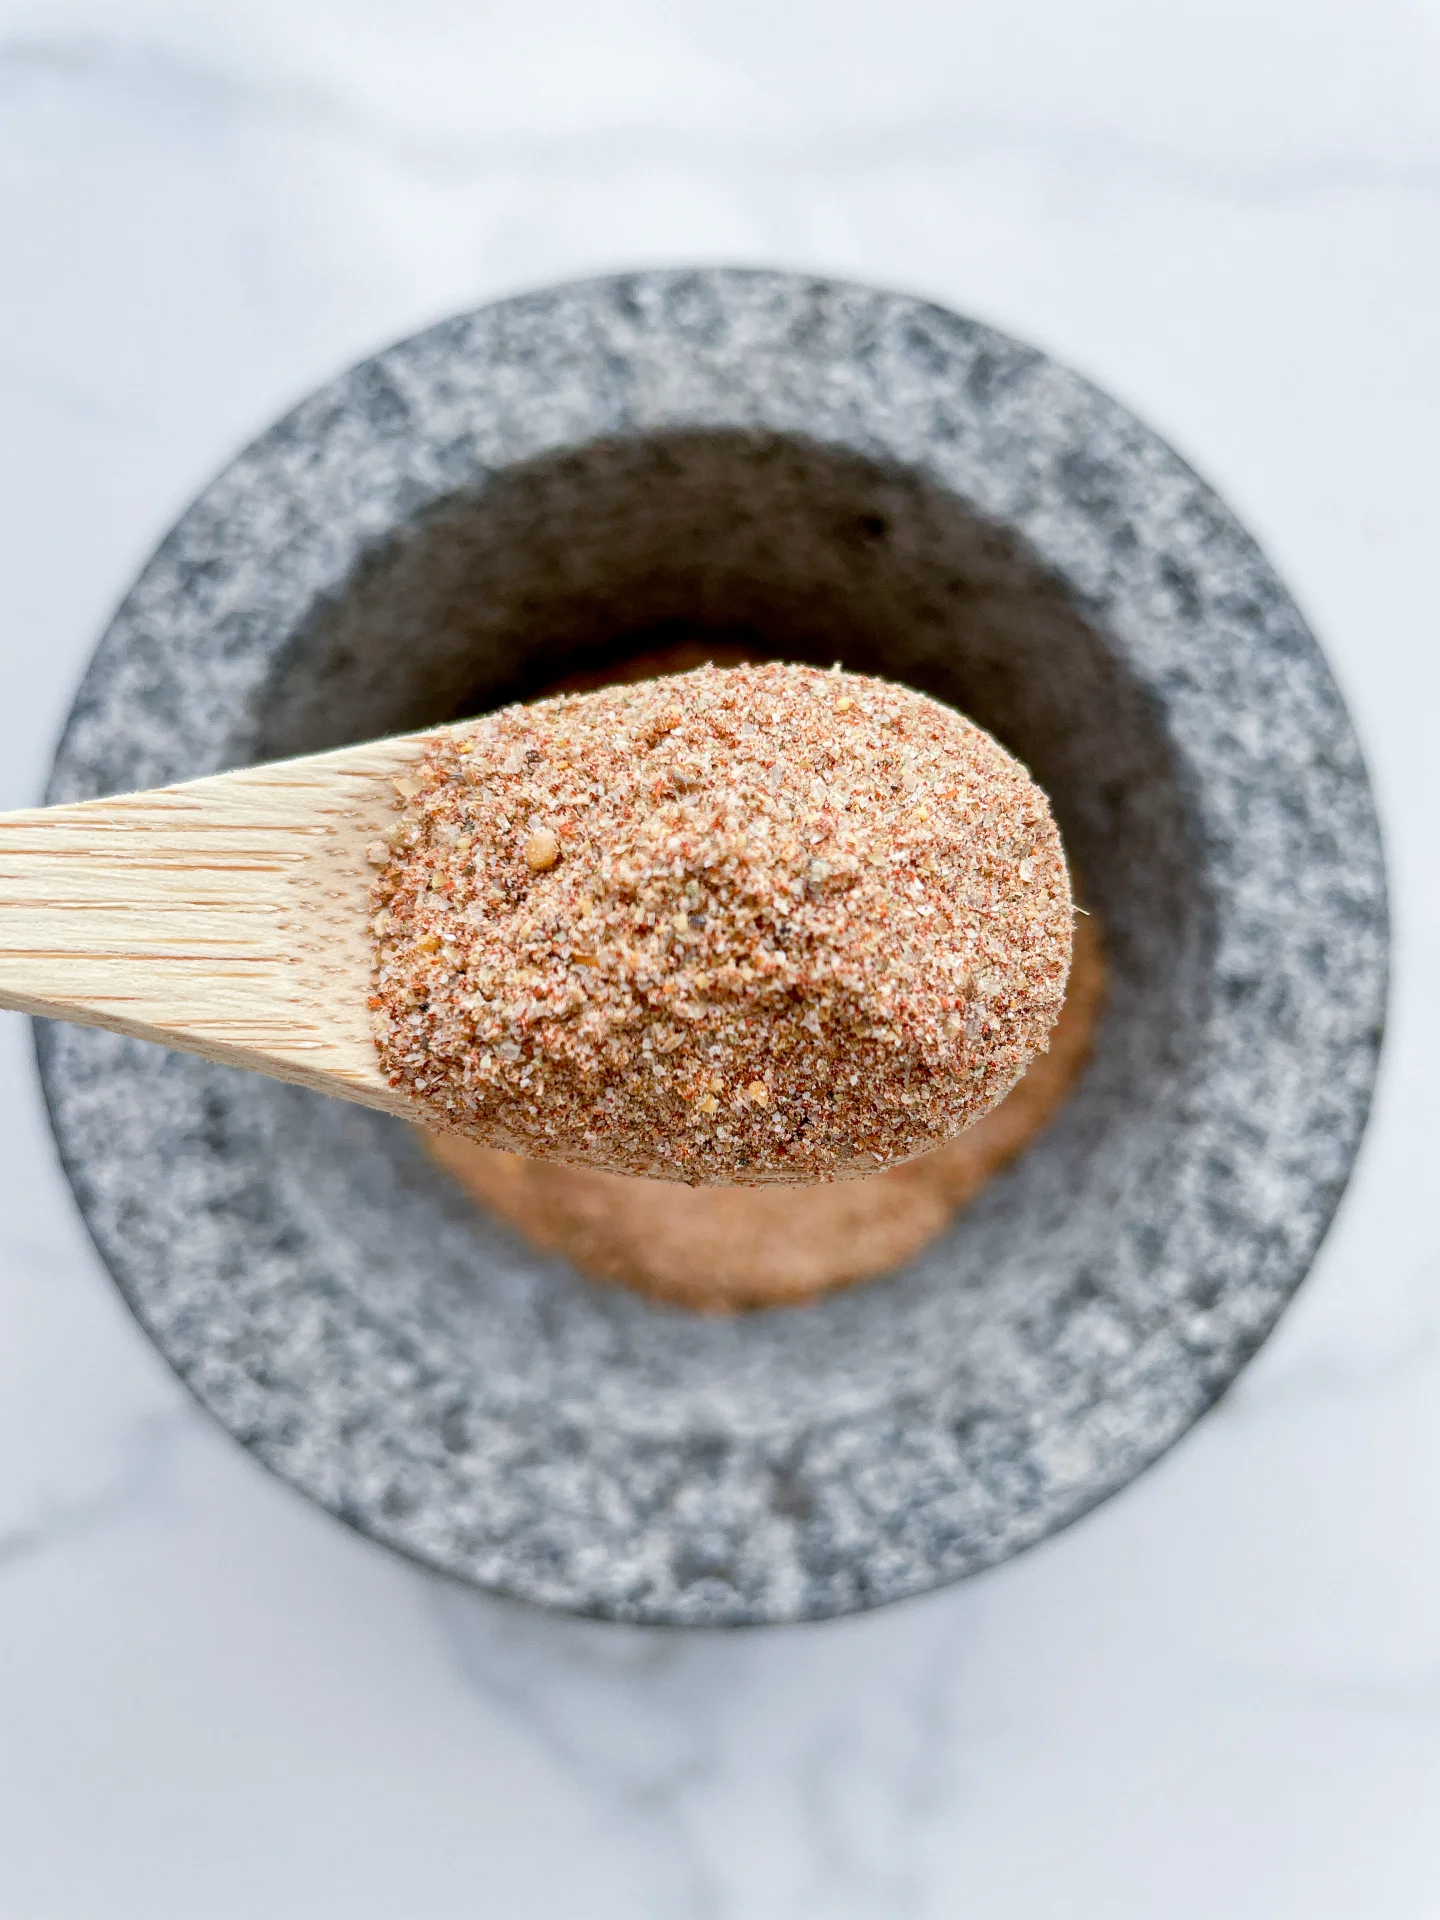
  • 1 tbsp cajun seasoning
  • 2 tbsp olive oil
SAUCE
  • 50 grams mayonnaise
  • 50 grams sweet &; sour sauce
  • 1 tbsp sriracha sauce
  • 1 tbsp lemon juice
  • 1 tsp crispy chili oil
  • 1 garlic clove
RICE
  • 300 grams jasmine rice
  • 400 milliliters water
TOPPING
  • spring onions

Instructions

  • Preheat the oven to 180°C (350°F)
  • Cut the spring onions into thin strips.
  • Cut the lemon in half.
  • Peel the garlic clove.
  • Pat the salmon dry and cut into large pieces.
  • Wash the rice until the water runs clear. Then cook the rice with 400ml (1 3/4 cups) of fresh water in the rice cooker. If you don’t have a rice cooker, you can cook the rice in a pot with a lid. To do so bring to a boil and then finish cooking on the lowest setting with the lid on.
  • In a medium-sized bowl, mix together the marinade for the salmon. Stir together the olive oil and Cajun seasoning and add the salmon bites. Stir everything well and then place the salmon pieces on a baking tray lined with baking paper.
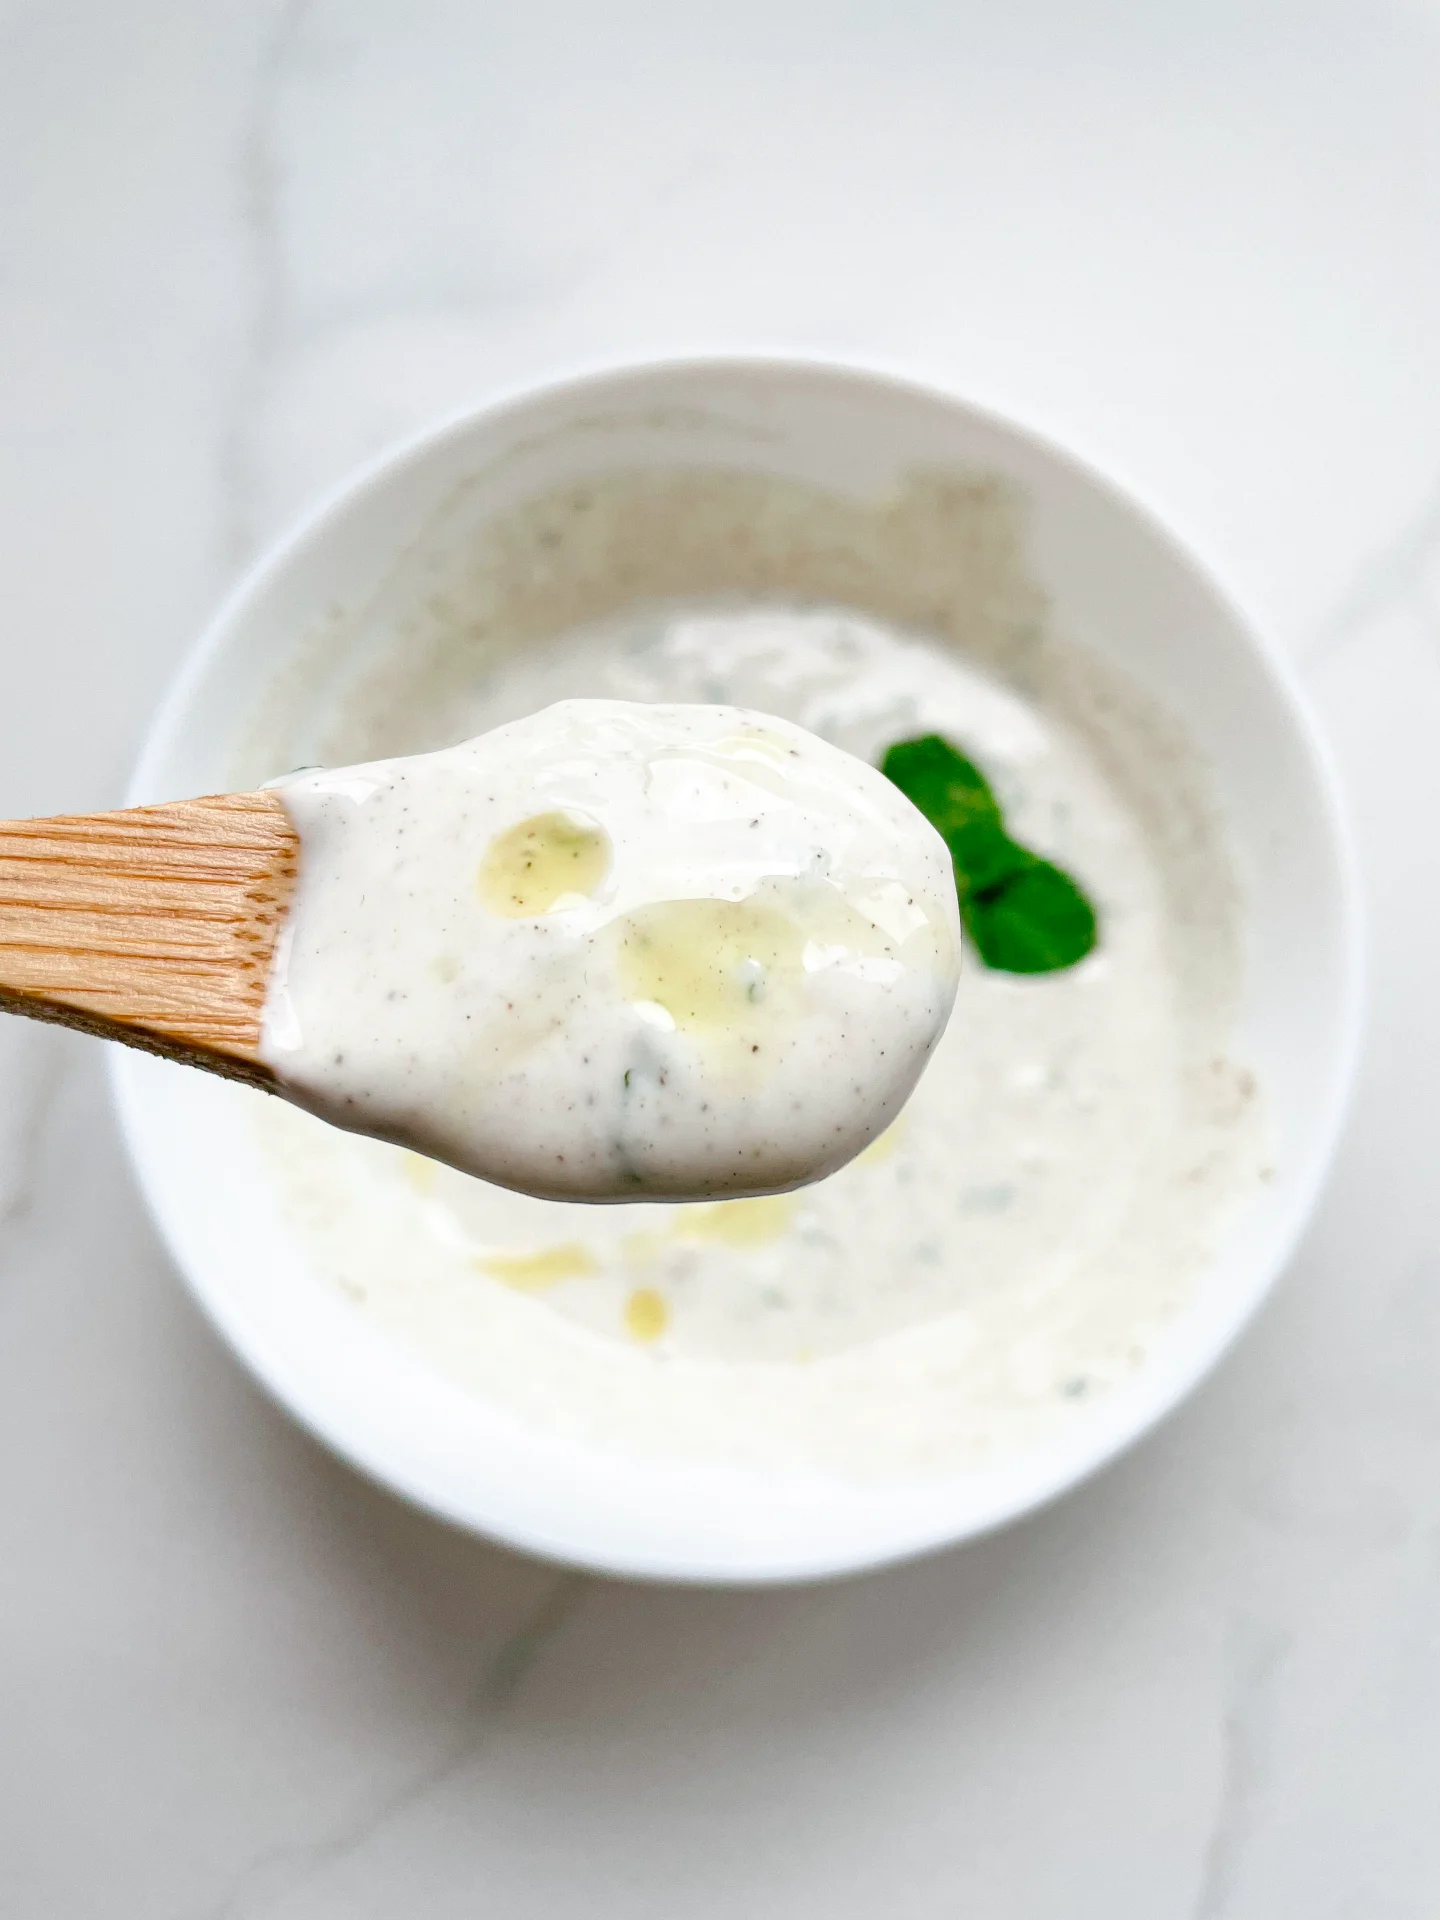
  • Meanwhile, prepare the sauce. In a small bowl, mix together the mayonnaise, sweet and sour sauce, Sriracha, lemon juice, crispy chili oil and crushed garlic.
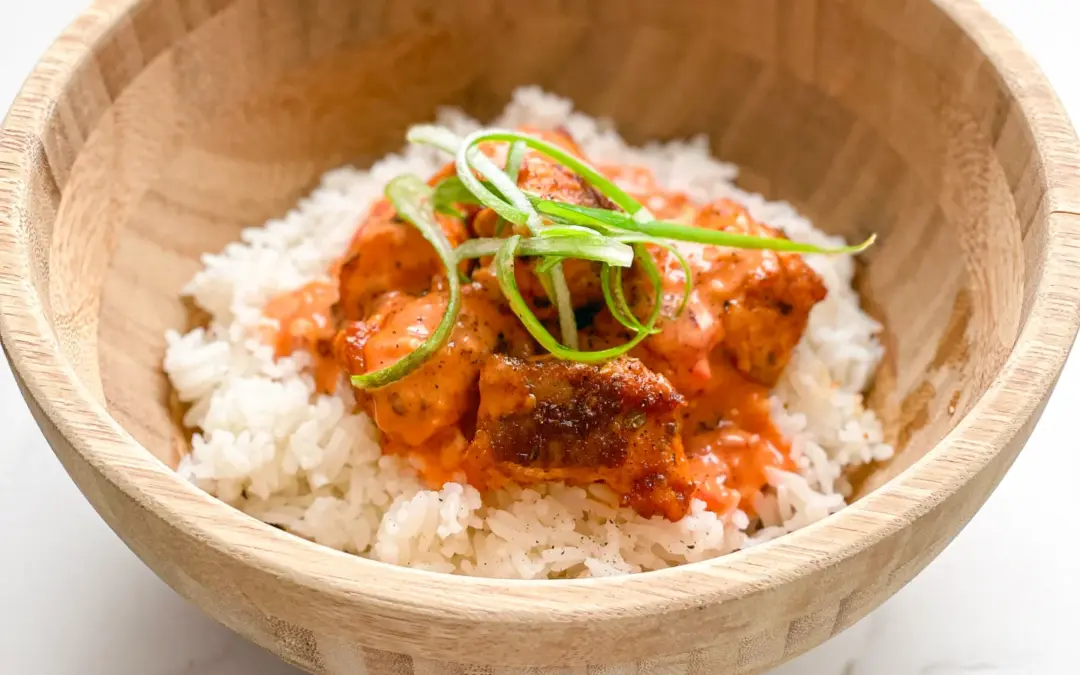
  • Remove the salmon from the oven after 5-7 minutes. Now divide the rice into two bowls, place the salmon bites on top and spread the sauce over them. Finally, top with spring onions.
  • Cook Time: 25 min

CRAVING MORE?

Follow along here & don’t forget to subscribe to my substack!

Parmesan Risotto with Mixed Mushrooms & Herbs

Parmesan Risotto with Mixed Mushrooms & Herbs

Parmesan Risotto with Mixed Mushrooms & Herbs

Parmesan Risotto with Mixed Mushrooms & Herbs

February 5, 2024 by Kimberly

Enjoy a delicious parmesan risotto with mixed mushrooms & herbs, perfect for a cozy, savory meal. It’s a simple, mouthwatering meal that everyone will love!

This website uses affiliate links which may earn commission for purchases made at no additional cost to you.

TOTAL TIME

80 min

SERVES

3 portions

DIET

vegetarian

EVERY RECIPE DESERVES

A Little Love Letter

Indulge in the comforting flavors of our Parmesan Risotto with Mixed Mushrooms & Herbs, a gourmet Italian Risotto that’s both easy to cook and irresistibly delicious. This creamy mushroom risotto, infused with the richness of Parmesan and the freshness of herbs, is a perfect representation of homemade risotto ideas. It’s a vegetarian risotto dish that combines health and taste in every spoonful.

To serve, present this risotto hot, garnished with extra Parmesan and a sprinkle of fresh herbs for a delightful aroma and taste. It pairs wonderfully with a crisp, green salad or a glass of white wine, making it ideal for a cozy family dinner or a sophisticated gathering. Remember, risotto is best enjoyed immediately to savor its creamy texture and rich flavors.

For storing, keep any leftovers of this healthy mushroom meal in an airtight container in the refrigerator. It will stay fresh for up to two days. When ready to enjoy again, gently reheat it on the stove, adding a little water or broth to maintain its creamy consistency.

Hi, I'm Kimberly!

Hi, I'm Kimberly.

A hopeless romantic when it comes to food. Every recipe I share is a love letter to food itself. I’m so glad you’re here. Make yourself at home and stay a while.

Love,
Kimberly

Kimberly the Zett Signature

If you want to get to know me better,
click here!


Parmesan Risotto with Mixed Mushrooms & Herbs

LET’S MAKE A PIECE OF HAPPINESS

Print
clock clock iconcutlery cutlery iconflag flag iconfolder folder iconinstagram instagram iconpinterest pinterest iconfacebook facebook iconprint print iconsquares squares iconheart heart iconheart solid heart solid icon
Parmesan Risotto with Mixed Mushrooms & Herbs

Parmesan Risotto with Mixed Mushrooms & Herbs


  • Author: Kimberly
  • Yield: 3 1x

Description

GOOD TO HAVE ON HAND

  • sharp knife
  • cutting board
  • medium-sized pot
  • medium sized pan


Ingredients

Units Scale
RISOTTO
  • 200 grams risotto rice
  • 400 milliliters broth, vegetable or chicken
  • 200 milliliters dry white wine
  • 300 milliliters water
  • 100 grams parmesan
  • 1 white onion
  • 2 tbsp olive oil
  • 1 tsp butter
  • salt & pepper to taste
MUSHROOMS
  • 250 grams mushrooms of your choice (I used brown champignons, oyster mushrooms & shimeji mushrooms)
  • 50 milliliters dry white wine
  • 1 stem rosemary
  • 1 stem sage
  • 1 stem thyme
  • 2 tbsp olive oil
  • 1 tsp butter
  • salt & pepper to taste

Instructions

  1. Finely grate the Parmesan.
  2. Clean the mushrooms and cut half of them into large pieces and the other half into small pieces.
  3. Cut the onion into small pieces.
  4. Pluck the herb leaves from the stalks and chop finely.
  5. Heat 1 tsp butter and 2 tbsp olive oil in a pan. Add the mushrooms and fry for approx. 10 minutes until golden brown. Add the finely chopped herbs, stir and fry briefly. Then deglaze with 50ml white wine and reduce until there is no more liquid in the pan. Season the mushrooms with salt and pepper. Put the pan to aside.
  6. Heat 1 tsp butter and 2 tbsp olive oil in the pan. Sauté the onions until translucent and then add the risotto rice. Stir everything well and sauté for 1-2 minutes. Now deglaze with 100ml (1/2 cup) white wine and reduce over a medium heat until there is no more liquid in the pan.
  7. Now pour 100ml (1/2 cup) of the stock into the rice. Leave to simmer, stirring occasionally, until the liquid has evaporated. Now pour in the next 100ml, stir and leave it to simmer until the rice soaked up the liquid. Proceed in the same way with the remaining 200 ml (1 cup) of stock, adding 100 ml (1/2 cup) at a time and allowing to simmer.
  8. Now add 150ml (1+ 1/4 cup) of the water to the rice and also let it cook until the rice absorbed the water. Next, add 100ml (1/2 cup) of white wine. Finally, add the last 150ml (1+ 1/4 cup) of water and cook now while stirring. The whole process takes about 40 minutes.
  9. Remove the pot from the heat and stir in the Parmesan. Stir well so that the Parmesan melts. Now add half of the fried mushrooms and stir well.
  10. Divide the risotto between plates and top with the other half of the mushrooms. Top with freshly ground pepper and olive oil to taste.

CRAVING MORE?

Follow along here & don’t forget to subscribe to my substack!

Truffle Mushroom Mascarpone Pasta

Truffle Mushroom Mascarpone Pasta

Truffle Mushroom Mascarpone Pasta

Truffle Mushroom Mascarpone Pasta

February 2, 2024 by Kimberly

Experience the luxurious taste of Truffle Mushroom Mascarpone Pasta, a creamy delight that’s simple to prepare and perfect for an unforgettable gourmet experience.

This website uses affiliate links which may earn commission for purchases made at no additional cost to you.

TOTAL TIME

55 min

SERVES

4 portions

DIET

vegetarian

EVERY RECIPE DESERVES

A Little Love Letter

Dive into the world of gourmet cooking with my Truffle Mushroom Mascarpone Pasta, a dish that promises a luxurious taste experience. Perfect for those who adore the rich, earthy flavors of truffles and the creamy texture of mascarpone, this easy Truffle Pasta is a delightful twist on traditional Italian cuisine. Its decadent mushroom blend is sure to impress, offering a quick yet elegant meal option for any occasion. 

You can use broth or stock for this dish. Just note that if you use stock, you will need to season the whole dish more strongly. As always, homemade broth or stock will make the dish taste a thousand times better than store-bought. Chopped truffle pieces in oil and truffle oil are a much cheaper and very tasty alternative to fresh truffles. You can order the products online or in a supermarket.

To elevate your dining experience, serve it hot, garnished with freshly grated Parmesan and a sprinkle of herbs. Pair it with a light, crisp white wine to complement the richness of the truffles and mascarpone. It’s a Luxury Pasta Dish that’s perfect for intimate dinners or as a sophisticated centerpiece for your gatherings.

If you have leftovers, let the pasta cool down and then store it in an airtight container. It can be refrigerated for up to 2 days. When ready to enjoy again, gently reheat it on the stove or in the microwave, adding a splash of stock or a dollop of mascarpone to retain its creamy texture. This Truffle Pasta delight remains a tantalizing treat, even as leftovers!

Hi, I'm Kimberly!

Hi, I'm Kimberly.

A hopeless romantic when it comes to food. Every recipe I share is a love letter to food itself. I’m so glad you’re here. Make yourself at home and stay a while.

Love,
Kimberly

Kimberly the Zett Signature

If you want to get to know me better,
click here!


Truffle Mushroom Mascarpone Pasta

LET’S MAKE A PIECE OF HAPPINESS

Print
clock clock iconcutlery cutlery iconflag flag iconfolder folder iconinstagram instagram iconpinterest pinterest iconfacebook facebook iconprint print iconsquares squares iconheart heart iconheart solid heart solid icon
Truffle Mushroom Mascarpone Pasta

Truffle Mushroom Mascarpone Pasta


  • Author: Kimberly
  • Total Time: 40 min
  • Yield: 4 1x

Description

GOOD TO HAVE ON HAND

  • sharp knife
  • cutting board
  • large pan
  • large pot


Ingredients

Units Scale
  • 500 grams spaghettoni
  • 500 milliliters vegetable or chicken broth
  • 100 milliliters white wine
  • 100 grams mascarpone
  • 200 grams mushrooms
  • 70 grams parmesan
  • 2 tsp minced truffle in oil
  • 2 tbsp butter
  • 1 shallot
  • 2 garlic cloves
  • 1-2 stems thyme
  • truffle oil, for topping

Instructions

  1. Cut the shallot into very small pieces.
  2. Cut the mushrooms into very small pieces.
  3. Finely grate the parmesan.
  4. Heat the butter with the truffle oil in a large pan. Sauté the finely chopped shallots over a medium heat for approx. 3 minutes until translucent.
  5. Now add the chopped mushrooms. Allow to brown for a few minutes so that the mushrooms turn golden brown. Add the peeled garlic cloves as whole and one to two stalks of fresh thyme and sauté for 1-2 minutes. Then deglaze with white wine and let it boil for about five minutes on a medium heat, then stir.
  6. Now add the hot chicken stock and cook over a medium heat until only 1/3 is left. This will take about 15 minutes.
  7. In the meantime, cook the pasta in a pan in boiling salted water until al dente.
  8. Now add the mascarpone to the sauce, stir and heat gently. Remove the garlic clove and thyme from the pan. Now add the chopped truffle. Stir well and remove the pan from the heat. Add 1 tbsp of butter to the sauce. Truffle butter is best for this, but normal butter will also work. Season to taste with salt and pepper.
  9. Add the pasta to the sauce in the pan. Stir well. Now add the grated Parmesan and approx. 150 ml of the pasta cooking water to the pan and stir everything until creamy using tongs. This may take a few minutes. Now serve on deep plates. Top with truffle oil and a few mushrooms.
  • Cook Time: 40 min

CRAVING MORE?

Follow along here & don’t forget to subscribe to my substack!

Classic Cucumber Salad

Classic Cucumber Salad

Classic Cucumber Salad

Classic Cucumber Salad

January 28, 2024 by Kimberly

Relish in the fresh, crisp taste of Classic Cucumber Salad, an effortlessly light and healthy dish, perfect for any meal or as a refreshing snack!

This website uses affiliate links which may earn commission for purchases made at no additional cost to you.

TOTAL TIME

30 min

SERVES

4 portions

DIET

vegan

EVERY RECIPE DESERVES

A Little Love Letter

Discover the timeless appeal of classic Cucumber Salad, a dish celebrated for its simplicity and freshness. This healthy salad, made with crisp cucumbers, is the epitome of a light side dish that complements any meal. Perfect for those seeking a nutritious vegetable salad that is both easy to prepare and delightfully satisfying.

Serving this classic Cucumber Salad is all about embracing its fresh and natural flavors. It’s an excellent addition to any table, be it for a casual lunch or a more formal dinner. This refreshing salad recipe pairs wonderfully with grilled meats, sandwiches, or as a standalone dish for a light meal. Its versatility also makes it a favorite in vegan salad ideas, appealing to various dietary preferences. For an enhanced experience, serve it chilled, allowing the flavors to meld together, creating a moreish, refreshing treat that’s sure to please any palate.

Keep it refrigerated in an airtight container to maintain its crispness and freshness. Ideally, it should be consumed within a day or two to enjoy its optimal taste and texture. This simple salad preparation ensures that you have a healthy, ready-to-eat option on hand.

Hi, I'm Kimberly!

Hi, I'm Kimberly.

A hopeless romantic when it comes to food. Every recipe I share is a love letter to food itself. I’m so glad you’re here. Make yourself at home and stay a while.

Love,
Kimberly

Kimberly the Zett Signature

If you want to get to know me better,
click here!


Classic Cucumber Salad

LET’S MAKE A PIECE OF HAPPINESS

Print
clock clock iconcutlery cutlery iconflag flag iconfolder folder iconinstagram instagram iconpinterest pinterest iconfacebook facebook iconprint print iconsquares squares iconheart heart iconheart solid heart solid icon
Classic Cucumber Salad

Classic Cucumber Salad


  • Author: Kimberly
  • Total Time: 30 min
  • Yield: 4 1x

Description

GOOD TO HAVE ON HAND

  • Mandolin (or sharp knife)
  • sealable glass
  • salad bowl


Ingredients

Scale
SALAD
  • 1 cucumber
  • 1 small onion
  • chives
DRESSING
  • 1 garlic clove
  • 2 tbsp olive oil
  • 2 tbsp white wine vinegar
  • 1/2 tsp sugar
  • 1 tsp salt
  • chives

Instructions

  • Wash the cucumber thoroughly.
  • Slice the cucumber into very thin slices. Finely chop the onion.
  • For the dressing, pour the vinegar, oil, salt, sugar and crushed garlic into a sealable jar and shake well. Flavour the dressing and season with salt and ground pepper to taste.
  • Mix the cucumber slices and onion pieces with the dressing in a bowl and leave to stand in the fridge for 20 minutes.
  • Passive Time: 20 min
  • Cook Time: 10 min

CRAVING MORE?

Follow along here & don’t forget to subscribe to my substack!

Basic Hummus

Basic Hummus

Basic Hummus

Basic Hummus

January 20, 2024 by Kimberly

Discover delicious Basic Hummus, a healthy, creamy snack! Perfect for dipping, it’s packed with flavor and nutrients. A must-try for all food lovers!

This website uses affiliate links which may earn commission for purchases made at no additional cost to you.

TOTAL TIME

10 min

SERVES

4 portions

DIET

vegan

EVERY RECIPE DESERVES

A Little Love Letter

Indulge in the delightful flavors of homemade Hummus. This creamy, protein-rich spread is not just delicious, but also a healthy snack option. Made from simple, wholesome ingredients, this easy Hummus recipe is perfect for health enthusiasts and food lovers alike. Whether you’re a fan of vegan options or looking for gluten-free snacks, this nutritious dip fits all palates.

Hummus is incredibly versatile, making it a perfect addition to any meal. Spread it on warm pita bread for a classic experience, or use it as a dip with crunchy vegetables for a healthy treat. It’s an excellent companion and can be customized to your liking. Add a sprinkle of olive oil and a dash of paprika to enhance its flavors, making it an irresistible centerpiece for your gatherings.

To keep your homemade Hummus fresh and flavorful, store it in an airtight container in the refrigerator. It stays good for up to a week, ensuring you have a protein-rich Hummus snack ready at all times.

Hi, I'm Kimberly!

Hi, I'm Kimberly.

A hopeless romantic when it comes to food. Every recipe I share is a love letter to food itself. I’m so glad you’re here. Make yourself at home and stay a while.

Love,
Kimberly

Kimberly the Zett Signature

If you want to get to know me better,
click here!


Basic Hummus
Basic Hummus

LET’S MAKE A PIECE OF HAPPINESS

Print
clock clock iconcutlery cutlery iconflag flag iconfolder folder iconinstagram instagram iconpinterest pinterest iconfacebook facebook iconprint print iconsquares squares iconheart heart iconheart solid heart solid icon
Basic Hummus

Basic Hummus


  • Author: Kimberly
  • Total Time: 10 min
  • Yield: 4 1x

Description

GOOD TO HAVE ON HAND

  • sharp knife
  • cutting board
  • sieve
  • food processor


Ingredients

Units Scale
HUMMUS BASE
  • 265 grams cooked chickpeas, drained
  • 2 tbsp oilve oil
  • juice of half a lemon
  • 60 grams tahini
  • 1 garlic clove
  • 1/4 tsp salt
  • 1/4 tsp cumin
  • 4-5 ice cubes
TOPPINGS
  • chickpeas
  • parsley
  • paprika powder
  • za’atar
  • olive oil

Instructions

  1. Pour the chickpeas from the tin into a sieve and rinse them with cold water until no more bubbles form from the aquafaba. You can also collect the aquafaba and use it for other vegan dishes.
  2. Peel the garlic clove and cut the lemon in half.
  3. Pour the chickpeas into the food processor. You can keep a few chickpeas for decoration. Add the garlic clove, tahini, salt, olive oil and cumin. Now blend everything well at medium speed until you have a crumbly but creamy mixture.
  4. Next, add the ice cubes in batches while the machine is running. Blend for about 1-3 minutes (depending on the model) on highest until a creamy, smooth and airy mixture is formed. Season to taste with salt, lemon juice and garlic if necessary. If the hummus is too thick, you can add a little cold water and blend again.
  5. Now pour the hummus into a deep plate and garnish with olive oil, chickpeas, herbs and paprika powder as desired.
  • Cook Time: 10 min

CRAVING MORE?

Follow along here & don’t forget to subscribe to my substack!

Roasted Eggplant with Tahini Yogurt Sauce

Roasted Eggplant with Tahini Yogurt Sauce

Roasted Eggplant with Tahini Yogurt Sauce

Roasted Eggplant with Tahini Yogurt Sauce

January 18, 2024 by Kimberly

Indulge in Roasted Eggplant with Tahini Yogurt Sauce, a tantalizing, easy-to-prepare dish that promises a burst of exquisite flavors in every bite!

This website uses affiliate links which may earn commission for purchases made at no additional cost to you.

TOTAL TIME

25 min

SERVES

2 portions

DIET

vegetarian

EVERY RECIPE DESERVES

A Little Love Letter

Embark on a culinary journey with this Roasted Eggplant with Tahini Yogurt Sauce, a dish that masterfully combines simplicity with exotic flavors. Perfect for those who adore vegetarian recipes, this easy-to-prepare entrée is a gourmet treat. Made with succulent roasted eggplant and draped in a homemade tahini yogurt sauce, it’s a delicious addition to any meal or a highlight on its own.

Serving this dish is a breeze and it’s incredibly versatile. Present it as a stunning centerpiece for a family-friendly vegetarian meal or as a side dish that complements a variety of mains. The creamy tahini yogurt sauce adds a savory richness, making it an instant hit. To elevate the experience, garnish with fresh herbs or a sprinkle of toasted sesame seeds. Pair with crusty bread or a light salad for a complete, flavorful eggplant dinner idea.

Refrigerate any leftovers in an airtight container, ensuring it stays fresh and delicious. Enjoy it within the next 2 days. The flavors often deepen, making the reheated dish even more delicious.

Hi, I'm Kimberly!

Hi, I'm Kimberly.

A hopeless romantic when it comes to food. Every recipe I share is a love letter to food itself. I’m so glad you’re here. Make yourself at home and stay a while.

Love,
Kimberly

Kimberly the Zett Signature

If you want to get to know me better,
click here!


Roasted Eggplant with Tahini Yogurt Sauce

LET’S MAKE A PIECE OF HAPPINESS

Print
clock clock iconcutlery cutlery iconflag flag iconfolder folder iconinstagram instagram iconpinterest pinterest iconfacebook facebook iconprint print iconsquares squares iconheart heart iconheart solid heart solid icon
Roasted Eggplant with Tahini Yogurt Sauce

Roasted Eggplant with Tahini Yogurt Sauce


  • Author: Kimberly
  • Total Time: 25 min
  • Yield: 2 1x

Description

GOOD TO HAVE ON HAND

  • sharp knife
  • cutting board
  • small bowl
  • medium bowl
  • mortar


Ingredients

Scale
EGGPLANT
  • 1 eggplant
  • 4 tbsp olive oil
  • 1/4 tsp salt
  • 1/8 tsp ground pepper
  • 1/8 tsp dried coriander powder
  • 1/8 tsp cinnamon
  • 1/8 tsp oregano
  • 1/8 tsp garlic powder
  • 1/8 tsp chili flakes
  • 2 cardamom capsules
TAHINI YOGURT SAUCE
  • 2 tbsp tahini
  • 4 tbsp cold water
  • 2 tbsp yogurt
  • 1 tbsp olive oil
  • 1 tbsp lemon juice
  • 1 garlic clove
  • 1/8 tsp salt
TOPPINGS
  • dates
  • chives
  • mint
  • lemon juice
  • olive oil

Instructions

  1. Preheat the oven to 230°C (450°F).
  2. Wash the eggplant and cut into 1 cm (1/2 inch) thick slices. Cut the chives into fine rolls and roughly chop the mint.
  3. Cut the dates into small pieces and crush the contents of the cardamom pods with a mortar.
  4. Mix spices together in a small bowl: 1/4 tsp salt and 1/8 tsp each of the ground pepper, coriander, cinnamon, oregano, garlic, chilli and the contents of two cardamom pods. Stir everything together and set aside.
  5. Place the eggplant slices on a baking tray lined with baking paper, spread 4 tablespoons of olive oil and the spice mixture over them. Rub all the slices with your hands and spread the oil and spices evenly. Now place the tray in the oven and bake the eggplant for 20 minutes.
  6. In the meantime, mix the tahini-yoghurt sauce in a medium-sized bowl. Mix 2 tbsp tahini with 4 tbsp water until smooth. Then add 2 tbsp yogurt, 1 tbsp lemon juice, 1 tbsp olive oil, 1 clove of garlic and 1/8 tsp salt and mix well.
  7. Remove the eggplant slices from the oven and arrange them on a large plate. Pour over the tahini-yoghurt sauce and serve with freshly ground pepper, the date pieces, chives, mint and a few sprinkles of olive oil and lemon juice.
  • Cook Time: 25 min

CRAVING MORE?

Follow along here & don’t forget to subscribe to my substack!